Best Smartphone Camera Settings for Night Sky Photography

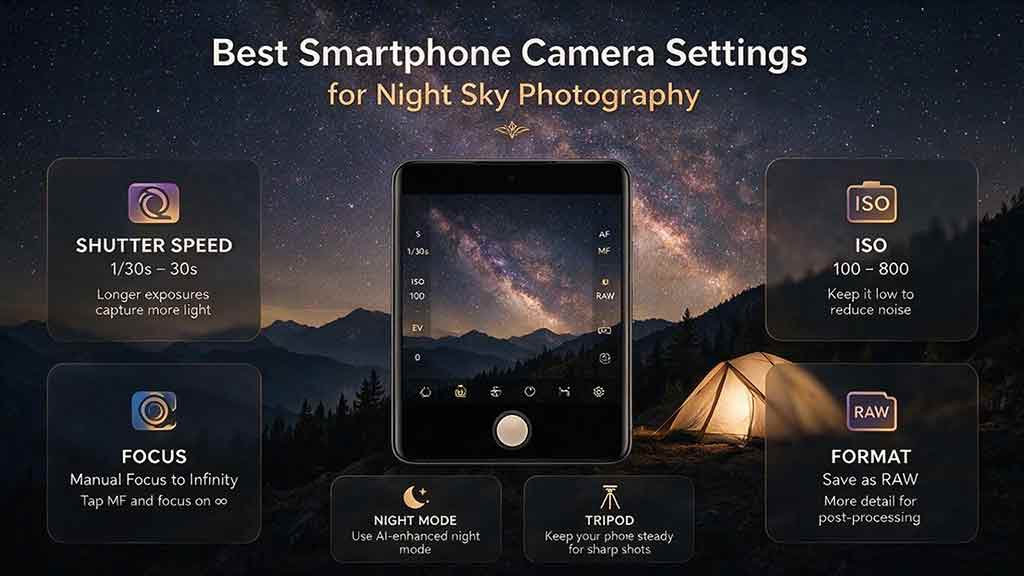
Best Smartphone Camera Settings for Night Sky Photography
For most smartphone night-sky photos, mount the phone on a tripod, use the main wide camera, turn off flash and digital zoom, focus on a bright star near infinity, and start with an 8–15 second exposure at ISO 800–1600. Review star shape and brightness, then adjust one setting at a time. Built-in astrophotography modes may work better when the phone is completely still.
Key Takeaways
- There is no universal “best” setting because phone sensors, lenses, software, sky brightness, Moon phase, and targets differ.
- The main wide camera is usually the safest starting lens; ultra-wide and telephoto modules often collect less light.
- Use the longest exposure that keeps stars acceptably round, then raise ISO only as much as needed.
- Manual focus, a timer, and a rigid tripod usually improve results more than maximum resolution or digital zoom.
- Automatic astrophotography modes can combine many frames effectively, but manual settings provide more control and repeatability.
This guide provides practical starting settings for stars, the Milky Way, constellations, meteor showers, aurora, moonlit landscapes, and star trails. It also explains automatic versus manual modes, RAW files, focusing, white balance, exposure testing, troubleshooting, editing, and field safety.
Editorial note: This guide is based on official NASA resources, current Apple, Google, and Samsung camera documentation, and practical exposure-testing criteria rather than hands-on testing of a specific phone, camera app, tripod, or editing program.
What Are the Best Starting Settings for Night Sky Photography?
Use the phone’s main wide camera, a tripod, manual or locked distant focus, an 8–15 second starting exposure, ISO 800–1600, and a neutral white balance around 3,500–4,500 K when those controls are available.
These values are starting experiments, not guaranteed final settings. A modern computational astrophotography mode may choose a much longer total capture while aligning and combining many shorter frames.
| Setting | Practical starting point | Adjust when |
|---|---|---|
| Camera lens | Main wide camera | Test another native camera only if it remains active and sharp |
| Flash | Off | Flash cannot illuminate stars |
| Support | Rigid tripod or stable surface | Add weight or shelter from wind if the phone moves |
| Focus | Manual near infinity, refined on a star | Refocus when stars look bloated or temperature changes |
| Shutter | 8–15 seconds | Shorten for trails, wind, aurora, or bright sky; lengthen for dark sky |
| ISO | 800–1600 | Lower for noise or light pollution; raise only if the image remains too dark |
| White balance | 3,500–4,500 K | Adjust for sky glow, aurora color, or creative intent |
| Timer | 3–10 seconds | Use enough delay for vibration to settle |
| File type | RAW plus processed JPEG/HEIF when available | Use processed output when RAW support is limited |
| Digital zoom | Off | Crop later unless a native optical camera performs better |
| Night mode | Test when the phone is rigidly supported | Compare with manual mode for control and star shape |
| Image stabilization | Leave at the phone’s normal setting initially | Test alternatives only if the app documents them |
The best exposure is the longest one that produces acceptable star shape, preserves highlights, avoids excessive sky glow, and does not create unstable computational artifacts.
Why Is There No Single Best Smartphone Astrophotography Setting?
Smartphone night photography depends on both physical exposure and model-specific computational processing.
Two phones displaying the same ISO and shutter speed may not produce equivalent files because they can differ in:
- Sensor area
- Pixel design
- Lens aperture
- Optical stabilization
- Noise reduction
- Multi-frame alignment
- RAW processing
- Camera-module switching
- Exposure calibration
- Automatic sharpening
- Local tone mapping
- File format
The night sky also changes. Light pollution, haze, thin cloud, Moon brightness, humidity, aurora activity, and target altitude affect the correct exposure.
Separate facts from starting recommendations
Fact: A longer shutter collects light for more time but records more apparent star movement and more background glow.
Fact: A higher ISO brightens the recorded signal but usually increases visible noise and reduces highlight flexibility.
Starting recommendation: Test 8–15 seconds and ISO 800–1600 with the main camera under a reasonably dark sky.
Personal judgment: Choose the cleaner 8-second image over a brighter 15-second image when the longer exposure visibly elongates stars.
Which Smartphone Camera Lens Should You Use?
Begin with the main wide camera because it usually combines the largest sensor, brightest lens, and strongest low-light processing.
Main wide camera
The main camera is generally best for:
- Milky Way landscapes
- Constellations
- Wide star fields
- Meteors
- Aurora
- Moonlit foregrounds
It often receives the phone maker’s most capable stabilization and computational processing.
Ultra-wide camera
Use the ultra-wide camera when the composition requires a very large sky area.
Advantages:
- Captures more sky
- Increases the chance of recording a meteor
- Makes small tracking errors less obvious
- Includes large foregrounds
Limitations:
- Smaller sensor on many phones
- Darker lens on some models
- Softer corners
- Stronger distortion
- Less detailed stars
Compare saved files rather than assuming a wider field is automatically better.
Telephoto camera
A telephoto module is rarely the first choice for untracked star fields because it captures a smaller area and magnifies apparent star movement.
It can be useful for:
- Bright conjunctions
- Moon photography
- A bright planet with a landscape
- Large constellations framed tightly
- Telescope-assisted imaging
A phone may switch away from the telephoto module in low light. Confirm which physical camera produced the saved file.
Why should digital zoom stay off?
Digital zoom usually crops and enlarges existing sensor data. It can add sharpening or AI reconstruction, but it does not guarantee more genuine star detail.
Capture at a native lens step and crop after editing. This preserves more control over framing and avoids hiding focus or motion problems behind preview processing.
Should You Use Automatic Astrophotography Mode or Manual Mode?
Use automatic astrophotography mode for the simplest multi-frame result and manual mode when repeatable exposure, target motion, or file control matters.
Automatic Night or Astrophotography mode
Apple states that supported iPhones automatically activate Night mode in low light and can extend the available exposure when the phone is steady. Google Pixel documentation requires a steady phone for Night Sight astrophotography, and some models use a short timer before beginning capture. Samsung Expert RAW includes astrophotography functions on supported devices.Apple SupportGoogle Pixel Camera HelpSamsung Support
Automatic modes may:
- Detect a tripod or stable surface
- Capture multiple frames
- Align stars
- Reduce noise
- brighten faint sky detail
- Protect some highlights
- Apply sharpening and tone mapping
- Save a ready-to-share image
Automatic modes are best when:
- The phone supports a documented astrophotography mode
- The phone is rigidly mounted
- The target is a static star field or Milky Way scene
- The user wants minimal processing
- The capture time is acceptable
Manual or Pro mode
Manual control is better when:
- Aurora is moving quickly
- A meteor sequence needs repeated exposures
- City sky glow requires shorter exposures
- The automatic mode over-brightens the sky
- Focus must remain locked
- Consistent frames are needed for stacking
- The photographer wants predictable white balance
- The phone supports genuine manual control on the selected camera
Samsung documents manual controls for ISO, shutter speed, exposure, white balance, and focus in Pro mode, while noting that available controls vary by device and software version.Samsung Support
Which mode should a beginner choose?
Try the phone’s documented Night or Astrophotography mode first on a rigid tripod. Then capture a manual comparison using the calibration sequence in this guide.
The better mode is the one that produces:
- Sharper stars
- Natural color
- Controlled sky brightness
- Stable foreground detail
- Fewer halos
- A file that supports the intended editing workflow
How Do You Set Shutter Speed for Sharp Stars?
Use an exposure ladder and choose the longest frame that keeps stars acceptably round at the intended output size.
NASA explains that Earth’s rotation makes stars appear to move during long exposures. Its meteor-photography guide presents the traditional 500 Rule for interchangeable-lens cameras, but that rule is only a rough reference and is not reliable for every smartphone sensor, computational mode, crop, or output size.NASA Science
The smartphone exposure ladder
Use this original calibration sequence:
- Mount the phone securely.
- Select the main wide camera.
- Lock focus and white balance.
- Capture a 2-second frame.
- Capture a 4-second frame.
- Capture an 8-second frame.
- Capture a 15-second frame.
- Capture a longer frame only when the app and sky support it.
- Compare the same bright star near a corner and near the center.
- Choose the longest frame with acceptable star shape and sky brightness.
This sequence is more dependable than applying one formula to every phone.
What shortens the usable exposure?
Use a shorter shutter when:
- A telephoto lens is selected
- The target is near the celestial equator
- The final image will be printed large
- The phone uses a high-resolution crop
- Wind moves the tripod
- Aurora changes quickly
- Light pollution brightens the background
- Foreground leaves or people are moving
What may allow a longer total capture?
A documented computational astrophotography mode may combine many aligned frames, allowing a longer total capture without producing the same result as one uninterrupted exposure.
Do not assume the displayed total time equals the shutter time of every source frame.
How Should You Choose ISO?
Use the lowest ISO that produces a workable exposure after shutter time has been set for acceptable star shape.
Practical ISO ladder
After selecting the shutter:
- Start at ISO 400.
- Test ISO 800.
- Test ISO 1600.
- Test ISO 3200 only when the image remains too dark and the phone supports it.
- Compare noise, color, sky glow, and highlight clipping.
- Keep the lowest ISO that preserves the intended stars and foreground.
Under dark skies, ISO 800–1600 is a useful starting range for many manual-camera phones. Under bright urban skies, ISO 200–800 and a shorter shutter may work better.
Why not always use the lowest ISO?
A very low ISO may produce a file that requires extreme brightening, revealing banding or color noise. Some computational phone cameras also process different ISO settings in model-specific ways.
Why not always use high ISO?
High ISO can:
- Increase visible noise
- Reduce color quality
- Clip bright signs or aurora
- Emphasize hot pixels
- Make sky glow orange or gray
- Leave less editing flexibility
Brightness alone is not proof of a better capture.
How Do You Focus on Stars With a Smartphone?
Set manual focus near infinity, then refine it on a bright star using a magnified preview or short test exposures.
NASA recommends locking focus because low-light autofocus can hunt or change during a session.NASA Science
Manual focus procedure
- Point the phone at a bright star or distant light.
- Set focus near the infinity end of the scale.
- Magnify the preview if the app allows it.
- Adjust until the star is as small as possible.
- Capture a short test frame.
- Review the star at 100%.
- Make a small adjustment.
- Lock focus before the final sequence.
Do not assume the end of the focus slider is perfectly calibrated to infinity.
What if the standard camera app has no manual focus?
- Tap a bright star or distant light.
- Hold to lock focus when the phone provides that function.
- Use a third-party manual app only after checking compatibility and privacy.
- Recheck focus after switching camera modules.
- Avoid touching the screen during the final exposure.
Apple documents tapping to set focus, adjusting exposure, and holding the focus area for AE/AF Lock on supported iPhones.Apple Support
Why do stars look like blobs?
Possible causes include:
- Focus set beyond or short of infinity
- Dew or condensation
- Dirty camera cover
- Thin cloud
- Camera shake
- Excessive digital zoom
- Lens-protector flare
- Strong noise reduction
- Corner aberrations
- Computational frame misalignment
Center sharpness and corner sharpness may differ even when focus is correct.
What White Balance Should You Use?
Start around 3,500–4,500 K when manual Kelvin control is available, then adjust for the sky, foreground, and intended color.
Lower values
A lower color temperature can reduce:
- Orange urban sky glow
- Warm sodium lighting
- Yellow haze
It can also make the scene look unnaturally blue.
Higher values
A higher color temperature can preserve:
- Warm foreground lighting
- Red or green aurora balance
- Natural twilight transitions
It can also exaggerate city glow.
Automatic white balance
Auto white balance may work for a single image, but it can vary between frames. Lock or manually set white balance when capturing:
- Panoramas
- Stacks
- Time lapses
- Meteor sequences
- Star trails
- Mosaics
RAW files permit broader white-balance adjustment later, but the selected camera and app must genuinely support RAW capture.
Should You Shoot RAW?
Shoot RAW plus the phone’s processed image when both are available and storage permits.
RAW can preserve more flexibility for:
- White balance
- Shadow recovery
- Noise reduction
- Color correction
- Highlight control
- Lens correction
- Stacking
Apple describes ProRAW as combining RAW information with iPhone processing, while Samsung Expert RAW saves editable DNG files alongside processed output on supported devices.Samsung SupportApple Support
RAW limitations
RAW is not automatically better because:
- Some phones restrict RAW to the main camera
- Computational astrophotography may be unavailable in RAW
- The RAW file may appear noisier
- Lens corrections may be incomplete
- File sizes are larger
- Some editors do not support the format correctly
- A computational JPEG or HEIF may contain cleaner aligned detail
Compare both files before deciding which one to edit.
What Settings Work for Different Night Sky Subjects?
Adjust shutter speed primarily for subject motion and sky brightness, then adjust ISO for exposure.
The following values are starting ranges for a stationary tripod and a main wide smartphone camera. They are not universal presets.
| Target | Starting shutter | Starting ISO | White balance | Main priority |
|---|---|---|---|---|
| Stars and constellations, dark sky | 8–15 s | 800–1600 | 3,500–4,500 K | Round stars and clean sky |
| Milky Way landscape | 10–20 s | 800–3200 | 3,500–4,500 K | Dark location and stable focus |
| Urban stars | 2–8 s | 200–800 | 3,200–4,200 K | Control sky glow |
| Bright aurora | 0.5–3 s | 200–800 | 3,200–4,200 K | Preserve moving structure |
| Faint or slow aurora | 2–8 s | 400–1600 | 3,200–4,500 K | Balance movement and brightness |
| Meteor shower | 5–15 s repeated | 800–3200 | 3,500–4,500 K | Wide field and continuous sequence |
| Moonlit landscape | 1–5 s | 100–800 | 3,500–5,000 K | Protect highlights and foreground |
| Star-trail sequence | 5–20 s per frame | 400–1600 | Fixed value | Consistent interval capture |
Change one variable at a time after reviewing a test image.
What Are the Best Settings for the Milky Way?
Use the main wide camera, a tripod, distant manual focus, approximately 10–20 seconds, ISO 800–3200, and fixed white balance as a starting experiment under a dark sky.
Milky Way workflow
- Choose a location away from direct lights.
- Check Moon phase, cloud cover, and target position.
- Compose a foreground before darkness becomes complete.
- Mount the phone securely.
- Use the main wide camera.
- Turn off flash and digital zoom.
- Focus on a bright star.
- Run the exposure ladder.
- Set ISO with the ISO ladder.
- Capture several frames.
- Capture a separate lower-ISO foreground frame when needed.
- Preserve originals and disclose any blend.
DarkSky International defines sky glow as brightening of the night sky over inhabited areas. Reducing nearby glare and traveling to a darker sky can improve the image more than increasing ISO.DarkSky International
What does a realistic phone Milky Way photo show?
Depending on the phone and sky, expect:
- A broad Milky Way band
- Brighter star clouds
- Dark lanes in favorable conditions
- Major constellations
- Foreground silhouettes
Do not expect a single phone exposure to match a heavily stacked, tracked, or professionally processed camera image.
What Are the Best Settings for Meteor Showers?
Use a wide field, lock focus, choose a 5–15 second exposure that controls star trails, and capture repeated frames for as long as practical.
NASA recommends dark skies, a tripod, a wide-angle lens, a timer or remote release, and manual focus for meteor photography.NASA Science
Meteor workflow
- Use the main or usable ultra-wide camera.
- Frame a large area of sky rather than zooming into the radiant.
- Lock focus and white balance.
- Use a repeat timer or interval mode when available.
- Capture many consecutive frames.
- Leave a short gap only when the phone requires processing time.
- Check battery temperature and storage.
- Review occasionally without ruining dark adaptation.
- Keep frames without meteors for noise reduction or a composite.
- Disclose when several meteors are combined into one image.
Meteor photography depends on timing and chance. A correct exposure does not guarantee a meteor in the frame.
What Are the Best Settings for Aurora?
Use shorter exposures than for the Milky Way when the aurora is bright or moving rapidly.
Bright, active aurora
Start near:
- 0.5–3 seconds
- ISO 200–800
- Fixed distant focus
- White balance around 3,200–4,200 K
Shorter exposures preserve rays, folds, and rapid movement.
Faint or slow aurora
Start near:
- 2–8 seconds
- ISO 400–1600
- Fixed distant focus
- White balance around 3,200–4,500 K
Lengthen the shutter only until structure begins to smear.
Avoid overexposure
An aurora can be bright enough to clip green channels or turn into a featureless band. Check the brightest area, not only the dark sky.
Automatic night modes may average moving aurora into a smoother appearance. Manual exposure is often easier to interpret when motion matters.
How Do You Photograph Star Trails With a Smartphone?
Capture a sequence of consistent shorter frames and combine them, rather than relying on one extremely long phone exposure.
Sequence approach
- Use a tripod that will not move.
- Turn off automatic lens switching.
- Lock focus, exposure, and white balance.
- Use 5–20 second frames.
- Keep the interval between frames short and consistent.
- Capture enough time for the desired trail length.
- Monitor battery, storage, dew, and phone temperature.
- Stack the sequence with software that preserves alignment.
- Remove only frames with genuine obstruction or movement.
- Keep the original sequence.
Advantages of a sequence:
- Easier removal of aircraft or accidental lights
- Less risk from one failed exposure
- Better control of noise
- Protection against app crashes
- Ability to create a time lapse
- More flexible editing
A long session can warm the phone and change noise characteristics. Test a shorter sequence before committing to a full night.
How Does Light Pollution Change the Settings?
Light pollution usually requires shorter exposures, lower ISO, better shielding from direct lights, and more modest expectations for faint detail.
In an urban location
Try:
- Main wide camera
- 2–8 seconds
- ISO 200–800
- Fixed white balance
- Bright constellations or star trails
- Foreground architecture
- Moonlit or twilight scenes
Avoid placing a streetlight directly outside the frame, where it can still cause flare.
In a dark location
Try:
- Longer exposure within the star-shape limit
- ISO 800–3200
- Milky Way composition
- Meteor sequences
- Fainter constellation patterns
- Multiple frames for stacking
Dark location does not mean unsafe location. Follow access rules, protect wildlife, and avoid blocking roads or trails.
How Do You Build a Repeatable Exposure From Scratch?
Use a fixed five-step decision framework instead of guessing settings.
Step 1: Choose the target
Classify the scene:
- Static stars
- Milky Way
- Moving aurora
- Meteor sequence
- Moonlit landscape
- Star trails
Target motion determines the shutter strategy.
Step 2: Choose the camera module
Start with the main wide camera. Change only when the field of view or verified image quality justifies another module.
Step 3: Find the shutter limit
Run the 2, 4, 8, and 15-second exposure ladder. Select the longest acceptable frame.
Step 4: Find the ISO
Run ISO 400, 800, 1600, and when necessary 3200. Keep the lowest useful value.
Step 5: Lock and repeat
Lock:
- Focus
- White balance
- Lens selection
- Framing
- Exposure
Then capture multiple frames for selection or stacking.
This framework is more transferable than memorizing one preset.
What Should You Do Before the Shoot?
Planning checklist
- Check cloud cover
- Check Moon phase and rise or set time
- Confirm target direction and altitude
- Find a legal and safe location
- Avoid private property without permission
- Check road, trail, tide, and weather conditions
- Tell someone where you will be
- Download maps for limited signal areas
- Charge the phone and power bank
- Free storage space
- Test the camera app before leaving
- Pack warm clothing and a dim light
- Protect the phone from rain and dew
Equipment checklist
- Smartphone
- Rigid tripod
- Secure phone clamp
- Remote shutter or timer
- Power bank and cable
- Lens-safe cloth
- Weather protection
- Small weight for tripod stability
- Red or dim light used responsibly
- Spare storage method when supported
Do not place a tripod where people, bicycles, or vehicles can strike it. Avoid bright light that disrupts other observers or wildlife.
How Should You Edit Night Sky Photos?
Correct lens issues, color, contrast, and noise conservatively, then judge the result at the intended output size.
Basic editing order
- Select the sharpest file.
- Apply the correct lens profile when available.
- Correct rotation and crop.
- Set white balance.
- Adjust overall exposure.
- Reduce highlights around artificial lights.
- Raise shadows carefully.
- Add moderate contrast.
- Apply color-noise reduction.
- Apply luminance-noise reduction only as needed.
- Add restrained clarity or dehaze.
- Sharpen at the final output size.
- Export a copy and preserve the original.
What should remain natural?
Avoid:
- Black clipping that removes all sky gradient
- Neon saturation
- Stars with bright sharpening rings
- Repeated artificial star patterns
- Completely smooth plastic sky
- Foreground halos
- Heavy purple or green noise
- AI-generated Milky Way structure
Stacking and composites
Several aligned sky frames can reduce random noise. A separately exposed foreground can preserve landscape detail.
Disclose:
- Multi-frame stack
- Foreground blend
- Panorama
- Meteor composite
- Star-trail stack
- Generative AI enhancement
Ordinary editing and stacking are not the same as inventing celestial detail.
Why Are My Stars Blurry?
The most likely causes are missed focus, phone movement, long shutter time, dew, thin cloud, or computational misalignment.
Troubleshooting order:
- Clean the external camera cover safely.
- Confirm the tripod is stable.
- Disable digital zoom.
- Recheck the active camera module.
- Refocus on a bright star.
- Shorten the shutter.
- Use a timer.
- Shield the tripod from wind.
- Check for dew.
- Compare automatic and manual mode.
If only corner stars are distorted, lens aberration may be responsible rather than focus.
Why Is the Sky Orange, Gray, or Washed Out?
Sky glow, haze, Moonlight, or excessive exposure is brightening the background.
Try:
- Shorter shutter
- Lower ISO
- Cooler white balance
- A location shielded from direct light
- A darker direction in the sky
- A night with less haze
- A different Moon phase
- Moderate local contrast in editing
A light-pollution filter over a smartphone camera is not a universal fix and can create color or reflection problems.
Why Are There Almost No Stars?
Possible causes include:
- Exposure too short
- ISO too low
- Camera module too dark
- Automatic mode selected the wrong lens
- Focus missed
- Heavy cloud or haze
- Bright Moon
- Severe light pollution
- Noise reduction removed faint stars
- Image viewed on a dim or small screen
Increase shutter time first within the star-shape limit, then increase ISO.
Why Does the Phone Refuse a Long Exposure?
The phone or app may limit exposure because of:
- Camera module
- Stabilization state
- Device movement
- Low battery
- Temperature
- Selected file format
- Resolution mode
- Night mode availability
- Software version
- App design
Apple, Google, and Samsung controls vary by supported model and software release. Use the current official manual for the exact device.
Why Does Automatic Astrophotography Mode Not Start?
The phone may not be stable enough, the sky may be too bright, or the selected model and mode may not support automatic astrophotography.
Try:
- Rigid tripod
- Timer
- Darker scene
- Main camera
- Night mode
- Updated camera software
- Correct orientation
- Removal of vibration
- Waiting for the mode indicator
Google Pixel documentation specifically emphasizes a steady device for night-sky capture.Google Pixel Camera Help
Why Are There Gaps in My Star Trails?
Gaps can result from:
- Slow image processing
- Long interval setting
- App delay
- Storage limitation
- Battery saving
- Thermal throttling
- Incoming notifications
- Manual interruption
Use an interval mode that minimizes delay, disable unnecessary interruptions, test file-writing speed, and keep the phone powered within safe operating conditions.
Real-World Setting Examples
The following examples illustrate the decision process rather than report hands-on tests.
Example 1: Dark-sky Milky Way landscape
Conditions:
- Main wide camera
- Stable tripod
- Little Moonlight
- Static foreground
Starting sequence:
- Focus near infinity and refine.
- Test 8, 15, and 20 seconds.
- Select 15 seconds because 20 seconds elongates stars.
- Test ISO 800 and 1600.
- Choose ISO 1600 because the foreground remains recoverable.
- Set white balance near 4,000 K.
- Capture eight consistent frames.
- Capture a separate lower-ISO foreground exposure.
Example 2: Suburban constellation photo
Conditions:
- Moderate sky glow
- Bright constellation
- Streetlights nearby
Starting sequence:
- Shield the phone from direct light.
- Test 2, 4, and 8 seconds.
- Select 4 seconds to keep the sky dark.
- Test ISO 400 and 800.
- Choose ISO 800 for enough stars.
- Use fixed white balance near 3,600 K.
- Capture several frames.
Example 3: Active aurora
Conditions:
- Bright moving curtains
- Dark rural foreground
- Main camera
Starting sequence:
- Set distant focus.
- Test 0.5, 1, and 2 seconds.
- Select 1 second to preserve ray structure.
- Test ISO 400 and 800.
- Choose ISO 400 because highlights remain controlled.
- Set fixed white balance around 3,600 K.
- Capture a rapid sequence.
Example 4: Meteor shower
Conditions:
- Dark sky
- Wide composition
- No tracking
Starting sequence:
- Use the main wide camera.
- Set 10-second exposure and ISO 1600.
- Lock focus and white balance.
- Capture repeated frames for an extended period.
- Check storage and battery temperature occasionally.
- Combine meteor frames only with clear disclosure.
What Common Mistakes Should You Avoid?
| Mistake | Why it hurts the image | Better approach |
|---|---|---|
| Handholding a long exposure | Creates movement and alignment errors | Use a tripod or secure support |
| Using maximum digital zoom | Enlarges noise and artifacts | Capture at a native lens step |
| Trusting autofocus in darkness | Focus may hunt or shift | Refine and lock distant focus |
| Starting with the longest shutter | Produces trails and bright sky | Use an exposure ladder |
| Raising ISO before testing shutter | Adds avoidable noise | Set shutter for star shape first |
| Using the telephoto camera automatically | Small sensor and motion may reduce quality | Start with the main camera |
| Leaving white balance on auto for a sequence | Color varies between frames | Lock a fixed value |
| Using flash | Cannot illuminate the sky | Turn it off |
| Touching the phone during capture | Causes vibration | Use a timer or remote |
| Shooting through a dirty window | Adds reflections and softness | Photograph outdoors when safe |
| Overediting noise | Removes faint stars | Use restrained reduction |
| Presenting a composite as one exposure | Misrepresents the capture | Disclose stacking and blending |
| Ignoring site safety | Risks people and equipment | Plan access, weather, and tripod placement |
Night Sky Photography Field Checklist
Camera setup
- Main wide camera tested
- Digital zoom off
- Flash off
- Phone secured in tripod clamp
- Focus refined and locked
- White balance fixed
- Timer or remote enabled
- Exposure ladder completed
- ISO ladder completed
- RAW and processed output selected when useful
- Storage space confirmed
Environment
- Cloud and haze checked
- Moon phase checked
- Direct lights blocked
- Tripod visible and out of traffic
- Wind evaluated
- Dew checked
- Location access confirmed
- Battery temperature monitored
- Wildlife and other observers respected
Capture
- Test frame reviewed at 100%
- Center and corner stars checked
- Several frames captured
- Exposure remains consistent
- Camera module did not switch
- Foreground exposure captured when needed
- Original files preserved
- Processing method recorded
How We Developed These Recommendations
This guide uses six priorities:
- Target motion: stars, meteors, aurora, and star trails require different shutter strategies.
- Real camera behavior: lens selection and computational processing vary by phone.
- Star-shape calibration: the exposure ladder replaces a universal shutter formula.
- Noise control: ISO is raised only after shutter time is chosen.
- Repeatability: focus, white balance, framing, and exposure are locked for sequences.
- Transparent processing: stacking, blending, and AI enhancement are identified accurately.
No smartphone, camera app, tripod, RAW format, or processing program was hands-on tested for this article.
Which Settings Should You Try First?
For a dark-sky star field or Milky Way scene, begin with the main wide camera, tripod, manual focus near infinity, 8–15 seconds, ISO 800–1600, and fixed white balance near 4,000 K.
For a city sky, shorten the exposure and lower ISO until the background is controlled.
For aurora, shorten the shutter enough to preserve moving structure.
For meteors, use a wide field and repeated exposures rather than one carefully timed frame.
For a supported automatic astrophotography mode, keep the phone completely still and compare its result with a manual exposure ladder. The best smartphone camera settings are the settings that preserve round stars, natural color, controlled sky brightness, and repeatable files under the actual conditions.
Frequently Asked Questions
What ISO is best for smartphone night sky photography?
ISO 800–1600 is a practical manual starting range under dark skies, but the correct value depends on the phone, shutter time, lens, sky brightness, and processing. Choose shutter time for star shape first, then use the lowest ISO that produces a workable exposure.
How long should a smartphone night-sky exposure be?
Start with 8–15 seconds on the main wide camera and compare 2, 4, 8, and 15-second frames. Use the longest exposure that keeps stars acceptably round and prevents excessive sky glow. Telephoto lenses and large output sizes usually require shorter exposures.
Should smartphone astrophotography use Night mode?
Night or Astrophotography mode is useful when the phone supports it and is completely steady. It can align and combine multiple frames automatically. Manual mode is preferable when the sky is bright, aurora is moving, consistent frames are needed, or the automatic result looks overprocessed.
Is the ultra-wide camera good for stars?
It can capture more sky and increase the chance of recording meteors, but many ultra-wide modules have smaller sensors, darker lenses, and softer corners. Compare it with the main wide camera under the same conditions.
Should focus be set exactly to infinity?
Use infinity as a starting point, then refine focus on a bright star. The end of a manual focus slider may not represent perfect astronomical infinity, and focus can change after switching camera modules or as temperature changes.
Can a smartphone photograph the Milky Way in a city?
A phone may record bright stars and part of the Milky Way under moderate sky glow, but urban light pollution and haze reduce contrast. Use shorter exposures, lower ISO, shield direct lights, and travel to a darker location when safe for substantially better detail.
Sources
Sources were checked August 19, 2026.
- Apple Support — Take Night Mode Photos With Your iPhone Camera
- Google Pixel Camera Help — Take Photos in Low Light or at Night
- Samsung Support — Professional Photography With Galaxy Expert RAW
- Samsung Support — How to Use Pro Mode on a Galaxy Phone Camera
- NASA Science — How to Photograph a Meteor Shower
- NASA Science — Astrophotography With Your Smartphone
- Apple Support — Use iPhone Camera Tools to Set Up Your Shot
- Apple Support — Take Apple ProRAW Photos With Your iPhone Camera
- DarkSky International — What Is Light Pollution?
- NASA Science — A Guide to Smartphone Astrophotography
- U.S. National Park Service — Night Skies
- NASA Science — Skywatching Tips and Guides
More from Smartphone Astrophotography
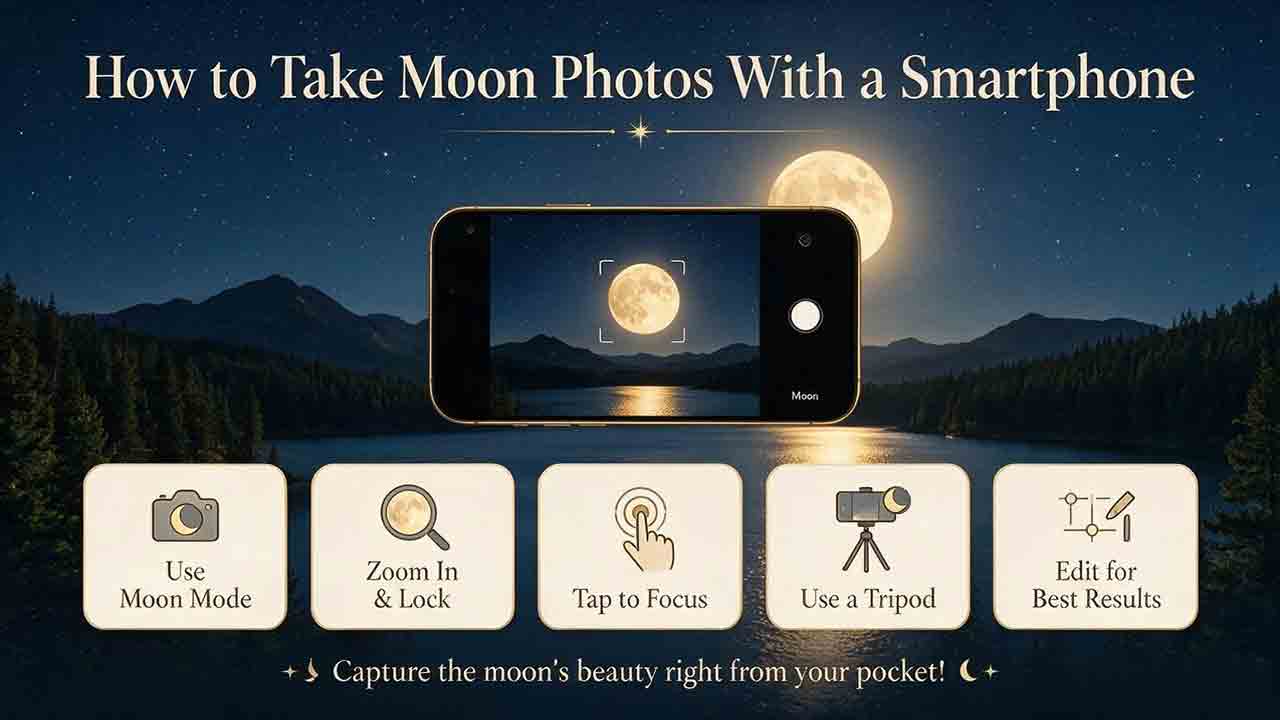
How to Take Moon Photos With a Smartphone
Clear smartphone Moon photos depend on real image scale, stable support, accurate focus, and reduced exposure rather than maximum digital zoom or a long Night-mode capture. This guide explains how to photograph the Moon with a phone alone, on a tripod, or through a telescope eyepiece using an afocal smartphone adapter. Readers learn how lunar phase and the terminator affect visible detail, how to choose between optical and digital zoom, how to lock focus and exposure, and how to prevent white disks, blur, vignetting, drift, and color fringes. It also provides practical settings principles, telescope magnification examples, still-versus-video guidance, frame-stacking basics, three real-world workflows, restrained editing recommendations, and a complete field checklist. The central recommendation is to start at low magnification, preserve lunar highlights, capture multiple frames, and keep original files.
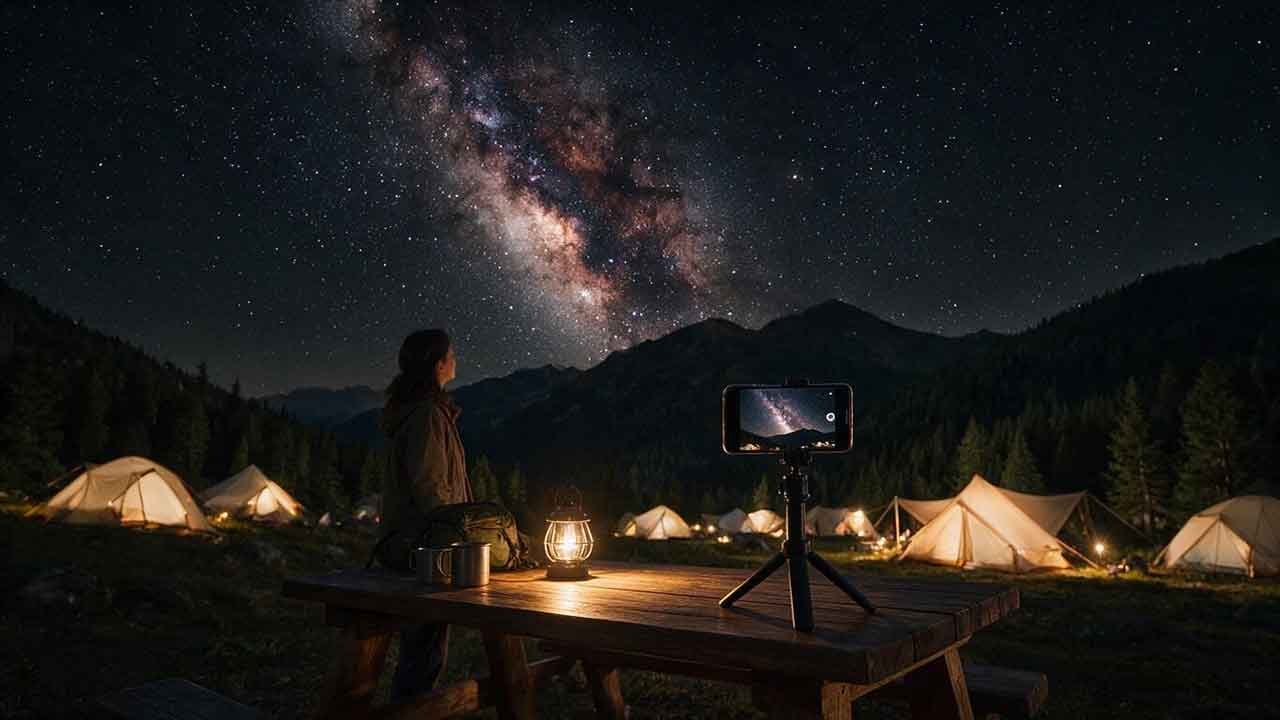
Can a Smartphone Photograph the Milky Way?
Yes, a supported smartphone can photograph the Milky Way when the galactic band is above the horizon, the sky is dark and clear, and the phone remains stable during a long or multi-frame capture. This guide explains how to determine whether the Milky Way will be visible, how moonlight and light pollution affect contrast, and how iPhone Night mode, Google Pixel Astrophotography, Samsung Expert RAW, and other Android camera systems differ. Readers receive separate device workflows, a Milky Way readiness scorecard, an exposure-testing table, focus and composition instructions, RAW and processed-file guidance, point-star stacking and storage calculations, a decision tree, real-world scenarios, a complete field checklist, common mistakes, and troubleshooting steps. The article avoids universal camera settings and does not claim that every phone was tested.
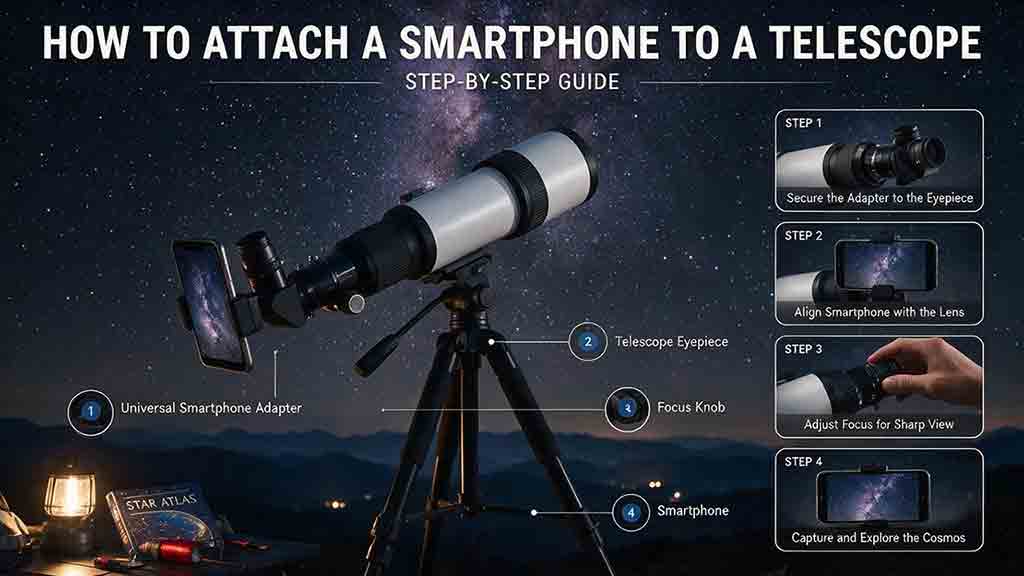
How to Attach a Smartphone to a Telescope
Attaching a smartphone to a telescope requires more than centering a camera over an eyepiece. The phone, adapter, eyepiece, focuser, diagonal, mount, and tripod form one mechanical load chain that must remain secure and balanced. This guide explains afocal imaging, exit pupil, eye relief, vignetting, adapter types, phone and eyepiece compatibility, active-camera selection, low-power eyepiece choice, three-axis alignment, telescope rebalancing, focus, exposure, and safe removal. It provides step-by-step instructions for refractors, Dobsonians, and diagonal-equipped telescopes, plus real-world Moon and Jupiter workflows, an adapter decision framework, troubleshooting for black circles, blur, lens switching, slipping, and focus failure, and a complete attachment checklist. The central recommendation is to align at low power, support the phone during every clamp adjustment, and verify the entire load path before capture.
Explore More Topics
Dedicated Astronomy Camera vs Regular Camera: What Is the Difference?
A dedicated astronomy camera is designed for telescope imaging through astronomy software and may provide regulated cooling, high-frame-rate readout, monochrome capture, filter-wheel integration, and FITS metadata. A regular DSLR or mirrorless camera is a self-contained general-purpose camera with a screen, battery, memory card, native lenses, autofocus, and daytime usefulness. This guide explains why neither category is universally better. It compares cooled deep-sky cameras, uncooled planetary cameras, guide cameras, monochrome and one-shot-color sensors, regular cameras, and specialized astrophotography DSLRs. Readers learn how cooling, dark current, H-alpha response, UV/IR filtering, sensor size, pixel scale, back focus, software, power, calibration, frame rate, and total system cost affect the decision. The article also includes calculation examples, use-case recommendations, a five-question selection process, a buying checklist, common mistakes, troubleshooting, and practical next steps.
How to Choose a Camera for Astrophotography
Choosing an astrophotography camera starts with the target, optical system, and workflow rather than megapixels or sensor size alone. This guide compares mirrorless and DSLR bodies, cooled one-shot-color cameras, cooled monochrome cameras, planetary cameras, and astronomy-modified models. Readers learn how sensor dimensions affect field of view, how pixel size and focal length determine image scale, and how cooling, quantum efficiency, read noise, full-well capacity, dynamic range, and frame rate should be interpreted. It also provides a color-versus-monochrome comparison, telescope compatibility and back-focus checks, software and driver requirements, a total-system-cost framework, five practical scenarios, troubleshooting, and a complete purchase checklist. The central recommendation is to choose the camera that fits the target, corrected image circle, mount, software, power system, processing workflow, and complete budget.
Best Focal Lengths for Milky Way Photography
For most untracked Milky Way landscapes, a 14–24mm full-frame-equivalent view offers the best balance of sky coverage, galactic scale, foreground context, and shutter-time tolerance. Wider 12–16mm views suit dramatic foregrounds and a large Milky Way arch, while 28–35mm makes the galactic center more prominent. Focal lengths of 40–50mm or longer are better for panoramas, stacking, or tracked high-detail images. This guide converts the recommendations for full-frame, 1.5× APS-C, 1.6× Canon APS-C, and Micro Four Thirds cameras. It explains shutter-time tradeoffs, crop-factor calculations, aperture and corner-performance limits, prime-versus-zoom choices, panorama planning, and tracker use. Readers also receive a three-question lens-selection method, real-world scenarios, a step-by-step lens test, a buying checklist, common mistakes, troubleshooting guidance, and practical recommendations without unsupported “best lens” claims.