Best Focal Lengths for Milky Way Photography

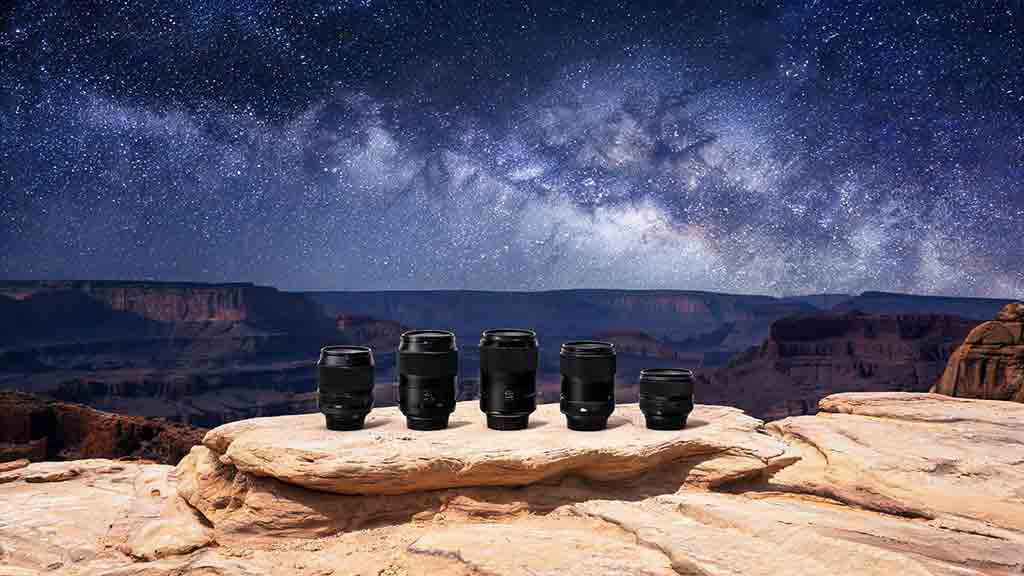
Best Focal Lengths for Milky Way Photography
For most untracked Milky Way landscapes, 14–24mm on full frame is the most practical range. Use 12–16mm for a huge sky and foreground, 18–24mm for a balanced single frame, and 28–35mm when the galactic center should appear larger. Focal lengths of 40–50mm or longer are better suited to panoramas, stacking, or tracked captures. Convert smaller sensors by angle of view.
Key Takeaways
- Compare lenses by full-frame-equivalent angle of view, not only by the focal length printed on the lens.
- A 14–24mm full-frame-equivalent view is the easiest starting range for an untracked Milky Way landscape.
- Wider lenses include more sky and allow longer untracked shutter times, but they make the Milky Way appear smaller and can exaggerate foreground perspective.
- Longer lenses show more galactic detail, but require more accurate focus, shorter untracked exposures, better corner performance, and often multi-row panoramas or tracking.
- Maximum aperture matters, but a slower sharp lens with controlled coma can outperform a faster lens whose stars become distorted near the edges.
This guide helps photographers choose a focal length for single-frame landscapes, prominent galactic-center compositions, panoramas, tracked images, APS-C cameras, and Micro Four Thirds cameras. It includes a focal-length matrix, crop-factor calculations, shutter-time examples, a three-question selection method, a lens-testing workflow, real-world scenarios, a buying checklist, common mistakes, and troubleshooting guidance.
Method note: This guide is based on optical principles, current manufacturer documentation, NASA and National Park Service guidance, and practical selection criteria rather than hands-on testing of every lens. Focal-length recommendations are expressed primarily as full-frame-equivalent angles of view. Lens quality, sensor resolution, tracking tolerance, and available products vary by camera system.
Which Focal Length Is Best for Milky Way Photography?
There is no single best focal length for every Milky Way image. The best choice depends on how much sky should fit in the frame, how large the galactic center should appear, how important the foreground is, and whether the camera is tracked.
Canon defines focal length as an optical measurement associated with the lens and explains that shorter focal lengths produce wider fields of view while longer focal lengths produce narrower fields. (Canon Europe) For Milky Way photography, that change in field of view affects composition, star movement, foreground perspective, panorama requirements, and the apparent scale of galactic structure.
Quick Focal-Length Recommendation Table
| Full-frame-equivalent view | Best use | Main advantage | Main limitation |
|---|---|---|---|
| 10–13mm | Extreme foreground, very large sky, creative ultra-wide views | Covers an enormous scene | Milky Way appears small; stretched corners and difficult composition |
| 14–16mm | Milky Way arch, dramatic foreground, beginner single frames | Wide field and forgiving untracked exposure | Foreground can dominate; edge quality matters |
| 18–20mm | Balanced sky-and-landscape composition | Strong balance of scale and coverage | Less room than 14mm for tall arches |
| 21–24mm | Prominent galactic center with environmental context | Milky Way looks larger without becoming too difficult | Shorter untracked shutter and tighter framing |
| 28–35mm | Detailed core, layered landscape, stitched panoramas | Stronger galactic detail and less extreme perspective | Requires more accurate focus and shorter untracked exposure |
| 40–50mm | High-detail mosaics and tracked or stacked images | Natural-looking perspective and strong core detail | Single frame covers little sky; untracked capture is demanding |
| 70–135mm | Telephoto Milky Way regions, tracked mosaics, dust-lane detail | Resolves smaller structures | Usually needs tracking, careful stacking, and precise planning |
These ranges are practical categories, not rigid optical boundaries. A 17mm lens does not suddenly behave differently from a 16mm lens, and a high-quality 24mm lens may be more useful than a poor 20mm lens.
Why Is 14–24mm the Most Useful Starting Range?
A 14–24mm full-frame-equivalent view captures enough sky for the Milky Way and enough landscape for a recognizable setting, while remaining easier to use without a tracking mount.
National Park Service night-photography guidance recommends a wide-angle lens for Milky Way work, and one NPS workshop identifies approximately 14–24mm as an optimum range. (U.S. National Park Service) (U.S. National Park Service) In this guide, all cross-format recommendations are normalized to full-frame-equivalent angle of view. Nikon’s published Milky Way examples also include 14mm and 20mm compositions, illustrating how both ultra-wide and moderately wide lenses can produce successful results. (Nikon USA)
The range is popular because it balances four needs:
- A broad enough field for the galactic band.
- A foreground large enough to remain meaningful.
- A shutter time long enough for an untracked camera.
- A composition that does not require a multi-row panorama.
When Is 14–16mm Better?
Choose approximately 14–16mm full-frame equivalent when:
- The Milky Way arch is high and wide.
- A tall foreground must fit in the frame.
- The camera is close to rocks, trees, buildings, or a tent.
- The photographer is new to star tracking and panoramic stitching.
- Extra cropping room is useful.
- A single frame must include both sky and landscape.
The tradeoff is scale. The galactic center occupies less of the image, and nearby foreground objects can look disproportionately large.
When Is 18–24mm Better?
Choose approximately 18–24mm full-frame equivalent when:
- The galactic center should be more prominent.
- The foreground is farther away.
- The composition does not require the entire arch.
- Edge stretching from an ultra-wide lens is undesirable.
- The lens offers better aperture or corner performance than the available 14mm option.
For many photographers, 20mm or 24mm is the most versatile compromise. The Milky Way appears larger, but the view remains wide enough for an environmental landscape.
When Should You Use 28–35mm?
Use 28–35mm full-frame equivalent when the Milky Way itself is a primary visual subject rather than a small band above a large landscape.
This range is useful for:
- The bright galactic-center region.
- Dark dust lanes.
- Layered mountain silhouettes.
- Vertical Milky Way compositions.
- Panoramas with fewer extreme corner distortions.
- Images intended for large prints.
- Blended foreground and sky sequences.
The main cost is reduced tolerance. Star motion becomes visible sooner, manual focus must be more precise, and small framing errors can cut off important parts of the galaxy.
Is 35mm Too Long for an Untracked Milky Way Photo?
No, but it is less forgiving.
A 35mm full-frame view can make the galactic center visually stronger than a 14mm view. It may work well for one vertical frame or for a stitched panorama, especially with a fast lens and a high-performing sensor.
However, a shorter shutter time may be required to keep stars point-like. The photographer may need to capture several frames for noise reduction instead of relying on one long exposure.
Are 40–50mm Lenses Good for the Milky Way?
Yes. A 40–50mm lens can produce detailed, natural-perspective Milky Way images, but it is not the easiest first lens for an untracked single-frame landscape.
Use 40–50mm for:
- Multi-frame mosaics.
- Tracked sky exposures.
- Point-star stacking.
- High-resolution galactic-center images.
- Compositions with distant foregrounds.
- Images that avoid the exaggerated perspective of an ultra-wide lens.
At these focal lengths, a single horizontal frame covers only part of the Milky Way. A panorama may require several columns or rows, and any foreground movement can make stitching more difficult.
Why Do Longer Focal Lengths Show More Detail?
A longer focal length projects a narrower field of view across the sensor. The galactic structure therefore occupies more pixels, assuming the same camera position and output resolution.
The lens does not physically move the Milky Way closer. It changes image scale and framing.
When Do 70–135mm Lenses Make Sense?
Focal lengths from roughly 70–135mm are specialized choices for tracked or carefully stacked astrophotography.
They can isolate:
- Dense star clouds.
- Dark nebula complexes.
- The Sagittarius and Scorpius regions.
- Large emission-nebula areas.
- Milky Way sections above distant mountains.
- Detailed panorama tiles.
These focal lengths are usually poor choices for a beginner’s untracked single-frame landscape because:
- Star motion appears quickly.
- Framing requires accurate planning.
- The field may not contain enough reference stars for easy composition.
- A tracker must be aligned accurately.
- Lens aberrations and focus errors become obvious.
- Many frames may be required for a full mosaic.
A telephoto Milky Way image is valid, but it answers a different creative problem from a 14mm landscape.
How Does Sensor Size Change the Recommended Focal Length?
Sensor size changes the angle of view recorded by a given lens. It does not change the lens’s physical focal length.
A smaller sensor records a smaller part of the image circle, producing a narrower view than the same lens on a full-frame camera. Nikon explains that its DX format introduces an approximately 1.5× crop factor, so a 24mm lens gives an angle of view similar to about 36mm on full frame. (Nikon USA) Sony provides the same approximate 1.5× relationship for APS-C E-mount cameras. (sony.com) Canon APS-C bodies commonly use an approximately 1.6× conversion, while Micro Four Thirds manufacturers publish approximately 2× full-frame-equivalent values. (usa.canon.com) (explore.omsystem.com; help.na.panasonic.com)
Full-Frame-Equivalent Formula
Full-frame-equivalent focal length = actual focal length × crop factor
This formula compares angle of view. It does not mean the physical focal length or aperture has changed.
Sensor Conversion Table
| Desired full-frame-equivalent view | Full frame | APS-C 1.5× | Canon APS-C 1.6× | Micro Four Thirds 2× |
|---|---|---|---|---|
| About 14mm | 14mm | About 9–10mm | About 9mm | About 7mm |
| About 16mm | 16mm | About 10–11mm | About 10mm | About 8mm |
| About 20mm | 20mm | About 13mm | About 12–13mm | About 10mm |
| About 24mm | 24mm | About 16mm | About 15mm | About 12mm |
| About 28mm | 28mm | About 18–19mm | About 17–18mm | About 14mm |
| About 35mm | 35mm | About 23mm | About 22mm | About 17–18mm |
| About 50mm | 50mm | About 33mm | About 31mm | About 25mm |
The values are rounded to focal lengths commonly found in lenses. Exact angles of view also depend on the sensor’s actual dimensions, aspect ratio, distortion correction, and the lens design.
Crop-Factor Calculation Example
A 16mm lens on a 1.5× APS-C camera gives:
16mm × 1.5 = 24mm full-frame equivalent
A 12mm lens on Micro Four Thirds gives:
12mm × 2 = 24mm full-frame equivalent
Both combinations provide an angle of view broadly comparable to a 24mm lens on full frame, although depth of field, sensor noise, lens aperture, pixel size, and image quality remain system-specific.
Does Focal Length Change the Maximum Shutter Time?
Yes. Longer focal lengths magnify apparent star movement, so they normally require shorter untracked exposures to keep stars point-like.
NASA explains that the sky appears to rotate approximately 15 degrees per hour because of Earth’s rotation. (NASA Science) The actual amount of visible trailing in a photograph also depends on:
- Sensor resolution.
- Pixel pitch.
- Viewing size.
- Print size.
- Star declination.
- Camera direction.
- Lens distortion.
- Focus.
- Acceptable blur.
- Image stabilization behavior.
Why the 500 Rule Is Only a Rough Shortcut
The traditional 500 Rule estimates an upper shutter time:
Approximate seconds = 500 ÷ full-frame-equivalent focal length
A more conservative starting point sometimes uses 300 instead of 500:
Conservative test seconds = 300 ÷ full-frame-equivalent focal length
Neither formula is a scientific guarantee. High-resolution cameras often reveal trails before the 500 Rule limit, while small web images may hide motion that is obvious in a large print.
Use the formulas to choose test exposures, then inspect the actual stars at high magnification.
Shutter-Time Calculation Examples
| Full-frame-equivalent view | 300-based conservative test | 500-based legacy estimate |
|---|---|---|
| 14mm | About 21 seconds | About 36 seconds |
| 20mm | About 15 seconds | About 25 seconds |
| 24mm | About 12.5 seconds | About 21 seconds |
| 35mm | About 8.5 seconds | About 14 seconds |
| 50mm | About 6 seconds | About 10 seconds |
These values are calculations, not recommended final settings.
For example, a 16mm lens on a 1.5× APS-C camera has a 24mm-equivalent view:
300 ÷ 24 = 12.5 seconds
The practical test sequence might be 8, 10, and 12 seconds, followed by close inspection of stars near the center and corners.
Why Direction Matters
Stars near a celestial pole move in smaller circles than stars near the celestial equator. The same focal length and shutter time can therefore produce different apparent trailing depending on where the camera points.
A mobile calculator that includes sensor size, focal length, aperture, pixel pitch, and declination can provide a more refined starting estimate, but a real test frame remains necessary.
Is a Faster Lens Always Better?
A wide maximum aperture is valuable because it allows more light to reach the sensor during a limited untracked exposure. It is not the only measure of a good Milky Way lens.
A useful lens must also control:
- Coma.
- Astigmatism.
- Sagittal flare.
- Chromatic aberration.
- Field curvature.
- Vignetting.
- Decentering.
- Focus shift.
- Corner softness.
Canon notes that shorter focal lengths and larger apertures create greater potential for aberrations, which lens design must correct. (Canon Europe) Sony promotes minimal coma and aberration as important properties of its current 14mm f/1.8 night-sky lens, illustrating why star shape matters as much as nominal aperture. (electronics.sony.com)
Should You Stop Down a Fast Lens?
Sometimes.
A lens advertised at f/1.4 may produce stronger corners at f/1.8 or f/2.0. Stopping down can improve star shape and reduce vignetting, but it also reduces captured light.
Test:
- Wide open.
- One-third or two-thirds of a stop closed.
- One full stop closed.
Compare both the center and corners. Do not judge the lens only from the center stars.
Prime Lens or Zoom Lens: Which Is Better?
Neither design is automatically better. The decision depends on optical performance, aperture, flexibility, weight, and cost.
Fast Prime Lens Pros and Cons
Advantages
- Often offers f/1.4, f/1.8, or f/2.
- Usually smaller than an equivalent fast zoom.
- Can provide strong central sharpness.
- Makes manual exposure easier under dark skies.
- Encourages a consistent visual style.
Limitations
- Only one angle of view.
- Reframing may require moving the tripod.
- Some fast primes have severe coma or decentering.
- Ultra-wide primes may accept limited filter systems.
- A lens change in the dark introduces dust and handling risk.
Wide-Angle Zoom Pros and Cons
Advantages
- One lens can cover 14mm, 18mm, 20mm, and 24mm.
- Easier to adapt to changing Milky Way height and foreground distance.
- Useful for scouting compositions before darkness.
- Reduces lens changes.
Limitations
- Fast models can be heavy and expensive.
- Maximum aperture may be slower.
- Zoom position can move accidentally.
- Corner quality may vary through the range.
- Some lenses extend or shift focus when pointed upward.
The best practical choice may be a sharp f/2.8 zoom if it replaces several weaker primes, or a compact fast prime if one focal length matches the photographer’s main compositions.
How Should You Choose a Focal Length for the Composition?
Use three questions.
1. How Much Foreground Must Fit?
Choose wider when:
- The camera is close to the foreground.
- A tall tree, arch, building, or cliff must fit.
- The entire Milky Way arch matters.
- Vertical cropping room is needed.
Choose longer when:
- The foreground is distant.
- The Milky Way should dominate.
- The scene looks empty at 14mm.
- A panorama is acceptable.
2. How Large Should the Galactic Center Appear?
Choose 14–16mm when the galaxy provides atmosphere and scale.
Choose 18–24mm when the Milky Way and landscape should share attention.
Choose 28–50mm when galactic dust lanes and star clouds are the main visual subject.
3. Is the Camera Tracked?
For an untracked camera, wider focal lengths are easier because they tolerate longer shutter times.
For a tracked sky exposure, 35–85mm becomes more practical. However, the tracker moves relative to the landscape, so a sharp foreground usually requires a separate untracked exposure and transparent blending.
What Focal Length Is Best for a Milky Way Panorama?
A panorama often benefits from 24–50mm full-frame equivalent because the longer view records more galactic detail and avoids some extreme ultra-wide stretching.
14–20mm Panorama
Use when:
- The Milky Way arch is large.
- The foreground is close.
- Fewer frames are preferred.
- Wind or changing cloud may interrupt a long sequence.
Tradeoff: each frame contains less galactic detail, and an ultra-wide panorama can include excessive empty sky.
24–35mm Panorama
Use when:
- Detail and manageable frame count are equally important.
- A single-row vertical panorama is possible.
- The foreground is distant enough to stitch cleanly.
- The photographer wants a natural-looking result.
This is a strong general panorama range.
40–50mm Panorama
Use when:
- Maximum detail matters.
- A tracker or robust stacking workflow is available.
- The scene can be captured in many overlapping frames.
- Foreground movement is limited.
- The photographer can maintain consistent focus, white balance, and exposure.
Use generous overlap and lock all settings. Do not allow auto white balance, autofocus, or auto exposure to change between tiles.
What Real-World Scenarios Suggest
Focal length should be chosen only after the weather, Moon, viewing direction, Milky Way position, light pollution, access, and local rules have been checked. National Park Service guidance identifies all of these as important parts of night-photography planning. (U.S. National Park Service)
Close foreground and a high Milky Way arch
A rock formation is only a few meters from the camera, and the full arch must fit.
Use approximately 14–16mm full-frame equivalent. Check the corners for stretched stars and make sure the foreground does not become disproportionately large.
Balanced mountain landscape
The mountain is distant, and the bright galactic center should remain prominent.
Use approximately 18–24mm full-frame equivalent. This range usually gives a stronger Milky Way scale without requiring a panorama.
Vertical galactic-center portrait
The goal is a strong vertical column of dust lanes above a horizon.
Use approximately 24–35mm full-frame equivalent. Shorten the shutter time and capture several identical frames for selection or stacking.
High-resolution Milky Way mosaic
The photographer has a star tracker and wants a large print.
Use approximately 35–50mm, or longer when the workflow supports it. Capture the tracked sky and untracked foreground separately and disclose the blend.
APS-C kit-lens owner
The widest available lens is 18mm on a 1.5× APS-C camera, equivalent to about 27mm full-frame.
The lens can still photograph the Milky Way, but the view is tighter and the maximum aperture may be slow. Use a shorter shutter, higher ISO if necessary, multiple frames, or a stitched panorama before buying another lens.
How Do You Test a Lens Before a Milky Way Trip?
Test the lens near home before relying on it at a remote location.
Step-by-Step Lens Test
- Confirm the exact sensor format and crop factor.
- Calculate the full-frame-equivalent view.
- Mount the camera on a stable tripod.
- Turn off autofocus after achieving accurate star focus.
- Use the widest aperture.
- Capture a conservative untracked shutter test.
- Capture a second frame with a shorter shutter.
- Repeat one-third or two-thirds of a stop closed.
- Inspect stars in the center, mid-frame, and all four corners.
- Check whether the focus ring moves when the camera points upward.
- Verify whether in-camera distortion correction changes the final field of view.
- Repeat at another focal length if using a zoom.
What Should You Inspect?
- Center sharpness.
- Corner star shape.
- Unequal corners that suggest decentering.
- Vignetting.
- Color fringes.
- Focus repeatability.
- Flare from nearby lights.
- Distortion correction crop.
- Zoom creep.
- Condensation.
- Filter-induced reflections.
One sharp test image is more useful than relying only on manufacturer marketing or daytime reviews.
What Should You Check Before Buying a Milky Way Lens?
Composition and Format
- The focal length produces the required full-frame-equivalent view.
- The lens fits the actual camera mount.
- The image circle covers the sensor format.
- The field of view suits single frames, panoramas, or tracked mosaics.
- Distortion correction does not crop more than expected.
Optical Performance
- Star samples are available from a trustworthy source.
- Corner coma and astigmatism are acceptable.
- All four corners appear reasonably similar.
- The lens can be used slightly stopped down without becoming too slow.
- Chromatic aberration is manageable.
- Manual focus is precise and repeatable.
- The focus ring does not move too easily.
Field Use
- Weight is acceptable for the tripod and tracker.
- The lens can be focused while wearing gloves.
- The front element supports the intended dew-control or filter solution.
- Weather sealing and operating limits suit the location.
- The lens hood does not interfere with the composition.
- The lens can be transported safely.
Budget and Ownership
- A rental or used option has been considered.
- The lens serves other photography needs.
- The return policy allows optical inspection.
- The purchase does not eliminate the budget for a tripod, head, batteries, or safe travel.
- Affiliate recommendations are independently verified.
What Common Focal-Length Mistakes Should You Avoid?
Comparing printed focal lengths across different sensors
A 12mm Micro Four Thirds lens and a 12mm full-frame lens do not provide the same field of view. Convert both to full-frame equivalent.
Assuming wider is always better
An extremely wide lens can make the Milky Way look small, add empty sky, and exaggerate nearby objects.
Assuming longer always means more useful detail
A longer lens records the galaxy at a larger scale, but star movement, focus error, noise, and stitching difficulty increase.
Buying by maximum aperture alone
An f/1.4 label does not guarantee clean stars. Corner coma, decentering, vignetting, and focus behavior may matter more.
Using the 500 Rule as a guarantee
The 500 Rule is a rough historical shortcut. Test shorter exposures, especially with high-resolution cameras.
Ignoring distortion correction
Software correction may stretch corners and crop the image, changing the effective composition.
Judging a lens only at the center
Milky Way images use the full frame. Inspect all corners for star shape and asymmetry.
Confusing perspective with focal length alone
Perspective changes when camera position changes. A wider lens often encourages the camera to move closer to the foreground, which creates the dramatic perspective associated with ultra-wide images.
How Can You Troubleshoot Focal-Length Problems?
| Problem | Likely cause | Practical response |
|---|---|---|
| Milky Way looks too small | Focal length too wide or excessive empty sky | Use a longer lens, crop carefully, or create a panorama |
| Galactic center does not fit | Focal length too long or wrong orientation | Switch to vertical framing, use a wider lens, or stitch frames |
| Stars trail at the center | Shutter too long, vibration, or tracking error | Shorten exposure or improve tracking |
| Stars are sharp in center but distorted in corners | Coma, astigmatism, field curvature, or correction stretching | Stop down slightly, refocus, or use a better-corrected lens |
| One corner is much worse | Decentering, tilt, adapter issue, or sensor alignment | Rotate-test the lens and inspect the mount or adapter |
| Foreground looks unnaturally large | Camera too close with an ultra-wide lens | Move back and use a longer focal length |
| Panorama will not stitch | Too little overlap, moving foreground, exposure changes, or parallax | Increase overlap, lock settings, and rotate around the entrance pupil when practical |
| Tracked sky is sharp but foreground is blurred | Tracker moved relative to land | Capture a separate untracked foreground |
| View is tighter than expected | Crop factor or correction crop ignored | Recalculate equivalent focal length and inspect correction settings |
| Focus changes between frames | Focus ring movement, temperature, or autofocus | Secure and recheck manual focus periodically |
| Lens fogs | Dew or temperature transition | Use appropriate dew prevention and allow equipment to dry safely |
Which Focal Length Should You Choose?
Choose 14–16mm full-frame equivalent for dramatic foregrounds, a large Milky Way arch, and the easiest untracked workflow.
Choose 18–24mm for the strongest general-purpose balance between galactic scale, landscape context, and shutter-time tolerance.
Choose 28–35mm when the galactic center should look larger and panoramas or stacked sequences are acceptable.
Choose 40–50mm or longer for tracked, stacked, or stitched high-detail work rather than a simple beginner single frame.
Before buying, convert the lens to its full-frame-equivalent view, test the real corner performance, and decide whether the desired image is a wide environmental landscape or a detailed portrait of the galaxy.
Frequently Asked Questions
Is 14mm or 24mm better for Milky Way photography?
Use 14mm when the full arch, a close foreground, or the easiest untracked shutter is important. Use 24mm when the galactic center should appear larger and the scene does not require an extreme field of view. Neither is universally better.
Is 35mm too long for the Milky Way?
No. A 35mm full-frame view is effective for prominent galactic-center images and panoramas. It requires shorter untracked exposures, more precise focus, and tighter framing than 14–24mm.
What focal length should I use on APS-C?
For a field similar to 14–24mm on full frame, use approximately 9–16mm on a 1.5× APS-C camera or about 9–15mm on a 1.6× Canon APS-C camera. Check the exact sensor and distortion crop.
What focal length should I use on Micro Four Thirds?
Approximately 7–12mm on Micro Four Thirds provides a field broadly similar to 14–24mm on full frame. A 14mm Micro Four Thirds lens gives a view similar to about 28mm full-frame equivalent.
Does a wider lens collect more light?
Focal length alone does not determine light collection per unit area on the sensor. Maximum aperture, transmission, exposure time, vignetting, sensor response, and scene framing also matter. A wider lens mainly changes field of view and untracked shutter tolerance.
Do I need a star tracker for a 50mm Milky Way image?
Not necessarily, but a tracker makes 50mm high-detail work easier. Without tracking, use short exposures, accurate focus, a fast lens, and multiple frames for stacking. A wide Milky Way panorama at 50mm may require many tiles.
Sources
The following sources were accessed on July 30, 2026. Product specifications, lens availability, support pages, and manufacturer guidance can change.
- Canon RF Lens World, “Focal Length and Field of View,” definition of focal length and relationship between shorter focal lengths and wider fields. Canon Europe
- U.S. National Park Service, “Night Photography with Andy Porter,” recommended 14–24mm wide-angle range for a Milky Way workshop. U.S. National Park Service
- U.S. National Park Service, “How to Photograph Acadia’s Night Skies,” wide-angle lens, tripod, manual mode, focus, aperture, ISO, shutter experimentation, and star-trail limits. U.S. National Park Service
- Nikon USA, “How to Photograph the Milky Way,” published example images using 14mm and 20mm lenses and multiple exposure approaches. Nikon USA
- Nikon USA, “The DX and FX Formats,” FX and DX sensor dimensions and approximately 1.5× DX crop factor. Nikon USA
- Sony USA, “Lens Basics,” approximately 1.5× full-frame-equivalent focal-length calculation on APS-C cameras. sony.com
- Canon U.S.A., “Visual Power in Wide-Angle Imagery,” official explanation that Canon APS-C cameras apply an approximately 1.6× crop factor to field of view. usa.canon.com
- OM SYSTEM and Panasonic official Micro Four Thirds documentation, 2× crop relationship and published examples such as 12–35mm corresponding to 24–70mm full-frame equivalent. explore.omsystem.com and help.na.panasonic.com
- NASA Science, “Reference Systems,” apparent celestial rotation of approximately 360 degrees in 24 hours, or 15 degrees per hour. NASA Science
- Canon RF Lens World, lens-development discussion noting the greater aberration-correction challenge associated with shorter focal lengths and larger apertures. Canon Europe
- Sony Electronics, “FE 14mm F1.8 GM,” official discussion of ultra-wide field, bright night-sky imaging, exposure tolerance, coma, and aberration control. electronics.sony.com
- U.S. National Park Service, “The Unique Photography Techniques That Help Preserve Spectacular Night Skies,” planning around weather, moon phase, viewing direction, celestial position, light pollution, rules, and wide apertures. U.S. National Park Service
Editorial method: Optical explanations, crop-factor examples, focal-length recommendations, and cited product statements were checked against the sources listed above. No hands-on test of every lens is claimed.
More from Cameras Lenses & Sensors
Dedicated Astronomy Camera vs Regular Camera: What Is the Difference?
A dedicated astronomy camera is designed for telescope imaging through astronomy software and may provide regulated cooling, high-frame-rate readout, monochrome capture, filter-wheel integration, and FITS metadata. A regular DSLR or mirrorless camera is a self-contained general-purpose camera with a screen, battery, memory card, native lenses, autofocus, and daytime usefulness. This guide explains why neither category is universally better. It compares cooled deep-sky cameras, uncooled planetary cameras, guide cameras, monochrome and one-shot-color sensors, regular cameras, and specialized astrophotography DSLRs. Readers learn how cooling, dark current, H-alpha response, UV/IR filtering, sensor size, pixel scale, back focus, software, power, calibration, frame rate, and total system cost affect the decision. The article also includes calculation examples, use-case recommendations, a five-question selection process, a buying checklist, common mistakes, troubleshooting, and practical next steps.
How to Choose a Camera for Astrophotography
Choosing an astrophotography camera starts with the target, optical system, and workflow rather than megapixels or sensor size alone. This guide compares mirrorless and DSLR bodies, cooled one-shot-color cameras, cooled monochrome cameras, planetary cameras, and astronomy-modified models. Readers learn how sensor dimensions affect field of view, how pixel size and focal length determine image scale, and how cooling, quantum efficiency, read noise, full-well capacity, dynamic range, and frame rate should be interpreted. It also provides a color-versus-monochrome comparison, telescope compatibility and back-focus checks, software and driver requirements, a total-system-cost framework, five practical scenarios, troubleshooting, and a complete purchase checklist. The central recommendation is to choose the camera that fits the target, corrected image circle, mount, software, power system, processing workflow, and complete budget.
DSLR vs Mirrorless Camera for Astrophotography
Mirrorless cameras are usually the more flexible choice for a new astrophotography system, but a capable DSLR can remain the better value when the photographer already owns suitable lenses, needs strong battery endurance, or can buy a proven used body inexpensively. This guide separates camera architecture from sensor performance and compares focusing, shutter vibration, battery use, body weight, lens ecosystems, telescope spacing, electronic shutters, stabilization, software support, modification, and complete switching cost. It also explains which format fits Milky Way landscapes, tracked deep-sky work, lunar and planetary imaging, star trails, and travel. Readers receive a keep-adapt-switch decision framework, a hypothetical transition-cost calculation, five practical scenarios, troubleshooting guidance, and a detailed buying checklist. The main recommendation is to change systems only when mirrorless solves a documented workflow limitation.
Explore More Topics
How to Edit Milky Way Photos Without Making Them Look Artificial
Edit a Milky Way photo by protecting believable color, smooth tonal transitions, natural star sizes, and a realistic relationship between the sky and foreground. Start with lens corrections and white balance, build contrast gradually, use Dehaze and saturation sparingly, and make local adjustments with soft masks. Judge the result at both full-image view and 100% magnification before exporting.
RAW vs JPEG for Astrophotography
For most astrophotography, shoot RAW. A RAW file preserves substantially more sensor data and gives you greater control over white balance, shadow recovery, color gradients, noise reduction, and stacking. JPEG is useful when speed, storage, or immediate sharing matters, but its in-camera processing and lossy compression leave less room for correcting faint stars and dark skies.
How to Stack Astrophotography Images
To stack astrophotography images, capture a consistent series of RAW exposures, remove technically poor frames, calibrate them when appropriate, align the stars, normalize brightness, reject outliers, and combine the accepted frames with an averaging method. The stack can reduce random noise and reveal faint detail, but it cannot repair missed focus, severe trailing, clipped highlights, or inconsistent capture settings.