Can a Smartphone Photograph the Milky Way?

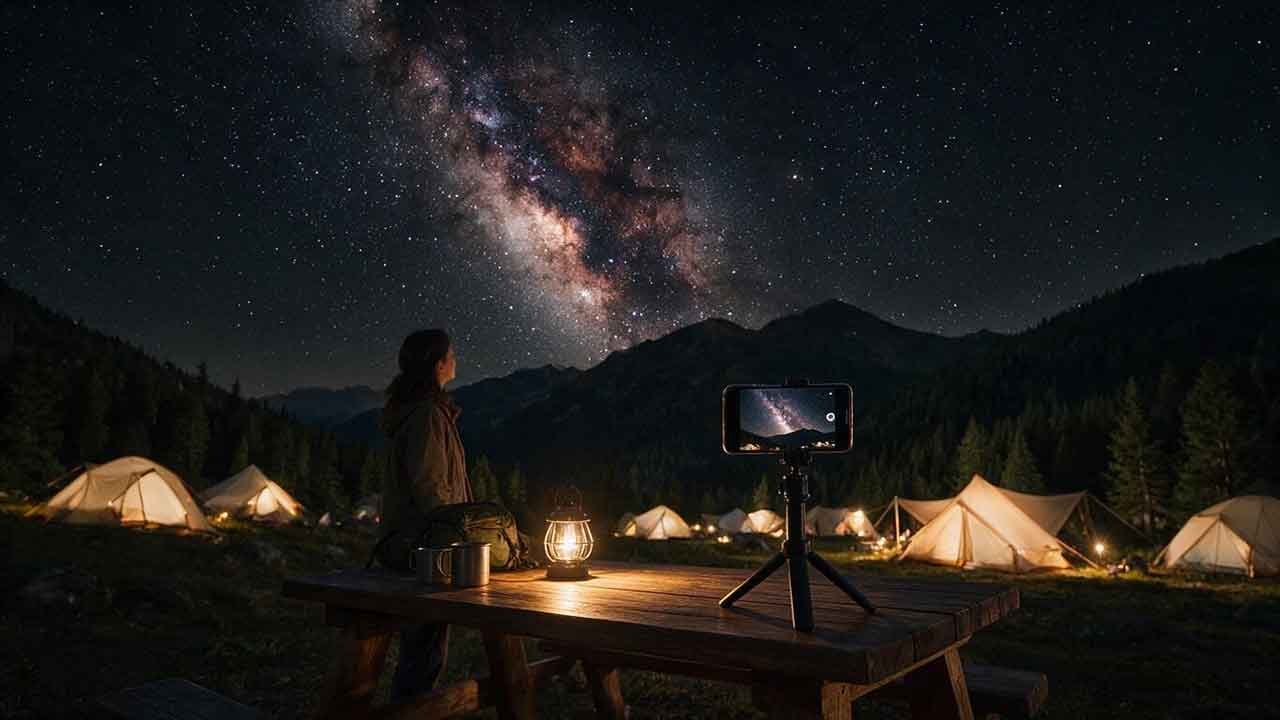
Can a Smartphone Photograph the Milky Way?
Yes. A supported smartphone can photograph the Milky Way when the galactic band is above the horizon, the sky is dark and clear, and the phone remains completely still during a long or multi-frame capture. Use the main rear camera, a tripod, Night or Astrophotography mode, a delayed shutter, and careful focus. Results vary greatly by phone, location, moonlight, season, and editing.
Key Takeaways
- The Milky Way must be visible from the location and at the chosen time; a phone cannot recover detail that strong light pollution, cloud, or bright moonlight has overwhelmed.
- Use the main rear camera, a stable tripod, a timer, and the phone’s supported Night, Astrophotography, or manual mode before experimenting with other lenses.
- iPhone Night mode, Google Pixel Astrophotography, Samsung Expert RAW, and other Android systems use different capture and processing methods.
- There is no universal best ISO or shutter speed. Start with the phone’s automated mode or a short exposure ladder, then inspect focus, star shape, sky brightness, and foreground movement.
- RAW files and external stacking can provide more editing control, but the processed phone image may already contain advanced multi-frame alignment and noise reduction.
This guide explains what a smartphone can realistically record, how to determine whether the Milky Way will be visible, and how to build separate iPhone and Android workflows. It also includes a Milky Way readiness scorecard, an exposure-testing table, stacking and storage examples, practical scenarios, a decision tree, a field checklist, common mistakes, and troubleshooting guidance.
Method note: This guide is based on current Apple, Google, Samsung, NASA, and U.S. National Park Service documentation plus practical selection criteria rather than hands-on testing of every phone. Camera features, menu names, RAW behavior, lens support, exposure limits, and computational processing vary by model, region, operating-system version, and camera-app version.
Can a Phone Really Show the Milky Way?
A modern smartphone can record the Milky Way as a textured band of stars and dark dust lanes when conditions are favorable. The result may be clearly recognizable even when the band looks faint to the unaided eye because the phone can collect light for several seconds and combine multiple frames.
NASA notes that smartphones can perform astrophotography when the user controls steadiness, focus, exposure, and processing. NASA also advises beginners to keep expectations realistic rather than comparing a first phone image with a deeply processed observatory photograph. (NASA Science)
What Should You Expect From a Good Phone Image?
A successful phone photograph may show:
- A broad Milky Way band.
- The brighter central region when it is visible from the location.
- Dark dust lanes under a sufficiently dark sky.
- Dense star fields.
- A silhouette or moderately illuminated foreground.
- Color and contrast that were difficult to see with the unaided eye.
The result will not normally match a large-sensor camera with a fast lens, a tracked multi-minute exposure, or a carefully calibrated multi-hour mosaic.
Why Can the Phone Record More Than Your Eyes See?
The eye views the scene continuously but does not accumulate light into one stored frame. A phone can keep collecting signal over time, align several exposures, reduce random noise, and apply local contrast and color processing.
This advantage has limits. If the Milky Way is hidden behind cloud, blocked by terrain, below the horizon, or overwhelmed by severe skyglow, computational processing cannot reconstruct a reliable real view of the galaxy.
When and Where Is the Milky Way Visible?
The Milky Way’s position changes through the night and across the year, while the visibility of its bright central region depends on latitude and hemisphere. The correct planning question is not “Is it Milky Way season everywhere?” but “Will the part I want be above my horizon during full darkness at my location?”
NASA describes the Milky Way from a dark site as a pale, cloudy band, with its bright central region marking the direction toward the crowded center of the galaxy. NASA’s July 2026 skywatching guidance also emphasizes dark locations and nights around the new Moon for better visibility. (NASA Science)
Check These Four Conditions First
| Planning condition | What to verify | Why it matters |
|---|---|---|
| Galactic position | The band or bright central region is above the horizon | The phone cannot photograph a target that has not risen or is blocked |
| Full darkness | The sky is beyond bright twilight | Twilight raises the sky background and reduces contrast |
| Moonlight | Moon phase, altitude, rise, and set times | A bright Moon can reduce faint Milky Way contrast |
| Sky quality | Cloud, haze, smoke, humidity, and artificial light | These can scatter light and hide low-contrast structure |
The National Park Service recommends checking weather, Moon phase, target direction, light pollution, access, and local rules before a night photography trip. (U.S. National Park Service)
Is a New Moon Required?
No, but it often makes faint Milky Way structure easier to record.
A bright Moon above the horizon can substantially reduce contrast. The Moon may still be useful when it softly illuminates a landscape, but the exposure must balance the bright foreground with the faint sky.
A practical plan is to photograph:
- Near a new Moon.
- Before a bright Moon rises.
- After it sets.
- When the Moon is low and outside the frame.
- With the camera facing away from the brightest moonlit sky.
National Park Service stargazing guidance recommends checking both Moon phase and rise or set times because moonlight affects visibility of the Milky Way. (U.S. National Park Service)
Do You Need a Dark-Sky Park?
No. A designated dark-sky location is helpful but not mandatory.
A phone can record parts of the Milky Way from some suburban locations if the camera faces a darker direction and direct lights are blocked. City-center conditions are more difficult because skyglow raises the background and reduces contrast across the galaxy’s broad structure.
Choose a safe site rather than entering closed, unstable, remote, or hazardous terrain solely to reduce light pollution.
Which Smartphones Can Photograph the Milky Way?
Many recent phones can record the Milky Way, but the easiest workflow usually requires one of the following:
- An automatic Night mode that extends capture time when the phone is stable.
- A dedicated Astrophotography mode.
- A Pro or manual mode with shutter, ISO, focus, and RAW controls.
- A reputable third-party camera app compatible with the specific device.
iPhone, Pixel, Samsung, and Other Android Differences
| Phone system | Common Milky Way workflow | Main advantage | Main limitation |
|---|---|---|---|
| Supported iPhone | Built-in Night mode on a tripod | Simple multi-frame capture and processing | Full manual shutter, ISO, and focus may require another app |
| Supported Google Pixel | Night Sight with Astrophotography mode | Dedicated automatic night-sky processing | Model and zoom restrictions apply |
| Supported Samsung Galaxy | Night mode, Pro mode, or Expert RAW Astrophoto | Manual controls and RAW options on compatible devices | Astrophoto support varies by model, region, and software |
| Other Android phones | Night mode, Pro mode, RAW, or compatible manual app | Some models provide extensive direct control | Features and image quality vary widely |
Apple states that supported iPhone models activate Night mode in low light and offer available exposure options, with a tripod recommended for additional detail. (Apple) Google documents both tripod-triggered and manually selected Astrophotography workflows on supported Pixel devices. (Google) Samsung’s 2026 Expert RAW documentation provides ISO, shutter, white-balance, exposure, and focus controls, while limiting Astrophoto availability to compatible devices and software. (Samsung)
Does the Most Expensive Phone Always Win?
No. A more expensive phone may have a larger sensor, better optics, stronger stabilization, or improved processing, but a cheaper supported phone at a dark site can outperform a flagship used under severe skyglow.
The final result depends on the complete system:
- Lens and sensor.
- Camera software.
- Tripod stability.
- Focus.
- Sky darkness.
- Moonlight.
- Atmospheric clarity.
- Composition.
- Editing discipline.
What Equipment Do You Need?
The minimum useful setup is simple:
- A supported smartphone.
- A stable tripod or rigid safe support.
- A secure phone clamp.
- A timer or remote shutter method.
- A clean camera lens cover.
- Enough battery and storage.
- A safe nighttime location.
- A weather and sky-planning tool.
NASA recommends a tripod or stable support, delayed shutter, locked focus, longer exposure, and post-processing for phone astrophotography. (NASA Science)
Which Phone Lens Should You Use?
Start with the native main rear camera, usually shown as 1×.
The main camera is commonly the phone’s strongest low-light option. An ultrawide lens can fit more sky and foreground but may have a smaller sensor, slower optics, softer corners, or weaker night-mode support. A telephoto lens captures a narrower region and magnifies shake, focus errors, and star movement.
Digital or computational zoom does not increase the physical aperture or collect more photons from the Milky Way. It may crop, combine frames, switch lenses, or reconstruct detail, so use the native view first.
Should You Remove the Phone Case?
Only when necessary.
Remove a case if it prevents secure clamping, blocks a lens, causes overheating, or makes the phone unstable. Keep it installed when it provides protection and does not interfere with the camera or mount.
Do not remove a case on a cliff edge, over water, or in another location where the phone can easily fall.
How Do You Photograph the Milky Way With an iPhone?
Use the built-in Night mode first on a supported iPhone. A third-party manual camera app is optional, not a requirement.
Step-by-Step iPhone Night Mode Workflow
- Clean the external camera lens cover.
- Mount the iPhone securely on a tripod.
- Open the built-in Camera app.
- Select the main rear camera at its native view.
- Frame the Milky Way and foreground.
- Confirm that Night mode is active.
- Open the Night mode controls and choose an available exposure option.
- Use a timer, Apple Watch remote, or another hands-free shutter method.
- Align the stabilization crosshairs if they appear.
- Keep the iPhone still until capture and processing finish.
- Inspect the saved image at high zoom.
- Shorten the capture if stars trail, branches move, highlights clip, or the sky becomes washed out.
Apple explains that Night mode exposure is set automatically but can be adjusted among the options provided by the iPhone. A tripod can enable more detailed results, but the exact available duration depends on model, lens, light level, and detected stability. (Apple)
Should You Use Apple ProRAW?
Use Apple ProRAW when:
- The iPhone supports it.
- You plan to edit.
- Storage space is sufficient.
- You want more control over white balance, color, and exposure.
- You are willing to compare the ProRAW file with the processed image.
Apple states that ProRAW combines RAW information with iPhone image processing and creates larger files. Support and available resolutions vary by model and camera mode. (Apple)
Do not assume that the highest advertised ProRAW resolution remains available in Night mode. On supported models, Night mode can reduce the available ProRAW resolution or change the active format.
How Do You Photograph the Milky Way With a Google Pixel?
Use Pixel Camera’s Night Sight and Astrophotography mode on a supported device.
Tripod-Triggered Pixel Workflow
- Move away from strong artificial light.
- Open Pixel Camera.
- Select Night Sight.
- Place the Pixel on a tripod or stable surface.
- Point the camera toward the planned Milky Way position.
- Wait until the shutter changes to Astrophotography mode.
- Tap the shutter.
- Keep the phone still through the countdown and capture.
- Review the image before changing the lens or zoom.
Google states that on Pixel 4a (5G) and later, Astrophotography works only at zoom settings of 1× or greater. Other model-specific restrictions may also apply. (Google)
Manually Selected Pixel Astro Workflow
On current supported software, some Pixel devices allow the user to:
- Open Night Sight.
- Open the camera controls.
- Move the Night Sight control to Astro.
- Press the shutter.
- Use the countdown to place the phone on a stable surface.
- Leave the phone untouched until the audio cue or completion indicator.
This option is software- and model-dependent. Verify the current official instructions for the exact Pixel.
Should You Enable RAW + JPEG?
Google allows RAW + JPEG capture on supported Pixel configurations. The camera saves a processed JPEG and a RAW file when the setting is enabled. (Google)
RAW can help with:
- White balance.
- Shadow recovery.
- Selective noise reduction.
- External stacking.
- Preserving an alternative to the phone’s processed rendering.
The RAW file may still include device-specific processing or lens correction. Test the actual output before assuming it behaves like a traditional camera RAW file.
How Do You Photograph the Milky Way With a Samsung Galaxy?
Use the built-in Night mode for simplicity or Expert RAW on a supported Galaxy when you want more control.
Expert RAW Astrophoto Workflow
- Confirm that Expert RAW and Astrophoto support the exact Galaxy model, region, and software version.
- Install or update Expert RAW through the official Galaxy Store.
- Mount the phone on a tripod.
- Choose a supported rear camera.
- Enable the required special photo options when applicable.
- Open Astrophoto.
- Use the sky guide only to assist planning.
- Adjust focus, white balance, and capture duration if available.
- Start the capture and keep the phone still.
- Review both JPEG and RAW files when both are saved.
Samsung’s March 2026 support documentation states that Expert RAW provides direct control over ISO, shutter speed, white balance, exposure, and focus. It also notes that Astrophoto support, resolution requirements, and compatible devices are limited. (Samsung)
What About Other Android Phones?
Check the official manual or support page for:
- Night or Astro mode.
- Maximum manual shutter duration.
- Manual focus.
- RAW or DNG support.
- Lens restrictions.
- Tripod detection.
- Interval capture.
- App compatibility.
Do not copy Pixel or Samsung steps onto another Android phone without verifying them.
What Manual Settings Should You Try?
There is no universal best Milky Way setting for a phone. Use an exposure ladder so every change has a purpose.
Example Exposure Ladder
| Test frame | Example shutter time | What to inspect |
|---|---|---|
| 1 | About 2 seconds | Whether stars and the Milky Way band are visible |
| 2 | About 4 seconds | Focus, noise, and foreground stability |
| 3 | About 8 seconds | Early star elongation and sky brightness |
| 4 | About 15 seconds | Trails, clipping, wind movement, and light pollution |
These are example starting tests, not guaranteed settings. Not every phone or camera app supports these durations.
How Should You Adjust ISO?
Use the lowest ISO that produces a workable image at the selected shutter time.
Raise ISO when the Milky Way remains too faint, but expect:
- More visible noise.
- Less highlight headroom.
- Stronger color variation.
- Greater dependence on noise reduction.
ISO does not increase the amount of light entering the lens. It changes how the captured signal is amplified or encoded.
In computational night modes, the displayed ISO and shutter value may not describe every frame used to create the final image. Manual ISO advice applies most directly to camera modes that provide documented manual control.
How Do You Focus?
- Aim at a bright star or very distant light.
- Tap to focus or move the manual slider near infinity.
- Lock focus if supported.
- Take a test frame.
- Inspect the saved image at high zoom.
- Adjust focus in small steps until the stars are smallest.
Do not assume that the end of a focus slider is the exact best infinity position.
How Can You Tell Whether Conditions Are Good Enough?
Use the following Milky Way readiness scorecard before traveling.
Milky Way Readiness Scorecard
Give one point for each “yes”:
- The Milky Way band or bright central region will be above the horizon.
- The planned capture occurs during full darkness.
- The Moon is absent, low, faint, or outside the important sky direction.
- Cloud, smoke, haze, and fog are expected to be limited.
- The camera faces away from the strongest artificial light.
- The phone supports Night, Astro, or useful manual control.
- A stable tripod and hands-free shutter are available.
- The location is legal, accessible, and safe after dark.
- Battery and storage are sufficient.
- The user has time to test focus and exposure.
Interpretation:
- 8–10 points: Strong preparation; proceed and refine composition.
- 5–7 points: Possible, but identify the weakest condition before traveling.
- 0–4 points: Change the time, place, weather window, or equipment plan.
This scorecard is an editorial planning tool, not a scientific visibility model. One severe problem—such as complete cloud cover—can prevent the photograph regardless of the total score.
How Do You Compose a Strong Milky Way Photo?
A clear Milky Way band is not enough by itself. Composition gives the sky scale and context.
Useful Foregrounds
- Mountain ridge.
- Tree silhouette.
- Desert formation.
- Coastline.
- Building with controlled lighting.
- Tent or observatory.
- Road or trail that leads toward the sky.
The foreground should support the image without requiring unsafe access or bright uncontrolled lighting.
Should You Use the Main Camera or Ultrawide?
Choose the main camera when:
- Low-light quality is the priority.
- The Milky Way fits the frame.
- Corner sharpness matters.
- Night or Astro mode is best supported on that lens.
Choose the ultrawide when:
- The foreground and sky require a broader view.
- The phone provides strong low-light support on that lens.
- You accept softer corners or more distortion.
Make a comparison rather than assuming the wider view is automatically better.
Should You Stack Multiple Milky Way Photos?
Stacking can reduce random noise and strengthen faint detail when the individual frames are registered and combined correctly. Siril’s official documentation describes star-based registration, frame selection, rejection, and stacking as separate processing stages. (Siril Documentation; Siril Documentation)
Point-Star Stacking Workflow
- Capture multiple frames without changing focus or composition.
- Reject frames with shake, cloud, aircraft, or direct light.
- Align the stars to the same positions.
- Average or combine the aligned sky frames.
- Process the foreground separately if it moved during the sequence.
- Blend only when necessary and disclose the method.
This is different from star-trail stacking. Point-star stacking aligns stars to remove apparent movement, while star-trail stacking preserves their movement.
Total Exposure Example
Suppose you keep 10 frames and each frame contains 15 seconds of exposure:
10 frames × 15 seconds = 150 seconds of accumulated exposure time
Stacking those frames does not produce the same result as one uninterrupted 150-second exposure. It combines repeated measurements, reduces some random noise, and requires alignment and processing.
Storage Example
If each RAW file is approximately 25 MB:
20 files × 25 MB = approximately 500 MB
This is only a planning example. Actual phone RAW files can be much smaller or larger depending on model, resolution, bit depth, compression, and computational processing.
What Editing Is Appropriate?
Edit to reveal recorded detail without creating a false representation of the phone’s performance.
A restrained workflow is:
- Preserve the original file.
- Correct white balance.
- Reduce clipped highlights.
- Raise shadows cautiously.
- Set the black point without erasing faint stars.
- Apply moderate noise reduction.
- Add restrained contrast and dehaze.
- Correct color casts.
- Sharpen after noise reduction.
- Crop and level.
- Export a separate copy.
What Should Be Disclosed?
Disclose material changes such as:
- Stacked sky frames.
- Separate foreground exposure.
- Exposure blending.
- Sky replacement.
- Generative additions or removals.
- AI reconstruction that invents stars or dust lanes.
- Composite images from different locations or times.
A normal adjustment to exposure, color, noise, or crop does not need an elaborate disclaimer, but a composite should not be presented as a single unedited phone capture.
What Does the Milky Way Decision Tree Recommend?
Can you identify the Milky Way band with your eyes or a planning app?
- Yes: continue.
- No: verify the time, direction, Moon, cloud, and light pollution.
Does the phone have a supported Astrophotography mode?
- Yes: start with that mode on a tripod.
- No: continue.
Does the phone provide a tripod-sensitive Night mode?
- Yes: use the available exposure options and inspect the result.
- No: continue.
Does the camera offer manual shutter, ISO, and focus?
- Yes: use the exposure ladder.
- No: consider a reputable compatible camera app.
Are the stars sharp but the Milky Way weak?
- Increase exposure or ISO gradually, or improve the location and timing.
Are the stars stretched or doubled?
- Shorten exposure, improve stability, or check multi-frame alignment.
Is the sky gray, orange, or clipped?
- Reduce exposure, face a darker direction, wait for the Moon to set, or change location.
Is one image too noisy?
- Capture several consistent frames for later selection or point-star stacking.
What Do Real-World Situations Suggest?
Recent iPhone at a Dark Rural Site
Night mode offers a longer exposure after the iPhone detects the tripod.
Use the main camera, choose an appropriate available duration, trigger hands-free, and check star shape. Compare the processed image with ProRAW only if the model supports it and editing is planned.
Supported Pixel Under Suburban Skies
Astrophotography mode activates, but the Milky Way remains weak.
The likely limit is sky contrast rather than the absence of an Astro mode. Face away from the city glow, wait for the Moon to set, or travel to a darker site.
Samsung Galaxy With Expert RAW
The photographer wants a manually controlled RAW sequence.
Confirm current Astrophoto compatibility, test focus, choose a conservative shutter time, and capture several identical frames for selection or stacking.
Basic Android With Limited Night Mode
The phone produces noisy images and offers no manual focus.
Start with the brightest Milky Way region from a darker location, use the main camera and tripod, and accept that the phone may record a broad band rather than detailed dust lanes.
Windy Foreground
Stars appear sharp in some frames, but trees or grass blur.
Shorten the exposure or use a more stable foreground. Do not assume a longer Astro capture is always better for a scene containing moving objects.
What Common Mistakes Should You Avoid?
Photographing Before the Milky Way Is in Position
A perfect camera setup cannot photograph a galactic region that is below the horizon or hidden by terrain.
Using Digital Zoom
Digital or computational zoom does not increase physical light collection and can magnify noise or processing artifacts.
Touching the Phone
Use a timer or remote trigger. Even a small touch can damage a multi-second or multi-frame capture.
Leaving the Lens Dirty
Fingerprints create halos, streaks, and false haze around stars and nearby lights.
Assuming Infinity Focus Is the Slider End
Confirm focus with saved test frames.
Selecting the Longest Capture Automatically
Shorten the capture when stars trail, clouds move, trees blur, highlights clip, or the phone cannot align its frames.
Overprocessing the Sky
Excessive dehaze and sharpening can create halos, false texture, unnatural colors, and invented-looking dust lanes.
Treating Every Android Tutorial as Universal
Verify the exact phone, region, operating system, app version, lens, and RAW support.
Ignoring Safety and Rules
Do not trespass, stand in roads, climb unstable surfaces, disturb wildlife, or use prohibited light painting.
How Can You Troubleshoot Milky Way Phone Photos?
| Problem | Likely causes | First checks |
|---|---|---|
| No Milky Way appears | Wrong time or direction, cloud, moonlight, severe skyglow | Confirm position and face a darker sky after moonset |
| Only a few bright stars appear | Exposure too short, unsupported lens, strong processing | Use the main camera and a supported Night or Astro mode |
| Stars look like soft disks | Missed focus, dirty lens, dew, overexposure | Clean the lens cover, refocus, and reduce exposure |
| Stars become short lines | Exposure too long or tripod movement | Shorten exposure and improve stability |
| Stars are doubled | Multi-frame alignment failure or vibration | Use a firmer support and do not touch the phone |
| Sky is gray or orange | Artificial light, haze, Moon, excessive exposure | Reduce exposure or move to a darker direction |
| Dust lanes look artificial | Excessive dehaze, sharpening, or AI processing | Return to the original and edit more gently |
| Night mode will not activate | Scene not dark enough, unsupported model or lens | Check the current official camera instructions |
| Pixel Astro does not appear | Phone not still, wrong mode, unsupported zoom | Use Night Sight, stabilize the phone, and confirm restrictions |
| Expert RAW Astrophoto is missing | Unsupported model, region, software, or resolution | Check Samsung’s current compatibility guidance |
| RAW option is missing | Unsupported model, lens, mode, or camera app | Check official RAW settings and limitations |
| Foreground is black | Dynamic range exceeds one exposure | Use a suitable naturally lit foreground or disclose a blended exposure |
| Phone overheats | Long processing, charging, warm case, high ambient temperature | Pause and follow the device’s temperature warning |
| Condensation forms | Dew, breath, or temperature transition | Keep breath away and allow moisture to clear safely |
Stop the session if the phone, battery, cable, or power bank becomes unusually hot, swollen, damaged, unstable, or internally wet.
What Should You Check Before Leaving Home?
Sky and Location
- The Milky Way position is known for the time and location.
- Full darkness occurs during the session.
- Moon phase, rise, set, and direction have been checked.
- Cloud, haze, smoke, wind, and dew are acceptable.
- The site is legal and safely accessible.
- Offline maps or a safe return route are available.
Phone and Camera
- The exact Night, Astro, Pro, or manual mode has been confirmed.
- The preferred lens supports the chosen mode.
- RAW behavior is understood.
- The phone has adequate battery and storage.
- A timer or remote trigger is ready.
- The lens cover is clean.
Support and Comfort
- The tripod and clamp hold the phone securely.
- The tripod has been tested in wind.
- Warm clothing, water, and a dim light are packed.
- Charging cables cannot create a trip hazard.
- The phone can remain dry and within its operating-temperature guidance.
So, Can a Smartphone Photograph the Milky Way?
Yes. A smartphone can photograph the Milky Way when the galaxy is in the correct position, the sky is dark and clear, and the phone is stable enough to use a long or multi-frame capture.
Use an iPhone Night mode workflow for the simplest supported Apple approach. Use Pixel Astrophotography when a supported Pixel provides it. Use Samsung Expert RAW or another documented Android manual mode when direct control is useful.
The most important next step is not buying another app or accessory. Confirm the Milky Way’s position, choose a darker and safer time, mount the phone, make one careful test image, and inspect focus before capturing a longer sequence.
Frequently Asked Questions
Can an older smartphone photograph the Milky Way?
Possibly. An older phone may record the brighter Milky Way band under a dark sky, especially with a stable support and a compatible long-exposure app. It may not provide the detail, low noise, RAW flexibility, or automatic multi-frame processing of a recent supported model.
Can a smartphone photograph the Milky Way from a city?
Sometimes, but strong skyglow usually hides much of the low-contrast structure. Face away from the brightest urban glow, avoid direct lamps, reduce exposure, and start with the brightest visible region. A darker site generally produces a much larger improvement.
What is the best phone camera setting for the Milky Way?
There is no universal setting. Start with the phone’s supported Night or Astrophotography mode. With manual controls, test several shutter times while holding focus, framing, and white balance constant, then adjust ISO after finding the longest acceptable exposure.
Is RAW necessary for a Milky Way phone photo?
No. A processed JPEG or HEIC may already include strong multi-frame alignment and noise reduction. RAW is useful when the phone supports it and the photographer wants more control over color, shadows, noise, or external stacking.
Why is the Milky Way brighter in the phone photo than in real life?
The phone can collect light over several seconds, combine multiple frames, and increase local contrast. The eye does not accumulate light into one stored image in the same way.
Do I need a star tracker?
No. A tripod and a supported Night, Astro, or manual mode are enough for many phone images. A tracker can enable longer point-star exposures with compatible equipment, but it increases cost, setup complexity, alignment requirements, and foreground-processing challenges.
Sources
The following sources were accessed on July 30, 2026. Camera features, supported models, app availability, exposure behavior, RAW formats, and menu names can change.
- NASA Science, “Astrophotography With Your Smartphone,” steadiness, focus lock, exposure, processing, and realistic beginner expectations. NASA Science
- NASA Science, “What’s Up: July 2026 Skywatching Tips from NASA,” dark locations, new-Moon timing, and the Milky Way’s bright central region. NASA Science
- U.S. National Park Service, “The Unique Photography Techniques That Help Preserve Spectacular Night Skies,” weather, Moon phase, target direction, light pollution, access, and smartphone night photography. U.S. National Park Service
- U.S. National Park Service, Yosemite National Park, “Stargazing,” moonlight, full darkness, and Milky Way visibility planning. U.S. National Park Service
- Apple Support, “Take Night mode photos with your iPhone camera,” automatic Night mode, available exposure controls, movement indicators, and tripod guidance. Apple
- Google Pixel Camera Help, “Take photos in low light or at night on your Pixel phone or tablet,” Night Sight, Astrophotography, tripod and manual Astro workflows, focus, and model restrictions. Google
- Samsung Support, “Take RAW photos on your Samsung Galaxy,” updated March 17, 2026, Expert RAW controls, Astrophoto availability, resolution requirements, and JPEG/RAW capture. Samsung
- Apple Support, “Take Apple ProRAW photos with your iPhone camera,” supported models, editing flexibility, resolution options, and larger file sizes. Apple
- Google Pixel Camera Help, “Change your Camera app settings,” RAW + JPEG controls on supported Pixel devices. Google
- Siril Documentation, “Registration” and “Stacking,” star-based image registration, frame selection, rejection, and sequence stacking. Siril Documentation and Siril Documentation
Editorial method: Technical and software claims were checked against the sources listed above. No hands-on test of every iPhone or Android device is claimed.
More from Smartphone Astrophotography
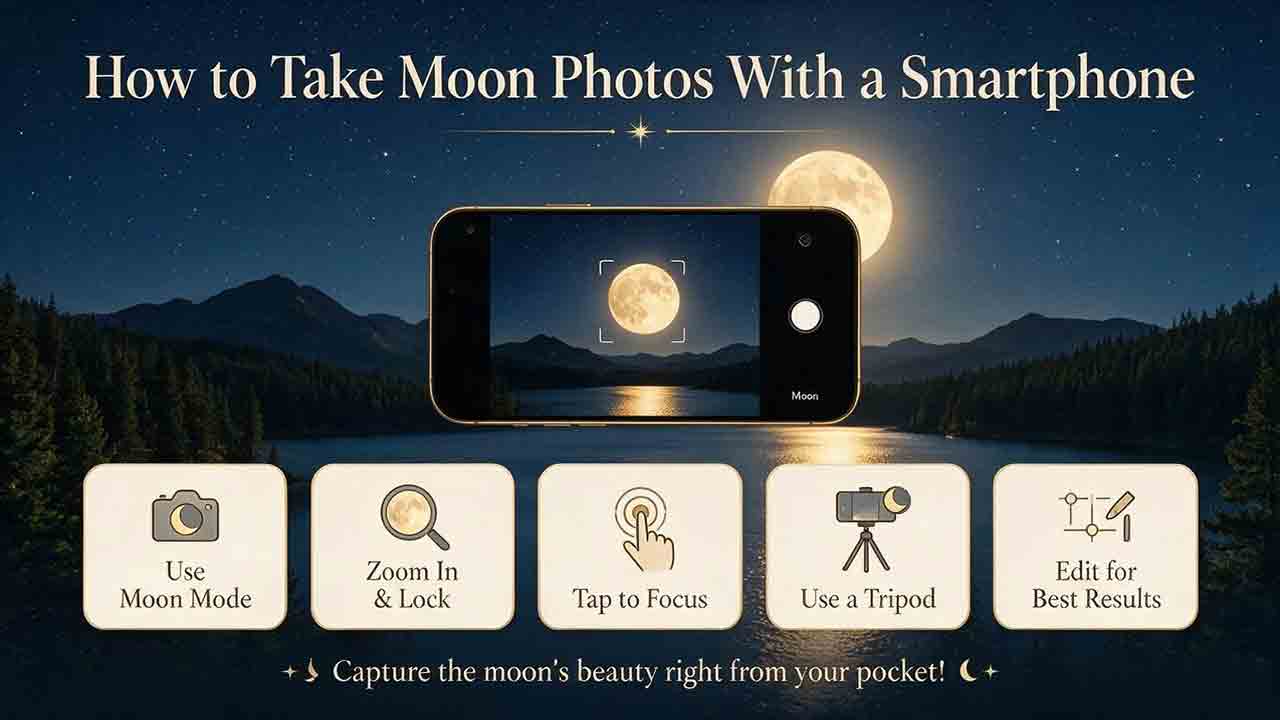
How to Take Moon Photos With a Smartphone
Clear smartphone Moon photos depend on real image scale, stable support, accurate focus, and reduced exposure rather than maximum digital zoom or a long Night-mode capture. This guide explains how to photograph the Moon with a phone alone, on a tripod, or through a telescope eyepiece using an afocal smartphone adapter. Readers learn how lunar phase and the terminator affect visible detail, how to choose between optical and digital zoom, how to lock focus and exposure, and how to prevent white disks, blur, vignetting, drift, and color fringes. It also provides practical settings principles, telescope magnification examples, still-versus-video guidance, frame-stacking basics, three real-world workflows, restrained editing recommendations, and a complete field checklist. The central recommendation is to start at low magnification, preserve lunar highlights, capture multiple frames, and keep original files.
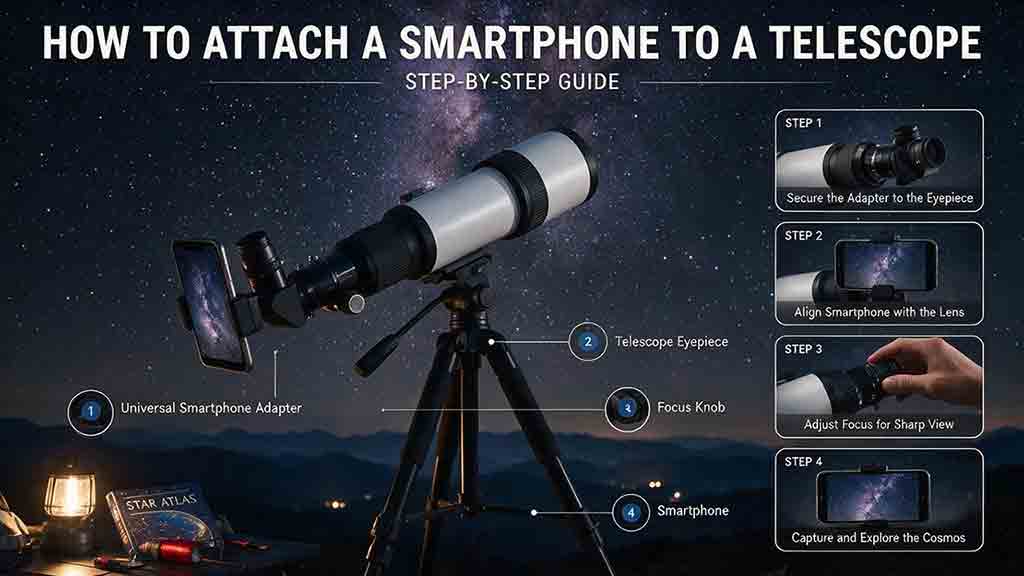
How to Attach a Smartphone to a Telescope
Attaching a smartphone to a telescope requires more than centering a camera over an eyepiece. The phone, adapter, eyepiece, focuser, diagonal, mount, and tripod form one mechanical load chain that must remain secure and balanced. This guide explains afocal imaging, exit pupil, eye relief, vignetting, adapter types, phone and eyepiece compatibility, active-camera selection, low-power eyepiece choice, three-axis alignment, telescope rebalancing, focus, exposure, and safe removal. It provides step-by-step instructions for refractors, Dobsonians, and diagonal-equipped telescopes, plus real-world Moon and Jupiter workflows, an adapter decision framework, troubleshooting for black circles, blur, lens switching, slipping, and focus failure, and a complete attachment checklist. The central recommendation is to align at low power, support the phone during every clamp adjustment, and verify the entire load path before capture.
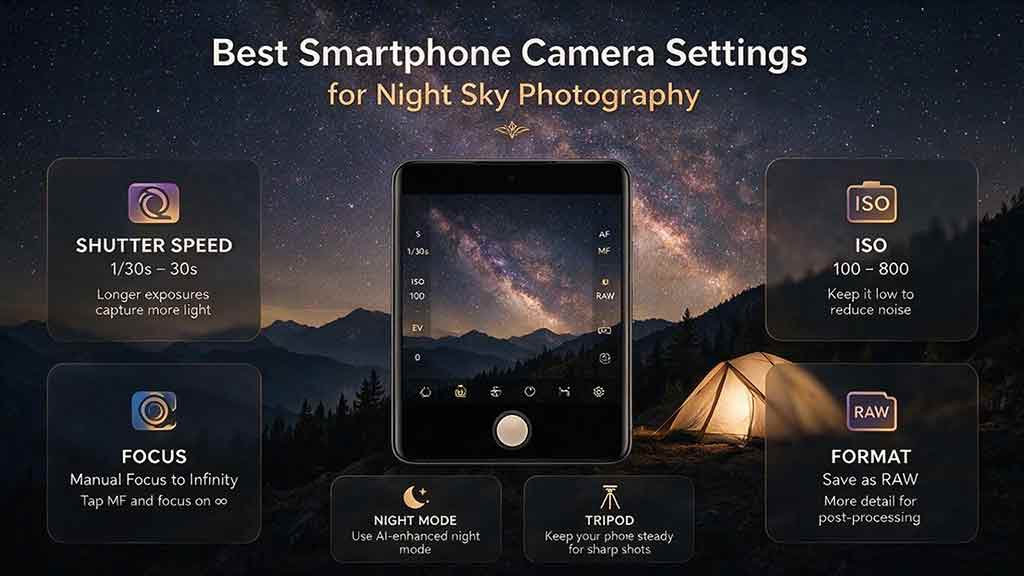
Best Smartphone Camera Settings for Night Sky Photography
The best smartphone night-sky settings are not one fixed preset. They depend on the phone’s camera module, computational processing, sky brightness, Moon phase, and target motion. This guide recommends beginning with the main wide camera, rigid tripod support, locked distant focus, an 8–15 second exposure, ISO 800–1600, and fixed white balance around 3,500–4,500 K, then refining those values with structured exposure and ISO ladders. It provides separate starting ranges for the Milky Way, constellations, urban stars, meteor showers, aurora, moonlit landscapes, and star trails. Readers also learn when to use automatic astrophotography mode, Pro mode, RAW, and stacking; how to diagnose blurry stars, washed-out skies, focus failure, and exposure limits; and how to edit and disclose composites responsibly.
Explore More Topics
Dedicated Astronomy Camera vs Regular Camera: What Is the Difference?
A dedicated astronomy camera is designed for telescope imaging through astronomy software and may provide regulated cooling, high-frame-rate readout, monochrome capture, filter-wheel integration, and FITS metadata. A regular DSLR or mirrorless camera is a self-contained general-purpose camera with a screen, battery, memory card, native lenses, autofocus, and daytime usefulness. This guide explains why neither category is universally better. It compares cooled deep-sky cameras, uncooled planetary cameras, guide cameras, monochrome and one-shot-color sensors, regular cameras, and specialized astrophotography DSLRs. Readers learn how cooling, dark current, H-alpha response, UV/IR filtering, sensor size, pixel scale, back focus, software, power, calibration, frame rate, and total system cost affect the decision. The article also includes calculation examples, use-case recommendations, a five-question selection process, a buying checklist, common mistakes, troubleshooting, and practical next steps.
How to Choose a Camera for Astrophotography
Choosing an astrophotography camera starts with the target, optical system, and workflow rather than megapixels or sensor size alone. This guide compares mirrorless and DSLR bodies, cooled one-shot-color cameras, cooled monochrome cameras, planetary cameras, and astronomy-modified models. Readers learn how sensor dimensions affect field of view, how pixel size and focal length determine image scale, and how cooling, quantum efficiency, read noise, full-well capacity, dynamic range, and frame rate should be interpreted. It also provides a color-versus-monochrome comparison, telescope compatibility and back-focus checks, software and driver requirements, a total-system-cost framework, five practical scenarios, troubleshooting, and a complete purchase checklist. The central recommendation is to choose the camera that fits the target, corrected image circle, mount, software, power system, processing workflow, and complete budget.
Best Focal Lengths for Milky Way Photography
For most untracked Milky Way landscapes, a 14–24mm full-frame-equivalent view offers the best balance of sky coverage, galactic scale, foreground context, and shutter-time tolerance. Wider 12–16mm views suit dramatic foregrounds and a large Milky Way arch, while 28–35mm makes the galactic center more prominent. Focal lengths of 40–50mm or longer are better for panoramas, stacking, or tracked high-detail images. This guide converts the recommendations for full-frame, 1.5× APS-C, 1.6× Canon APS-C, and Micro Four Thirds cameras. It explains shutter-time tradeoffs, crop-factor calculations, aperture and corner-performance limits, prime-versus-zoom choices, panorama planning, and tracker use. Readers also receive a three-question lens-selection method, real-world scenarios, a step-by-step lens test, a buying checklist, common mistakes, troubleshooting guidance, and practical recommendations without unsupported “best lens” claims.