How to Take Moon Photos With a Smartphone

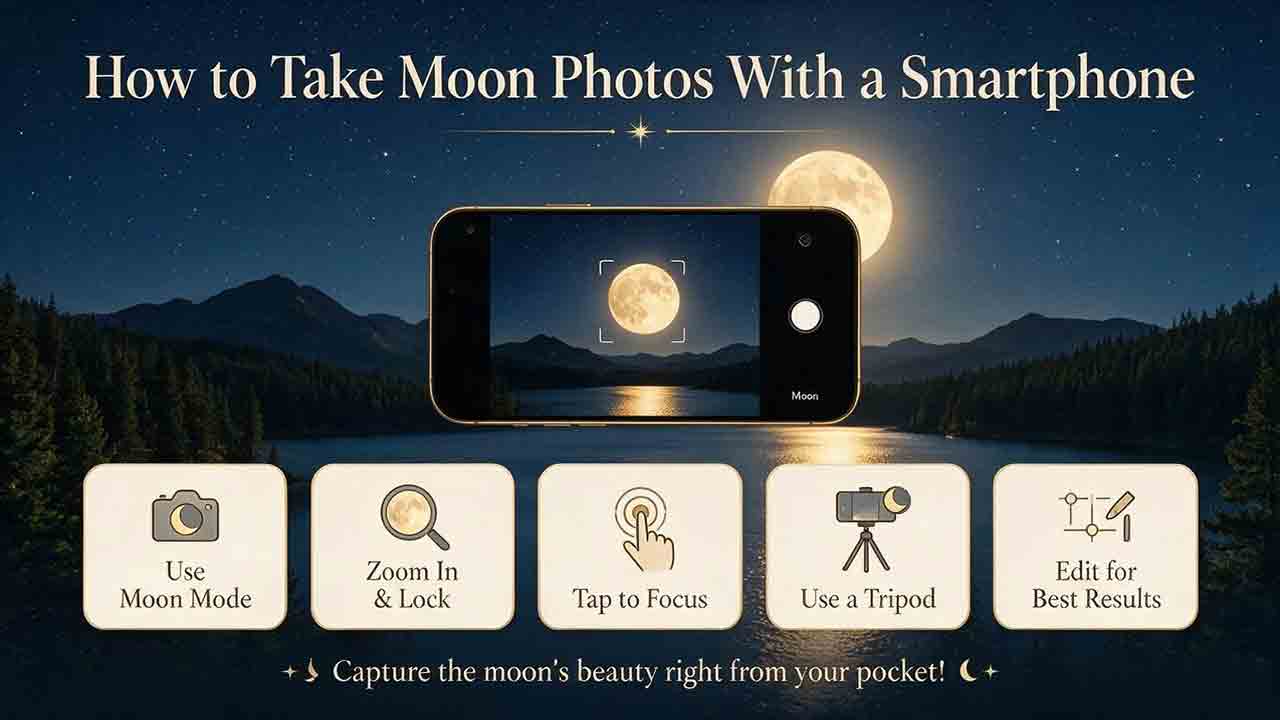
How to Take Moon Photos With a Smartphone
To photograph the Moon with a smartphone, stabilize the phone, turn off the flash, select a real telephoto lens when available, tap the Moon to focus, and lower exposure until surface detail replaces the white blob. For closer images, align the phone over a telescope eyepiece with a secure adapter, begin at low magnification, and use a timer or remote shutter.
Key Takeaways
- The Moon is sunlit and bright, so ordinary Night mode can overexpose it; reduce exposure and favor a faster shutter when manual controls are available.
- Optical telephoto zoom preserves more real detail than digital zoom, which may only crop or enlarge the image.
- A tripod improves wide or telephoto shots, while a telescope and smartphone adapter provide the largest useful lunar image scale.
- Crescent and quarter phases usually reveal stronger crater shadows near the terminator than a full Moon.
- Take several exposures or a short video instead of depending on one frame, then edit lightly and keep the original file.
This guide covers Moon photography with only a smartphone, with a tripod, and through a telescope. It explains phase selection, exposure, focus, lens choice, afocal alignment, practical settings, image stacking, editing, and troubleshooting for white, blurry, tiny, shaky, or color-fringed Moon photos.
Editorial note: This guide is based on current NASA photography guidance, official smartphone camera documentation, telescope-adapter instructions, and practical selection criteria rather than hands-on testing of a specific phone, app, telescope, or adapter.
What Is the Easiest Way to Photograph the Moon With a Phone?
Start with the phone’s longest genuine optical camera, stabilize the device, tap the Moon, and reduce brightness until gray lunar features appear.
NASA recommends turning off the flash, focusing on the Moon, lowering exposure, using a timer, and experimenting carefully with zoom because some phones provide optical zoom while others only crop digitally.NASA Science
A quick first attempt
- Clean the phone’s external camera cover with an appropriate clean lens cloth.
- Open the standard camera app.
- Turn off the flash.
- Select the longest native optical lens available, such as the phone’s telephoto camera.
- Brace the phone or place it on a tripod.
- Tap the Moon on the screen.
- Drag the exposure control downward until craters or maria become visible.
- Use a short timer or remote shutter.
- Take several frames with slightly different exposure levels.
- Review at normal size before adding more zoom.
Do not judge the result only from the bright phone screen. Zoom into the saved image and check whether the lunar edge and major surface features are actually defined.
Which Moon-Photography Method Should You Use?
| Method | Equipment | Best result | Main limitation |
|---|---|---|---|
| Handheld wide scene | Smartphone only | Moon with landscape, clouds, buildings, or people | Moon remains small |
| Braced or tripod telephoto | Phone with genuine telephoto camera | Larger Moon with better consistency | Phone lens still limits detail |
| Phone plus clip-on lens | Phone and compatible add-on telephoto | More image scale on some phones | Alignment and optical quality vary |
| Smartphone through binocular or spotting scope | Phone adapter and compatible optic | Larger Moon without full telescope setup | Small exit pupil and alignment can be difficult |
| Smartphone through telescope eyepiece | Telescope, eyepiece, adapter, stable mount | Highest practical lunar detail for most beginners | More setup, tracking, focus, and vibration control |
| Telescope video and frame stacking | Same as above plus processing software | Sharper detail from selected frames | More storage and editing effort |
Use the simplest method that matches the intended image. A landscape composition does not need a telescope, while a close crater photograph usually does.
When Is the Best Time to Photograph the Moon?
Choose the phase according to the photograph: quarter and crescent phases emphasize surface relief, while a full Moon favors an evenly illuminated disk and ray systems.
The terminator is the boundary between the Moon’s illuminated and dark sides. NASA notes that low sunlight near the terminator creates long, prominent shadows that make craters and terrain appear more three-dimensional.NASA Science
Crescent Moon
Best for:
- Earthshine
- Thin-arc compositions
- Twilight landscapes
- Strong relief near the terminator
- Moon-and-planet conjunctions
The illuminated section is small, so a phone may struggle to expose both the bright crescent and faint Earthshine in one frame. Capture separate exposures when both matter.
First or third quarter
Best for:
- Crater shadows
- Mountain relief
- Rilles and basin edges
- Telescope close-ups
- Learning exposure and focus
Quarter phases are often easier for detail because the terminator crosses prominent terrain and the disk is not uniformly bright.
Gibbous Moon
Best for:
- Large illuminated surface area
- Terminator details near one edge
- Bright ray systems
- Intermediate landscape brightness
Full Moon
Best for:
- The complete lunar disk
- Eclipse photography
- Color or albedo differences
- Ray systems around bright craters
- Moonrise compositions
A full Moon has fewer long shadows across the central face. It is not necessarily the best phase for showing crater depth.
Twilight or night?
NASA suggests trying twilight or dawn because the brightness difference between the Moon and the surrounding sky is smaller, making the scene easier for a phone to record.NASA Science
Choose:
- Twilight for landscapes and foregrounds
- Dark night for a clean black background
- Moonrise or moonset for atmospheric color and foreground scale
- High altitude for sharper detail through less atmosphere
A Moon near the horizon can appear unusually large because of the Moon illusion and nearby foreground references, but its angular size is not physically enlarged by the horizon.
What Equipment Do You Actually Need?
A stable support and exposure control matter more than buying many accessories.
Minimum equipment
- Smartphone
- Standard camera app
- Stable wall, railing, bag, or other safe support
- Clean external phone-camera cover
- Clear view of the Moon
Useful additions
- Phone tripod clamp
- Small tripod
- Remote shutter or headset control supported by the phone
- Camera app with focus, exposure, ISO, shutter, and white-balance control
- Telescope or spotting scope
- Smartphone-to-eyepiece adapter
- Known-good eyepiece
- Dew control for the telescope
- Image-editing or frame-stacking software
Do you need a smartphone telescope adapter?
A smartphone adapter is strongly recommended for imaging through an eyepiece. Celestron’s adapter instructions describe securing the phone, aligning the active phone camera over the eyepiece, and clamping the adapter to a compatible eyepiece.Celestron
Handholding a phone over an eyepiece can produce a quick record, but it makes these problems more likely:
- Cropped circular image
- Repeated loss of alignment
- Shutter vibration
- Tilted focus plane
- Accidental eyepiece contact
- Dropped phone
- Inconsistent framing
Verify the adapter’s phone width, camera position, case thickness, eyepiece diameter, and total weight before purchase.
Which Smartphone Camera Lens Is Best for the Moon?
Use the longest real optical lens that remains sharp and stable; avoid assuming that the highest displayed zoom number represents genuine optical magnification.
Modern phones may include:
- Ultra-wide camera
- Main wide camera
- Short telephoto camera
- Long periscope telephoto camera
- Digital crop stages
- Hybrid computational zoom
Optical zoom vs digital zoom
Optical zoom uses a lens or camera module with a longer real focal length.
Digital zoom crops and enlarges sensor data. It may add sharpening or computational reconstruction, but it cannot guarantee the same real detail as a longer optical lens.
NASA notes that some smartphone zoom is optical while other zoom is only a crop that could be performed later.NASA Science
Practical lens-selection test
- Place the phone on a tripod.
- Photograph the Moon at each native lens step.
- Avoid intermediate zoom values initially.
- Use the same exposure approach.
- Compare saved files at the same display size.
- Check crater edges, halos, sharpening, and noise.
- Choose the lens that preserves the most believable detail.
A high-number hybrid zoom can be useful for framing, but compare it with a lower optical step and a later crop.
Why does the phone switch cameras unexpectedly?
Phones may switch camera modules because of:
- Low light
- Focus distance
- Stabilization
- Software processing
- Lens obstruction
- Selected mode
- Temperature
- Device-specific camera logic
A manual or professional camera app may provide more control, but feature availability varies by model and operating-system version.
What Camera Settings Work for Moon Photos?
Expose the Moon as a bright daylight subject in a dark scene, not as a faint night-sky object.
NASA advises using daylight-oriented settings, a fast shutter, and reduced exposure when the goal is to preserve lunar detail.NASA ScienceNASA Science
Universal settings strategy
| Setting | Starting recommendation | Why |
|---|---|---|
| Flash | Off | It cannot illuminate the Moon and may create reflections |
| Focus | Tap the Moon or set focus toward infinity | Prevents the phone from focusing on foreground or sky |
| Exposure | Reduce until surface features are visible | Avoids a featureless white disk |
| ISO | Lowest practical value in manual mode | Reduces noise and preserves highlight detail |
| Shutter speed | Start fast, then lengthen only if needed | Limits blur and overexposure |
| White balance | Daylight or neutral starting point | Moonlight is reflected sunlight |
| Timer | Short timer or remote release | Reduces touch vibration |
| HDR | Test on and off | Multi-frame processing may help or create halos and ghosting |
| Night mode | Usually test off first for the Moon itself | Long computational exposure can overexpose the bright disk |
| RAW | Use when supported and editing is planned | Preserves more adjustment flexibility |
| Aspect ratio | Use the full native sensor ratio when possible | Keeps maximum captured area for later cropping |
These are starting principles, not universal settings. Phone camera modules, software processing, lunar phase, haze, telescope aperture, and magnification all change the correct exposure.
Automatic-camera workflow
- Use Photo mode rather than Portrait mode.
- Turn off flash.
- Select the optical telephoto lens.
- Tap and hold the Moon if the phone offers focus and exposure lock.
- Lower the exposure control.
- Use a timer.
- Capture an exposure sequence from slightly dark to slightly bright.
- Compare the files after capture.
Apple documents tapping to position focus, dragging the exposure control, locking focus and exposure, and using a camera timer.Apple Support
Manual or Pro-mode workflow
When supported:
- Select the intended camera module.
- Set focus to distant or manual infinity, then refine if needed.
- Use a low ISO.
- Set a fast shutter.
- Use a daylight or neutral white balance.
- Adjust shutter or ISO until highlights are retained.
- Keep the histogram away from severe right-edge clipping if a histogram is available.
- Take several exposures.
Samsung’s Pro mode documentation describes manual control of ISO, shutter speed, exposure, white balance, and focus, while noting that available controls vary by device.Samsung Support
Why Night mode may fail
Night modes are designed to gather and combine more light from dark scenes. The Moon is bright, so the phone may:
- Blow out surface detail
- Create a glowing halo
- Over-sharpen the edge
- Misalign combined frames
- Change the Moon’s color
- Add artificial-looking texture
Night mode can still help a twilight landscape or foreground scene. Compare it with a standard exposed-down image rather than assuming one mode is always superior.
Google’s Pixel documentation emphasizes that Night Sight and astrophotography modes depend on keeping the phone steady for multi-frame capture.Google Pixel Camera Help For the bright lunar disk, stabilization remains valuable even when a long night exposure is unnecessary.
How Do You Photograph the Moon Without a Telescope?
Use a tripod or firm support, a genuine telephoto camera, reduced exposure, and composition that accepts the Moon’s limited size.
Step 1: Choose the goal
Decide whether the photograph is about:
- Lunar surface detail
- Moonrise over a landscape
- Crescent Moon and twilight
- Clouds crossing the Moon
- A conjunction
- An eclipse
- A silhouette
- A sequence of lunar phases
A phone-only image usually works best when the Moon is part of a composition rather than expected to fill the frame with crater detail.
Step 2: Plan the position
Use a reliable sky map or lunar ephemeris to check:
- Rise and set direction
- Moon phase
- Highest altitude
- Foreground alignment
- Weather
- Cloud cover
- Local access and safety
NASA’s Moon Phase and Libration resources provide current visualizations of phase, libration, and illuminated terrain.NASA Scientific Visualization Studio
Step 3: Stabilize the phone
Use:
- Tripod
- Clamp
- Wall
- Stable bag
- Railing only when the phone cannot fall
- Ground-level support protected from dirt and moisture
Do not balance an unsecured phone on a narrow ledge.
Step 4: Frame before maximizing zoom
First create a balanced composition. Then compare the longest native optical lens with a moderate hybrid zoom.
For a landscape, leave space around the Moon. For a lunar disk, center it and crop later.
Step 5: Lock focus and reduce exposure
Tap the Moon, lower the brightness, and wait for focus to settle. If the phone repeatedly hunts, use manual distant focus or lock focus and exposure.
Step 6: Take a bracket
Capture:
- Dark exposure preserving the lunar disk
- Middle exposure
- Brighter exposure for foreground or clouds
This is an exposure bracket: several images of the same scene at different brightness levels.
Do not claim a combined result is a single unedited exposure when multiple exposures were blended.
How Do You Photograph the Moon Through a Telescope?
Use afocal imaging: the telescope forms a visual image through an eyepiece, and the smartphone camera photographs that eyepiece image.
Afocal imaging means placing a camera with its own lens behind a telescope eyepiece rather than replacing the eyepiece with a bare camera sensor.
Step 1: Set up the telescope visually
Before attaching the phone:
- Stabilize the telescope.
- Allow the optics to approach outdoor temperature.
- Check collimation if using a reflector.
- Insert a low-power eyepiece.
- Center and focus the Moon visually.
- Lock or balance the mount as intended.
Do not attach a heavy phone to an unstable telescope.
Step 2: Start at low magnification
Telescope magnification is:
Telescope focal length ÷ eyepiece focal length
For a 1,200 mm telescope:
- 25 mm eyepiece: 1,200 ÷ 25 = 48×
- 10 mm eyepiece: 1,200 ÷ 10 = 120×
Start near the lower magnification. It provides:
- Wider field
- Easier alignment
- Brighter image
- Less visible vibration
- Slower drift across the frame
- More forgiving focus
Move to higher magnification only after obtaining a sharp, stable image.
Step 3: Prepare the phone adapter
- Remove a bulky phone case when required.
- Identify the active camera lens.
- Center that physical lens over the adapter opening.
- Tighten the phone clamp evenly.
- Confirm no clamp presses a side button.
- Attach the adapter to the eyepiece.
- Tighten only enough to prevent movement.
- Support the phone while checking balance.
Do not allow the adapter or phone lens to touch the eyepiece glass.
Step 4: Find the exit pupil
The exit pupil is the small beam of light leaving the eyepiece.
With the camera app open:
- Move the phone laterally until a bright circular field appears.
- Adjust vertical and horizontal position to center the circle.
- Adjust phone-to-eyepiece distance to enlarge the usable field.
- Confirm the Moon is centered.
- Tighten the adapter gradually.
- Recheck alignment after tightening.
A black crescent or partial circle usually means the phone camera is not centered over the exit pupil.
Step 5: Select the correct phone lens
Multi-camera phones can make alignment confusing. The camera app may switch modules after the adapter has been centered.
Use:
- A camera mode that lets you select the intended lens
- The main camera when telephoto alignment or low-light switching is unreliable
- A verified optical lens step rather than arbitrary digital zoom
Do not cover other camera modules unless the phone manufacturer or app specifically permits it; some devices use multiple sensors for focusing or processing.
Step 6: Refocus
Focus the telescope first, then refine the phone’s focus.
If possible:
- Lock phone focus
- Use manual distant focus
- Recheck telescope focus on crater edges
- Keep the Moon near the field center
Phone autofocus may lock onto dust, reflections, or the eyepiece field stop instead of the lunar surface.
Step 7: Reduce exposure
The eyepiece view may appear bright enough to trigger overexposure.
Lower exposure until:
- Bright highlands show texture
- Dark maria remain visible
- Crater rims are not clipped
- The edge of the Moon is clean
- No broad white patch remains
Step 8: Trigger without touching
Use:
- Camera timer
- Bluetooth remote
- Supported wired shutter
- Voice command when it does not disturb others
- Stable touchscreen tap followed by a delay
Celestron sells adapter kits with remote shutter controls specifically to reduce unwanted vibration during capture.Celestron
Step 9: Capture stills and video
Take:
- Several single frames
- A short video with locked exposure and focus
- A darker and brighter sequence
- Separate sections of the Moon at higher magnification, if desired
Video can preserve many brief moments of better atmospheric steadiness. Selected frames may later be aligned and stacked.
Should You Take Photos or Record Video?
Use still photos for simplicity and video when you plan to select or stack the sharpest frames.
Still-photo advantages
- Higher single-frame resolution on many phones
- Easier editing
- Smaller total file volume
- RAW may be available
- Better for landscapes and exposure brackets
Still-photo limitations
- One frame may coincide with poor seeing or vibration
- Computational processing can vary between frames
- High-resolution modes may use a different lens or slower capture
Video advantages
- Captures many atmospheric moments
- Easier to select sharp frames
- Useful for manual Dobsonian tracking
- Supports frame stacking
- Reduces dependence on one shutter press
Video limitations
- Compression may remove fine detail
- Exposure and focus may change unless locked
- Resolution may be lower than still mode
- Electronic stabilization may crop or distort
- Long clips use storage and can warm the phone
Start with a short clip and inspect the actual file before recording a long sequence.
What Is Lucky Imaging and Frame Stacking?
Lucky imaging selects the clearest frames from a video, while stacking aligns and combines selected frames to reduce noise and strengthen consistent detail.
Atmospheric turbulence changes rapidly. Some frames may be sharper than others even when the telescope is not moved.
A basic workflow is:
- Record a stable lunar video.
- Transfer the original file without additional messaging compression.
- Extract or load the frames into suitable software.
- Reject blurred frames.
- Align the Moon or selected lunar region.
- Stack a reasonable set of sharp frames.
- Apply restrained sharpening.
- compare the result with a single frame.
- Keep the original video and processing notes.
Stacking cannot recover detail that the telescope, focus, exposure, or video compression never recorded.
Whole Moon or crater close-up?
Whole-disk stacking is easier because the target has a clear boundary and moderate image scale.
High-magnification crater stacking requires:
- Better tracking
- More precise focus
- Accurate collimation
- Stable seeing
- Careful alignment
- Less aggressive sharpening
What Is the Best Starting Setup for Each Goal?
| Goal | Recommended setup | Camera approach | Main priority |
|---|---|---|---|
| Moon over landscape | Main or short telephoto lens on tripod | Bracket Moon and foreground | Composition and dynamic range |
| Crescent with Earthshine | Tripod, moderate optical zoom | Separate bright crescent and Earthshine exposures | Highlight control |
| Full lunar disk | Longest sharp optical phone lens | Low exposure, timer, several frames | Preserve disk texture |
| Lunar disk through telescope | Low-power eyepiece and adapter | Lock focus and exposure | Alignment and vibration |
| Crater close-up | Moderate eyepiece magnification and stable mount | Short video for frame selection | Focus, seeing, and tracking |
| Eclipse sequence | Tripod, fixed framing, planned intervals | Recheck exposure as brightness changes | Consistency and battery |
| Handheld record shot | Brace phone and use optical lens | Exposure down, burst several frames | Stability |
These recommendations are starting points. The correct setup depends on phone lens behavior, telescope focal length, eyepiece design, Moon phase, and atmospheric conditions.
How Do You Edit Moon Photos Without Making Them Look Artificial?
Correct exposure, crop, color, and local contrast conservatively; avoid sharpening until crater edges glow or false texture appears.
Basic editing order
- Select the sharpest frame.
- Correct rotation and crop.
- Reduce highlights if they are recoverable.
- Set black and white points carefully.
- Adjust neutral color balance.
- Add modest contrast.
- Apply restrained clarity or texture.
- Reduce noise only when needed.
- Sharpen at the final output size.
- Export a copy and keep the original.
Common overediting signs
- Bright halo around the Moon
- Dark ring outside the lunar edge
- Crater rims with white outlines
- Plastic-looking maria
- Excessive orange or blue cast
- Blocky compression
- Repeated artificial texture
- Completely black shadows with lost detail
- Overly smooth surface
Computational phone modes may already apply sharpening, denoising, HDR, and local contrast. Add less editing when the file is already heavily processed.
Should you use AI enhancement?
AI tools can reduce noise, increase resolution, or invent plausible texture. They are acceptable for creative work when disclosed, but they should not be presented as documentary lunar detail if the processing synthesizes features.
For an observational record:
- Keep the original
- Record the device and method
- Distinguish stacking from generative enhancement
- Avoid adding or removing lunar features
- State when multiple exposures were blended
Why Is the Moon a White Blob?
The Moon is overexposed. Reduce exposure, use a faster shutter in manual mode, lower ISO, and turn off Night mode or HDR when they brighten the disk excessively.
Troubleshooting order:
- Tap the Moon.
- Lower the exposure slider.
- Lock exposure.
- Turn off flash.
- Test standard Photo mode.
- Reduce ISO in manual mode.
- Increase shutter speed.
- Check whether haze is creating glare.
- Remove a dirty phone case or lens protector from the optical path when safe.
- Recheck through a clean eyepiece.
A full Moon needs a darker exposure than many users expect.
Why Is the Moon Tiny?
The phone’s lens has a short focal length or digital zoom is not adding real detail.
Options:
- Use a real telephoto camera
- Compose the Moon with a foreground
- Crop the highest-resolution sharp file
- Use a spotting scope
- Use a telescope and smartphone adapter
- Photograph at higher telescope magnification after mastering low power
Do not expect a wide phone camera to produce a frame-filling Moon without substantial cropping.
Why Is the Moon Blurry?
Possible causes include:
- Camera shake
- Telescope vibration
- Poor focus
- Autofocus hunting
- Atmospheric seeing
- Moon low above the horizon
- Haze or thin cloud
- Dew
- Dirty phone-camera cover
- Misaligned phone adapter
- Excessive digital zoom
- Too much telescope magnification
- Unstable mount
- Reflector miscollimation
- Telescope not thermally stable
Sky-Watcher manuals note that a watery or rapidly moving planetary or lunar image can result from turbulent atmospheric seeing.Sky-Watcher
Reduce magnification, wait for steadier moments, refocus, and use a timer before blaming the phone.
Why Is There a Black Circle or Crescent Around the Image?
The phone camera is not centered over the eyepiece exit pupil, or the phone-to-eyepiece distance is wrong.
Fix it by:
- Loosening the adapter slightly.
- Selecting the intended phone camera.
- Moving the phone left, right, up, or down.
- Adjusting distance from the eyepiece.
- Starting with a lower-power eyepiece.
- Re-centering the Moon.
- Tightening gradually.
This effect is called vignetting when part of the image field is blocked or darkened.
Why Does the Image Move Out of Frame?
The Moon is drifting because the mount is not tracking, the telescope is unbalanced, or the phone’s weight changed the system.
For a manual Dobsonian:
- Start with low magnification
- Place the Moon near the leading edge of the field
- Let it drift through
- Record video
- Recenter between clips
- Adjust bearing tension
- Rebalance if the design permits
For a tracking mount:
- Confirm lunar or sidereal tracking mode
- Check alignment
- Secure clutches
- Route cables without drag
- Verify the phone adapter is not striking the mount
Why Are the Moon’s Edges Red and Blue?
Possible causes include:
- Atmospheric dispersion when the Moon is low
- Chromatic aberration in an achromatic telescope
- Eyepiece lateral color
- Phone-lens aberration
- Misaligned computational frames
- Excessive saturation
- Edge sharpening
Photograph the Moon when it is higher, keep it near the center of the eyepiece, reduce processing, and compare another eyepiece.
Why Does the Phone Keep Changing Exposure or Camera Lens?
Automatic camera processing is responding to the bright disk, dark sky, vibration, or the adapter blocking part of the camera system.
Try:
- Exposure lock
- Focus lock
- Pro or manual mode
- A fixed native lens selection
- Standard Photo mode rather than Night mode
- Removing an incompatible case
- Re-centering the active camera
- Avoiding intermediate hybrid zoom values
- Disabling automatic lens switching when the phone provides that option
Menus and controls vary by device and software version. Use the current official phone manual.
A Real-World Example: Three Ways to Photograph a First-Quarter Moon
Method 1: Smartphone only
The photographer wants a Moon above a city skyline.
Process:
- Arrive during twilight.
- Use a tripod.
- Select the optical telephoto camera.
- Compose the skyline.
- Lock focus near the Moon.
- Reduce exposure enough to preserve the lunar disk.
- Capture a darker lunar exposure and a brighter city exposure.
- Keep both originals and disclose any blend.
Best outcome: a balanced environmental image rather than maximum crater detail.
Method 2: Smartphone through an 80 mm refractor
The photographer wants the complete lunar disk.
Process:
- Set up and focus visually.
- Use a low-power eyepiece.
- Attach the phone adapter.
- Align the main camera over the exit pupil.
- Lock focus and exposure.
- Use a timer.
- Capture several still images.
- Select the sharpest file and edit lightly.
Best outcome: a detailed whole-Moon image with manageable setup.
Method 3: Smartphone through an 8-inch Dobsonian
The photographer wants crater detail near the terminator.
Process:
- Collimate and cool the telescope.
- Begin at low power.
- Align the phone adapter.
- Move to moderate magnification.
- Center a crater region.
- Lock focus and exposure.
- Record short video clips while the target drifts.
- Select or stack the sharpest frames.
Best outcome: higher-resolution regional detail, with more work required for tracking and processing.
These scenarios are practical workflows, not reports from hands-on product testing.
What Mistakes Should You Avoid?
| Mistake | Why it hurts the result | Better approach |
|---|---|---|
| Leaving flash on | Flash cannot illuminate the Moon | Turn it off |
| Using maximum digital zoom immediately | Enlarges noise and processing artifacts | Test native optical lenses first |
| Letting the Moon stay white | Highlights contain no recoverable texture | Lower exposure |
| Using long Night mode for the bright disk | Can overexpose or misalign frames | Test standard Photo or manual mode |
| Handholding over an eyepiece | Alignment and vibration change constantly | Use a secure adapter |
| Starting at extreme telescope power | Narrows the field and magnifies shake | Start with low magnification |
| Touching the phone during capture | Creates blur | Use timer or remote |
| Ignoring telescope balance | Phone weight can move the tube | Rebalance and secure the mount |
| Focusing only with the phone | Telescope may remain out of focus | Focus telescope first |
| Photographing low over hot roofs | Turbulence softens detail | Choose higher altitude and cleaner sightline |
| Applying heavy sharpening | Creates halos and false texture | Edit at final size conservatively |
| Deleting original files | Prevents later reprocessing and verification | Preserve originals |
| Pointing a telescope near the Sun for a daytime Moon | Can cause permanent eye injury | Avoid unsafe daytime sweeping |
Moon Photography Checklist
Before leaving
- Moon phase and position checked
- Weather and cloud cover checked
- Safe observing location confirmed
- Phone charged
- Storage available
- Camera lens cover clean
- Tripod and phone clamp packed
- Remote shutter or timer available
- Telescope and eyepieces ready
- Adapter compatibility checked
- Dew control packed when needed
Phone-only setup
- Flash off
- Optical telephoto lens selected
- Phone stabilized
- Moon tapped for focus
- Exposure reduced
- Timer enabled
- Several exposures captured
- Digital zoom compared with later crop
- Foreground exposure captured separately when needed
Telescope setup
- Telescope stable
- Optics thermally ready
- Reflector collimation checked
- Low-power eyepiece used first
- Moon centered and visually focused
- Phone securely clamped
- Active phone camera aligned
- Adapter does not touch optical glass
- Mount rebalanced
- Focus and exposure locked
- Still frames or video captured
After capture
- Original files preserved
- Files transferred without messaging compression
- Sharpest frame selected
- Highlights checked
- Color kept believable
- Sharpening halos avoided
- Composite or AI processing disclosed
- Telescope and phone dried before storage
How We Developed These Recommendations
This guide uses six practical priorities:
- Image scale: decide whether the Moon should be part of a landscape or fill more of the frame.
- Real optics: prefer genuine telephoto lenses or telescope magnification over unnecessary digital enlargement.
- Highlight control: expose for the bright lunar surface rather than the dark sky.
- Mechanical stability: reduce phone, adapter, telescope, and shutter vibration.
- Repeatable capture: use brackets, multiple stills, or short video rather than relying on one frame.
- Transparent editing: preserve originals and distinguish ordinary editing, exposure blending, frame stacking, and generative enhancement.
No smartphone, camera app, telescope, eyepiece, adapter, remote shutter, or processing program was hands-on tested for this article.
What Should You Try Next?
For a first attempt, place the phone on a tripod, select the longest sharp optical lens, turn off flash, tap the Moon, reduce exposure, and take several timed frames.
For a detailed full disk, attach the phone securely to a low-power telescope eyepiece and master alignment before increasing magnification.
For crater close-ups, record short, exposure-locked video clips through a well-focused, thermally stable, and accurately collimated telescope, then select or stack the sharpest frames.
The most important improvement is usually not more digital zoom. It is better stability, lower exposure, accurate focus, and enough image scale from a real telephoto lens or telescope.
Frequently Asked Questions
Can you take a good Moon photo with only a smartphone?
Yes. A tripod, genuine telephoto camera, reduced exposure, accurate focus, and good timing can produce a clear lunar disk or attractive landscape composition. A telescope is needed when the goal is substantially more crater detail or a larger lunar image.
Should Night mode be on for Moon photography?
Usually test standard Photo or manual mode first because the bright Moon can be overexposed by long computational night capture. Night mode may still help the surrounding twilight or landscape, so compare both and inspect for halos or lost lunar detail.
What smartphone zoom should you use for the Moon?
Start with the phone’s longest native optical lens step. Compare higher hybrid or digital zoom with a crop from the optical-lens image. The largest displayed zoom number does not necessarily contain the most genuine detail.
What eyepiece should you use for smartphone Moon photos?
Begin with a longer-focal-length, low-power eyepiece because it provides a wider field, brighter image, easier adapter alignment, and less vibration. Move to moderate magnification after the full disk is centered, focused, and exposed correctly.
Why can I see Moon details with my eyes but not in the photo?
The phone may expose for the dark sky, causing the Moon to clip to white. Tap the Moon, reduce exposure, stabilize the phone, use a real telephoto lens, and avoid excessive digital zoom.
Can smartphone Moon photos be scientifically accurate?
They can document phase, position, eclipses, and large lunar features, but automatic processing, sharpening, multi-frame compositing, lens switching, and AI enhancement can alter appearance. Preserve originals and document the capture and processing method when accuracy matters.
Sources
Sources were checked August 19, 2026.
- NASA Science — Lunar Photography Guide
- NASA Science — Terminator Moon: A Moonscape of Shadows
- Celestron — Basic Smartphone Adapter Instructions and Specifications
- NASA Science — How to Photograph the Moon
- Apple Support — Use iPhone Camera Tools to Set Up Your Shot
- Samsung Support — How to Use Pro Mode on a Galaxy Phone Camera
- Google Pixel Camera Help — Take Photos in Low Light or at Night
- NASA Scientific Visualization Studio — Moon Phase and Libration, 2026
- Celestron — NexYZ DX Smartphone Adapter Kit
- Sky-Watcher — AZ-GTi Mount Manual
- Tele Vue — FoneMate Smartphone Adapter Instructions
- Celestron — Smartphone Astrophotography Overview
More from Smartphone Astrophotography
Can a Smartphone Photograph the Milky Way?
Yes, a supported smartphone can photograph the Milky Way when the galactic band is above the horizon, the sky is dark and clear, and the phone remains stable during a long or multi-frame capture. This guide explains how to determine whether the Milky Way will be visible, how moonlight and light pollution affect contrast, and how iPhone Night mode, Google Pixel Astrophotography, Samsung Expert RAW, and other Android camera systems differ. Readers receive separate device workflows, a Milky Way readiness scorecard, an exposure-testing table, focus and composition instructions, RAW and processed-file guidance, point-star stacking and storage calculations, a decision tree, real-world scenarios, a complete field checklist, common mistakes, and troubleshooting steps. The article avoids universal camera settings and does not claim that every phone was tested.
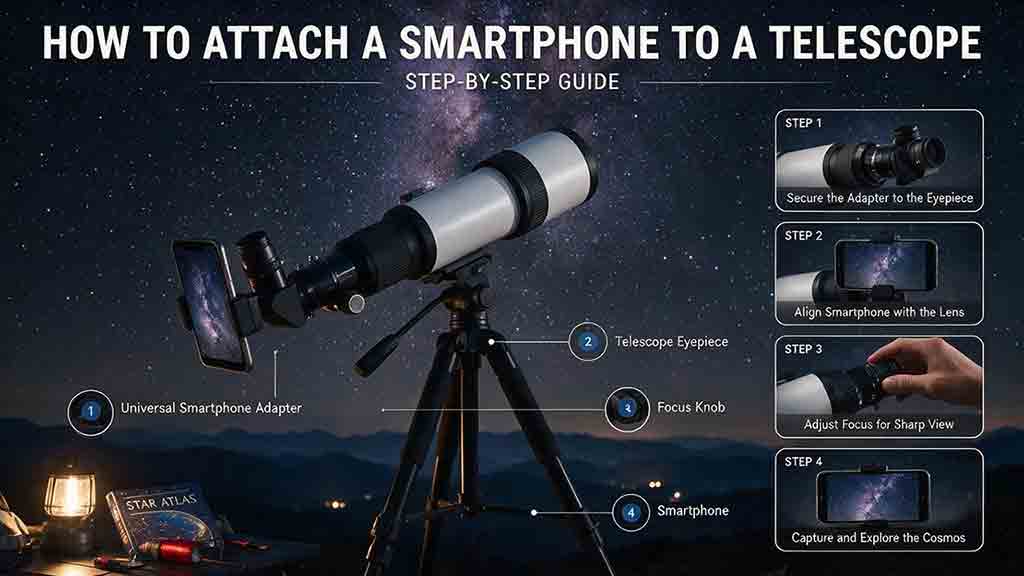
How to Attach a Smartphone to a Telescope
Attaching a smartphone to a telescope requires more than centering a camera over an eyepiece. The phone, adapter, eyepiece, focuser, diagonal, mount, and tripod form one mechanical load chain that must remain secure and balanced. This guide explains afocal imaging, exit pupil, eye relief, vignetting, adapter types, phone and eyepiece compatibility, active-camera selection, low-power eyepiece choice, three-axis alignment, telescope rebalancing, focus, exposure, and safe removal. It provides step-by-step instructions for refractors, Dobsonians, and diagonal-equipped telescopes, plus real-world Moon and Jupiter workflows, an adapter decision framework, troubleshooting for black circles, blur, lens switching, slipping, and focus failure, and a complete attachment checklist. The central recommendation is to align at low power, support the phone during every clamp adjustment, and verify the entire load path before capture.
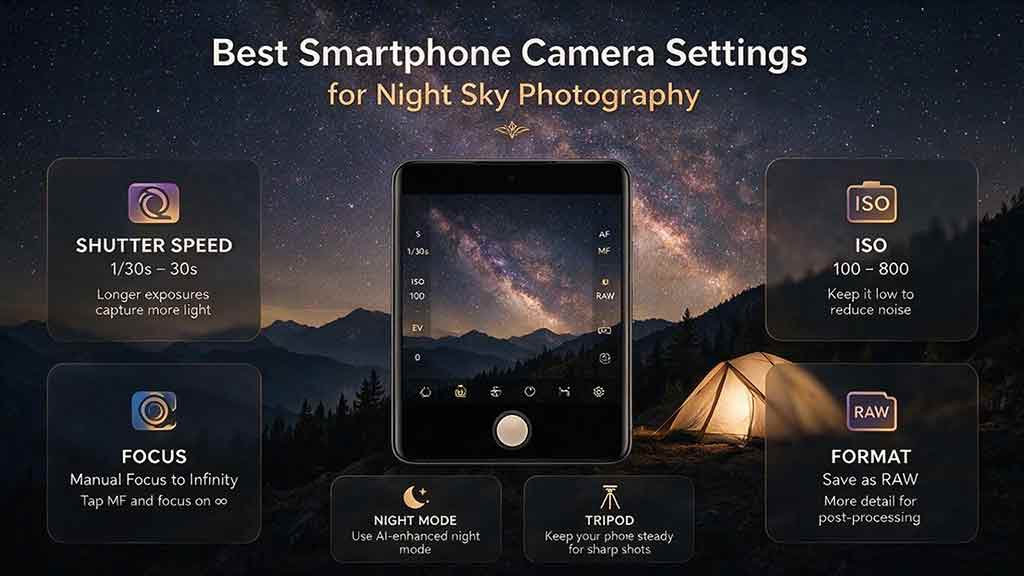
Best Smartphone Camera Settings for Night Sky Photography
The best smartphone night-sky settings are not one fixed preset. They depend on the phone’s camera module, computational processing, sky brightness, Moon phase, and target motion. This guide recommends beginning with the main wide camera, rigid tripod support, locked distant focus, an 8–15 second exposure, ISO 800–1600, and fixed white balance around 3,500–4,500 K, then refining those values with structured exposure and ISO ladders. It provides separate starting ranges for the Milky Way, constellations, urban stars, meteor showers, aurora, moonlit landscapes, and star trails. Readers also learn when to use automatic astrophotography mode, Pro mode, RAW, and stacking; how to diagnose blurry stars, washed-out skies, focus failure, and exposure limits; and how to edit and disclose composites responsibly.
Explore More Topics
Dedicated Astronomy Camera vs Regular Camera: What Is the Difference?
A dedicated astronomy camera is designed for telescope imaging through astronomy software and may provide regulated cooling, high-frame-rate readout, monochrome capture, filter-wheel integration, and FITS metadata. A regular DSLR or mirrorless camera is a self-contained general-purpose camera with a screen, battery, memory card, native lenses, autofocus, and daytime usefulness. This guide explains why neither category is universally better. It compares cooled deep-sky cameras, uncooled planetary cameras, guide cameras, monochrome and one-shot-color sensors, regular cameras, and specialized astrophotography DSLRs. Readers learn how cooling, dark current, H-alpha response, UV/IR filtering, sensor size, pixel scale, back focus, software, power, calibration, frame rate, and total system cost affect the decision. The article also includes calculation examples, use-case recommendations, a five-question selection process, a buying checklist, common mistakes, troubleshooting, and practical next steps.
How to Choose a Camera for Astrophotography
Choosing an astrophotography camera starts with the target, optical system, and workflow rather than megapixels or sensor size alone. This guide compares mirrorless and DSLR bodies, cooled one-shot-color cameras, cooled monochrome cameras, planetary cameras, and astronomy-modified models. Readers learn how sensor dimensions affect field of view, how pixel size and focal length determine image scale, and how cooling, quantum efficiency, read noise, full-well capacity, dynamic range, and frame rate should be interpreted. It also provides a color-versus-monochrome comparison, telescope compatibility and back-focus checks, software and driver requirements, a total-system-cost framework, five practical scenarios, troubleshooting, and a complete purchase checklist. The central recommendation is to choose the camera that fits the target, corrected image circle, mount, software, power system, processing workflow, and complete budget.
Best Focal Lengths for Milky Way Photography
For most untracked Milky Way landscapes, a 14–24mm full-frame-equivalent view offers the best balance of sky coverage, galactic scale, foreground context, and shutter-time tolerance. Wider 12–16mm views suit dramatic foregrounds and a large Milky Way arch, while 28–35mm makes the galactic center more prominent. Focal lengths of 40–50mm or longer are better for panoramas, stacking, or tracked high-detail images. This guide converts the recommendations for full-frame, 1.5× APS-C, 1.6× Canon APS-C, and Micro Four Thirds cameras. It explains shutter-time tradeoffs, crop-factor calculations, aperture and corner-performance limits, prime-versus-zoom choices, panorama planning, and tracker use. Readers also receive a three-question lens-selection method, real-world scenarios, a step-by-step lens test, a buying checklist, common mistakes, troubleshooting guidance, and practical recommendations without unsupported “best lens” claims.