Tripod Buying Guide for Night Sky Photography

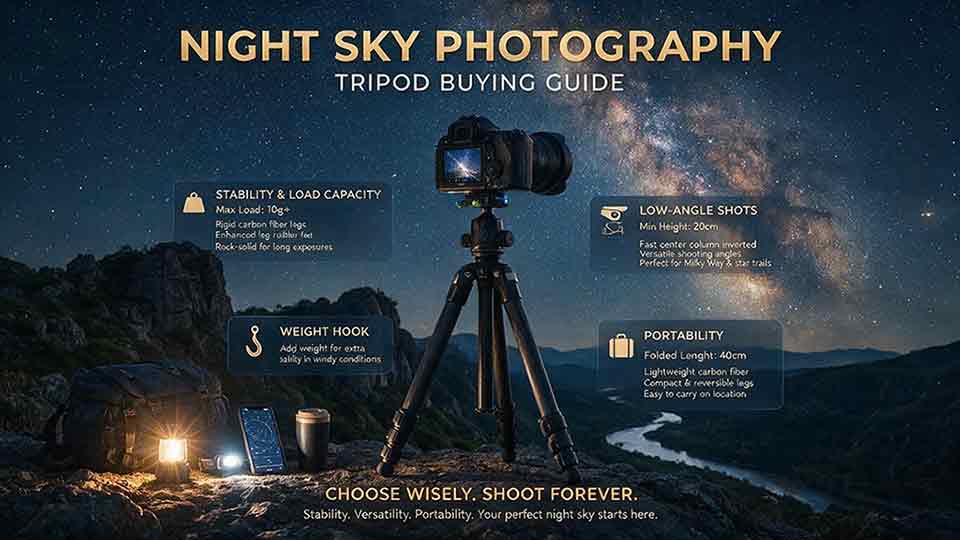
Tripod Buying Guide for Night Sky Photography
Choose a tripod for night sky photography by stability, complete system load, working height, head security, ground contact, and realistic carry weight—not by payload alone. A compact travel tripod can suit a lightweight wide-angle camera, while a tracker, telephoto lens, or windy site needs a stiffer platform. The best tripod is the lightest model that remains dependable for the actual setup and conditions.
Key Takeaways
- A tripod’s load rating describes support or safety capacity; it does not guarantee vibration-free long exposures.
- Add the camera, lens, head, tracker, wedge, counterweights, heaters, and attached accessories when calculating the load carried by the legs.
- A raised center column, thin lower leg sections, loose clamps, wind, and unstable ground can reduce practical stability.
- Carbon fiber often saves weight, while aluminum often saves money; tube diameter, joints, locks, head, and overall design matter more than material alone.
- A tripod that is too heavy to carry or too slow to deploy may deliver less real value than a slightly smaller tripod used consistently.
This guide explains how to compare tripod specifications, choose a head, calculate complete load, evaluate center columns and leg sections, prepare for wind and uneven ground, support a star tracker, and test a tripod before the return period ends.
Editorial note: This guide is based on official photography guidance, manufacturer safety documentation, tripod manuals, and practical selection criteria rather than hands-on testing of a specific tripod, head, camera, lens, or tracker.
What Does a Night Sky Tripod Need to Do?
A night sky tripod must keep the camera’s framing stable for the complete exposure sequence while remaining safe and practical at the location.
Nikon recommends a steady or sturdy tripod for long night-sky and Milky Way exposures, while Canon identifies a camera, wide-angle lens, and tripod as a sufficient starting kit for basic night-sky photography.Nikon USACanon Europe The U.S. National Park Service also recommends positioning the camera and tripod securely and using a timer or remote release to reduce contact during capture.U.S. National Park Service
A tripod must resist movement from:
- Wind
- Shutter or button contact
- Ground vibration
- A slipping head
- Loose leg locks
- A raised center column
- Cable pull
- Tracker rotation
- An off-center telephoto lens
- People touching or walking near the legs
- Soft soil, sand, snow, or wet rock
The tripod does not need to be the largest model available. It needs to be stable enough for the actual camera system and portable enough to reach the intended site.
Which Tripod Type Fits Your Night Sky Setup?
| Imaging setup | Practical tripod direction | Main priority |
|---|---|---|
| Smartphone or compact camera | Compact tripod with secure clamp and wide stance | Reliable device retention |
| Lightweight mirrorless camera and wide lens | Quality travel tripod | Carryability and low-profile stability |
| DSLR or mirrorless camera with heavy wide zoom | Mid-size tripod with strong head | Torsional stiffness and head security |
| Camera with 70–200 mm or similar telephoto | Larger leg diameter and lens-collar support | Wind resistance and reduced flex |
| Camera star tracker | Flat, rigid platform or minimally extended center column | Complete-load support and wedge stability |
| High-capacity tracker with counterweight | Substantial tripod or manufacturer-specified support | Total load, torque, and top-platform security |
| Small telescope on a portable mount | Dedicated astronomy tripod or suitable heavy photo tripod | Torsional stiffness and accessory load |
| Windy coast or exposed mountain | Stiffer, lower setup with appropriate feet | Wind and ground resistance |
| Backpacking nightscape kit | Lightweight tripod that still reaches the required composition | Realistic packed weight |
| Star-trail or time-lapse sequence | Stable locks, power access, and secure framing | Multi-hour reliability |
These are workflow categories rather than product rankings. The exact camera, lens, tracker, wind, terrain, and output standard determine the required support.
Which Tripod Specifications Matter Most?
Safety payload
Safety payload describes the load a support is designed to hold without its structure or locks failing under the stated test method.
Manfrotto explains that its UNI/PdR 105:2021 Safety Payload is based on defined laboratory criteria and is different from a theoretical maximum payload.Manfrotto Other manufacturers may use different terms and test methods.
A payload number does not directly describe:
- Vibration damping
- Wind resistance
- Torsional stiffness
- Stability with an offset load
- Performance at full center-column height
- Performance at a long focal length
- Head slippage
- Ground stability
Do not assume that two tripods with the same stated payload will perform equally.
Stiffness
Stiffness is resistance to bending and twisting under load.
Night-sky photography benefits from:
- Large, well-supported leg joints
- Rigid top casting
- Secure locks
- Low play between sections
- A strong head-to-tripod connection
- A short load path from camera to legs
A tripod can safely hold a camera yet still flex enough to soften stars in wind or during a long sequence.
Vibration damping
Damping describes how quickly movement settles after the tripod is disturbed.
Sources of vibration include:
- Touching the camera
- Mechanical shutter movement
- Wind gusts
- A swinging strap
- A cable snapping into tension
- Footsteps on a deck
- Tracker gears starting or reversing
- A loose center column
Use a remote release, self-timer, or electronic control when appropriate, but first remove the physical source of movement.
Torsional rigidity
Torsional rigidity is resistance to twisting around the tripod’s vertical axis.
This matters when:
- A tracker rotates a counterweighted system
- A long lens catches wind
- A ball head places the camera off-center
- A panorama head rotates between frames
- A telescope mount changes direction
- A cable pulls sideways
A tripod that feels strong under straight downward pressure may still twist under an off-axis load.
Working height
Working height is the height of the camera viewfinder or screen after adding:
- Tripod legs
- Center column, if used
- Head or leveling base
- Camera body
- Tracker and wedge, if present
Night photography does not always require an eye-level tripod. An articulating screen, low foreground, or tracker may make a lower and stiffer setup more useful.
Folded length and packed diameter
Folded size affects whether the tripod:
- Fits in airline luggage
- Attaches securely to a backpack
- Fits inside a vehicle compartment
- Catches on vegetation
- Can be carried with other equipment
- Is likely to be taken to the site
A smaller folded tripod may use more leg sections or a compact center-column design. Portability improvements can introduce thinner lower sections and more joints, so compare the complete design.
Minimum height
Low minimum height is useful for:
- Reducing wind exposure
- Ground-level foregrounds
- Stability on exposed ridges
- Shooting beneath railings where permitted
- Using a tracker without unnecessary leg extension
Independent leg-angle positions can help on uneven ground. Gitzo’s Systematic tripod instructions, for example, describe multiple leg-angle settings for low positioning.Gitzo
How Much Tripod Payload Do You Actually Need?
Calculate every component supported by the tripod, then compare that total with the ratings of the tripod, head, plate, clamp, wedge, and tracker.
Fixed-camera system
For a normal camera-on-head setup, include:
- Camera body
- Lens
- Filter holder
- Battery grip
- L-bracket or camera plate
- Intervalometer attached to the camera
- Small microphone or monitor, when used
- Tripod head
The legs support the head and everything above it. The head supports the camera-side equipment.
Star-tracker system
For a tracker, include:
- Tracker head
- Equatorial wedge
- Camera
- Lens
- Dovetail or declination bracket
- Ball head, if used
- Counterweight shaft
- Counterweight
- Guide equipment
- Dew heater attached to the moving system
- Cables carried by the tracker
Mount manufacturers may exclude counterweights from an imaging-payload rating, but the tripod beneath the tracker still carries their physical mass.
Illustrative complete-load calculation
Assume a portable tracking system includes:
- Camera: 0.75 kg
- Lens: 1.20 kg
- Tracker: 1.35 kg
- Wedge: 0.65 kg
- Dovetail and clamp: 0.35 kg
- Counterweight and shaft: 1.80 kg
- Heater and attached cables: 0.20 kg
Total load carried by the tripod = 6.30 kg
This is an illustrative calculation, not a recommendation to use a tripod with a particular rating. A tripod rated near 6.30 kg may support the mass safely yet remain too flexible for wind, long focal lengths, or an offset tracker load.
The weakest-link rule
The system is limited by the least capable critical component.
Check:
- Tripod legs
- Center column or top platform
- Head or wedge
- Clamp
- Quick-release plate
- Camera or lens attachment
- Tracker saddle
- Safety stops
A high-capacity tripod does not compensate for a slipping ball head or poorly retained quick-release plate.
Why Should You Not Buy by Load Rating Alone?
Load capacity is a safety and compatibility specification, not a universal astrophotography performance score.
Manufacturers may test under different conditions. Ratings may not state:
- Load position
- Center-column extension
- Tripod height
- Wind
- Focal length
- Exposure time
- Accepted vibration
- Head type
- Terrain
- Whether the rating is a safety payload or theoretical maximum
Manfrotto notes that an excessive load imbalance can reduce stability and compromise product safety.Manfrotto This matters because a long telephoto lens can create a more difficult load than a compact camera of the same mass.
Mass versus load geometry
A 2 kg camera system centered over the tripod may be easier to support than a 2 kg system extending far to one side.
The support challenge increases with:
- Distance from the head’s center
- Lens length
- Ball-head offset
- Raised center column
- Wind-catching surface area
- Tracker counterweight geometry
- Loose joints
Treat the payload number as the beginning of the comparison, not the final decision.
Carbon Fiber vs Aluminum: Which Is Better?
Carbon fiber is usually the stronger choice when low packed weight matters, while aluminum is often the better value when cost matters and extra weight is acceptable. Neither material guarantees a stable tripod.
| Factor | Carbon fiber | Aluminum |
|---|---|---|
| Weight | Usually lighter for a comparable class | Usually heavier |
| Cost | Usually higher | Usually lower |
| Rigidity-to-weight potential | Often favorable | Can be very good in a robust design |
| Cold handling | Lower thermal conductivity can feel less harsh | Metal can feel very cold to bare hands |
| Damage behavior | Can be damaged by severe impact or crushing | Can dent or bend |
| Maintenance | Locks and joints still require cleaning | Locks and joints still require cleaning |
| Best fit | Hiking, travel, frequent carrying | Budget systems, vehicle access, added mass |
| Main mistake | Assuming every carbon tripod is stiff | Assuming extra weight guarantees stability |
Gitzo describes low weight and rigidity as core advantages of its carbon-fiber tripod tubes, but that is a manufacturer-specific design claim rather than proof that every carbon tripod outperforms every aluminum tripod.Gitzo
Choose carbon fiber when:
- The tripod must be carried far
- Airline weight matters
- A larger tripod would otherwise be left behind
- The design has suitable tube diameter and locks
- The price does not reduce the budget for lens, tracker, or safety equipment
Choose aluminum when:
- The site is close to a vehicle
- Budget is limited
- A heavier tripod remains practical
- The selected model has a secure head and strong joints
- Cold-weather handling and transport weight are manageable
Material is one variable. Compare the complete tripod and head.
How Tall Should the Tripod Be?
Choose enough height for the intended composition without relying on full center-column extension.
Calculate required leg height
Estimate:
Required tripod leg height ≈ desired camera height − head height − camera or tracker stack height
Illustrative example:
- Desired sensor height: 145 cm
- Ball head: 10 cm
- Camera base to sensor or screen position: 8 cm
Required leg-platform height:
145 − 10 − 8 = 127 cm
A tracker and wedge may add much more height than a ball head. Measure the real stack before buying.
Eye level is not always necessary
A lower tripod can be preferable when:
- The camera has an articulating screen
- The lens points upward
- Wind is strong
- The foreground is low
- A tracker and wedge add height
- The photographer can sit or kneel safely
- Lower weight and folded length matter
When more height is useful
Extra leg height helps when:
- Shooting over vegetation or railings where permitted
- Working on a slope with one downhill leg extended
- Using a non-articulating screen
- Framing a high foreground
- Avoiding repeated bending during a long session
Do not use maximum height as a status feature. Buy the height the composition and body ergonomics require.
Should You Avoid a Center Column?
A center column is convenient for fine height adjustment, but a long extension acts like a cantilever and can reduce practical stability.
A center column is useful when:
- Composition requires small height changes
- Wind is low
- The camera and lens are light
- Exposure is short
- The column is thick and well locked
- The tripod would otherwise be too short
Keep it lowered when:
- Wind is present
- A tracker is mounted
- A telephoto lens is used
- A multi-hour time-lapse is running
- The ground is vibrating
- Maximum star sharpness matters
A short or removable center column can provide flexibility without requiring a tall extension.
Center-column hook caution
Some tripods provide a hook for a stabilizing bag. Gitzo documents hooks designed for stabilizing weight on selected tripods.Gitzo
Use added weight only when:
- The manufacturer permits it
- The tripod remains within its rated load
- The weight cannot swing
- The bag does not pull the center column sideways
- The ground and feet remain secure
A freely swinging camera bag can transmit movement rather than reduce it. In wind, a low bag lightly contacting the ground may be safer than a suspended pendulum, provided the manufacturer’s instructions and local conditions allow it.
How Many Leg Sections Should You Choose?
Three sections favor simplicity and larger lower tubes, while four or five sections favor shorter folded length. Design quality matters more than the number alone.
Three-section legs
Typical advantages:
- Fewer locks
- Faster visual inspection
- Larger lowest tube
- Potentially strong stiffness
- Simpler cleaning
Typical limitations:
- Longer folded length
- Harder airline or backpack packing
- Less height adjustment granularity
Four-section legs
Typical advantages:
- Balanced travel size
- Good height range
- Common availability
- Practical compromise for many users
Typical limitations:
- More locks
- Thinner lowest section
- Slightly more setup and cleaning
Five-section legs
Typical advantages:
- Very short folded length
- Easier suitcase packing
- Useful for strict travel constraints
Typical limitations:
- More joints
- Thin lowest section
- More locks to verify in darkness
- Greater potential for dirt intrusion
- Lower practical stiffness in some designs
Do not reject a tripod solely because it has four or five sections. Extend the thickest sections first and use the thinnest sections only as needed.
Twist Locks vs Flip Locks: Which Is Better at Night?
Both can work well. Choose the lock type you can operate reliably with gloves, inspect in low light, and maintain after dust, sand, or salt exposure.
Twist-lock advantages
- Compact external profile
- Several locks can sometimes be loosened together
- Less likely to catch on straps or vegetation
- Often easy to clean when designed for disassembly
Twist-lock limitations
- A partially tightened lock may be hard to notice
- Gloves can reduce grip
- Dirt can affect threads and seals
- Users may rotate the wrong direction in darkness
Flip-lock advantages
- Lock state is visually and physically obvious
- Fast operation
- Easy to use with some gloves
- Tension can often be adjusted
Flip-lock limitations
- Levers can catch on equipment
- Tension may change with wear or temperature
- Exposed mechanisms can collect dirt
- A loose adjustment can permit leg collapse
Before every long sequence, press down gently on the top platform and verify that every leg section remains locked.
Which Tripod Head Is Best for Night Sky Photography?
A secure ball head is the most versatile choice for ordinary nightscapes, while specialized workflows may benefit from a geared head, leveling base, panorama head, or direct tracker wedge.
Ball head
Best for:
- Wide nightscapes
- Fast composition
- Travel
- Vertical and horizontal framing
- Light to moderate camera systems
Check:
- Main lock security
- Friction control
- Pan lock
- Clamp safety stop
- Plate fit
- Creep after tightening
- Performance when the camera points upward
A ball head can place the camera off-center at steep angles. Use an L-bracket or lens collar when it improves balance.
Three-way head
Best for:
- Independent axis adjustment
- Precise horizon control
- Architecture and landscape overlap
- Users who prefer separate locks
Trade-offs:
- Larger packed size
- More handles
- Slower major reframing
- More potential contact points
Geared head
Best for:
- Precise foreground alignment
- Multi-row panoramas
- Repeated framing
- Small controlled adjustments
Trade-offs:
- Greater weight
- Higher cost
- More mechanical complexity
- Slower large movements on some designs
Leveling base
A leveling base can quickly level the platform without repeatedly changing all three leg lengths. Really Right Stuff documents leveling bases that provide a limited angular adjustment beneath a head.Really Right Stuff
A level platform helps:
- Panoramas
- Tracker wedges
- Video-style heads
- Repeatable horizontal rotation
Leveling the tripod is not the same as polar-aligning a star tracker.
Gimbal head
A gimbal is useful for large telephoto lenses and moving subjects, but it is rarely the first choice for a static wide-angle nightscape. Balance the lens according to the head instructions and support the equipment while releasing locks.
Tracker wedge or direct mount
A star tracker should usually attach to:
- A manufacturer-compatible wedge
- A rigid leveling base
- A secure flat platform
- The correct threaded stud or adapter
Avoid stacking multiple weak heads and adapters beneath a tracker. Every extra joint can add play and torsion.
What Quick-Release System Should You Use?
Use a plate and clamp that retain the camera securely, resist twisting, and can be checked by touch in darkness.
Check:
- Correct screw size
- Anti-twist design
- Plate length
- Lens-collar fit
- Secondary safety stop
- Clamp engagement
- Compatibility between nominally similar dovetails
- Clearance for battery and cable doors
Manfrotto’s head instructions emphasize secure mounting and locking between the head and tripod, including locking screws on compatible support systems.Manfrotto
L-brackets
An L-bracket can:
- Keep the camera centered in portrait orientation
- Reduce ball-head offset
- Improve panorama geometry
- Preserve access to ports when designed correctly
Verify exact camera compatibility. A poorly fitting bracket can block:
- Battery door
- Screen articulation
- USB port
- Remote port
- Memory card slot
Lens plates and collars
Use a lens collar when a heavy lens dominates the system.
Benefits can include:
- Better center of gravity
- Less stress on the camera mount
- Easier portrait rotation
- Reduced head creep
- Better balance on a tracker
What Tripod Works Best With a Star Tracker?
A tracker tripod needs torsional stiffness, a secure top platform, sufficient complete-load capacity, and enough stance width for the rotating counterweighted system.
Prioritize:
- Rigid legs
- Minimal center-column use
- Strong top casting
- Secure wedge attachment
- Large enough feet
- Independent leg angles
- Full clearance for counterweight rotation
- A practical leveling method
- Resistance to cable pull
Photo tripod versus astronomy tripod
A photographic tripod may be preferable when:
- Portability is critical
- The tracker and lens are light
- The top platform is rigid
- The required thread or adapter is available
- The tripod is already owned and tested
A dedicated astronomy tripod may be preferable when:
- The tracker is large
- Counterweights are substantial
- A small telescope is used
- Torsional stiffness matters more than folded size
- The mount has a dedicated interface
- Accessory trays or spreaders improve rigidity
Do not confuse leveling with polar alignment
Leveling can make wedge adjustment easier, but the tracker follows the sky because its polar axis is aligned with the celestial pole.
A slightly unlevel tripod can still be polar aligned, although GoTo initialization and adjustment may be less intuitive on some mounts. Follow the exact tracker manual.
How Should You Prepare for Wind?
Lower the tripod, reduce exposed surface area, remove loose straps, and protect the setup from gusts before adding weight.
Wind-reduction sequence
- Move to a sheltered legal position.
- Lower the tripod.
- Widen the stance if the tripod permits it.
- Keep the center column down.
- Remove or secure the camera strap.
- Shorten or restrain loose cables.
- Rotate the lens or camera to reduce side area when composition allows.
- Use the lens hood only when it does not increase wind leverage.
- Shorten the exposure if vibration remains.
- Stop the session when the setup is unsafe.
Why hanging weight can fail
A suspended bag can behave like a pendulum. If a stabilizing hook is used:
- Prevent the bag from swinging
- Keep the load within the tripod rating
- Avoid side pull
- Do not create a trip hazard
- Do not use water or sand containers that can leak onto equipment
Added mass cannot correct a loose lock, weak head, unstable ground, or excessive wind.
Which Feet Work Best on Different Ground?
| Surface | Practical foot choice | Main caution |
|---|---|---|
| Rock or concrete | Rubber | Check for water, ice, and vibration |
| Boardwalk or deck | Rubber | Footsteps can transmit movement |
| Soil or grass | Rubber or permitted spikes | Avoid buried utilities and protected ground |
| Sand | Wide feet or controlled leg placement | Legs can settle during exposure |
| Snow | Snow shoes or wide feet when compatible | Hidden holes and uneven crust |
| Ice | Approved spikes only when safe and permitted | Spikes can slide on hard ice |
| Indoor floor | Clean rubber feet | Avoid marks and traffic |
| Coastal rock | Rubber with secure stance | Watch waves, spray, and salt |
Spikes do not guarantee grip. Test each leg gently before mounting expensive equipment.
In parks and public spaces, keep tripod legs within permitted areas and leave room for others. The National Park Service specifically warns photographers to stay behind barriers, remain on trails or boardwalks where required, and avoid blocking traffic or walkways.U.S. National Park ServiceU.S. National Park Service
How Should You Use a Tripod on Uneven Ground?
Set the leg angles and lengths so the top remains supported inside a wide, secure footprint without forcing a leg onto unstable material.
Practical sequence:
- Place one leg downhill when this improves access and stability.
- Extend thick upper sections before thin lower sections.
- Adjust individual leg angles.
- Press each foot into stable contact without damaging the site.
- Confirm the top platform cannot rock.
- Mount the head or tracker.
- Recheck after the load is installed.
- Verify clearance around every leg.
Do not place a tripod where one leg can slip over an edge or where the photographer must stand in traffic, water, or unstable terrain.
How Do Cold, Sand, Salt, and Moisture Affect a Tripod?
Environmental exposure affects locks, joints, feet, clamps, and heads even when the tripod material itself appears undamaged.
Cold
In cold conditions:
- Wear gloves that still allow lock control
- Test lock tension before loading
- Watch for ice on feet
- Avoid breathing condensation onto the head
- Do not force a frozen mechanism
- Check manufacturer temperature limits
Sand and dust
Sand can enter:
- Twist-lock threads
- Flip-lock pivots
- Ball heads
- Leveling bases
- Quick-release clamps
- Foot threads
Avoid collapsing dirty wet legs into the upper tubes.
Salt water
Really Right Stuff advises wiping and drying legs after mud, sand, or saltwater exposure and cleaning the tripod according to its maintenance instructions.Really Right Stuff Its ball-head guidance also recommends removing saltwater contamination with fresh water and drying the head without submerging or pressure-washing it.Really Right Stuff
Follow the manual for the exact tripod. Do not use unapproved grease, solvent, or high-pressure water.
Condensation
After a cold session:
- Cap and pack equipment before entering warm humid air when appropriate
- Allow gradual warming
- Dry external moisture
- Open the case later in a dry space
- Inspect locks and plates before storage
How Should You Set Up a Tripod for Sharp Night Sky Photos?
Step 1: Inspect the support
Check:
- Leg locks
- Feet
- Top plate
- Head attachment
- Quick-release clamp
- Plate screw
- Safety stops
- Center-column lock
Step 2: Choose safe ground
Avoid:
- Road shoulders without a safe pullout
- Cliff edges
- Incoming tides
- Unstable snow
- Thermal areas
- Public walkways
- Loose scree
- Thin ice
- Areas closed to tripods
The National Park Service advises photographers to keep attention on safe footing and remain on the safe side of barriers.U.S. National Park Service
Step 3: Deploy the thickest sections first
Use the largest-diameter tubes before extending thin lower sections. Keep the center column lowered unless composition requires it.
Step 4: Set a wide, stable stance
Adjust leg angles for the ground. Confirm that each foot is secure.
Step 5: Attach the head securely
Use the correct thread and any manufacturer-provided locking screws. Manfrotto instructions for compatible heads note that set screws should be tightened to secure the head to the tripod.Manfrotto
Step 6: Mount the camera or tracker
Support the equipment with one hand while tightening the clamp. Confirm the safety stop and plate engagement before releasing the camera.
Step 7: Route cables
Provide enough slack for:
- Camera rotation
- Tracker movement
- Screen articulation
- Focusing
- Battery changes
Do not let a cable pull against the head.
Step 8: Remove movement sources
Secure:
- Camera strap
- Backpack straps
- Remote cable
- Dew-heater cable
- Lens cap cord
- Hanging accessories
Step 9: Perform a stability test
With one hand ready to support the camera:
- Press gently downward.
- Apply a small sideways touch.
- Check for head creep.
- Check every lock.
- Wait for vibration to settle.
- Capture a short test frame.
Step 10: Use remote capture
Use a self-timer, cable release, wireless remote, or computer control when compatible. Nikon and the National Park Service recommend remote or delayed release techniques for night photography.Nikon USAU.S. National Park Service
What Seven-Question Buying Framework Should You Use?
1. What is the complete system?
List every item that the tripod and head must support.
2. What is the longest focal length?
A 14 mm lens is more forgiving than a 200 mm lens or small telescope.
3. Where will the tripod be used?
Compare:
- Vehicle access
- Hiking distance
- Airline travel
- Wind exposure
- Sand or salt water
- Boardwalks
- Snow
- Backyard use
4. What working height is actually needed?
Measure the head, camera, tracker, and wedge stack. Do not automatically buy the tallest tripod.
5. Which head or mount interface is required?
Choose among:
- Ball head
- Geared head
- Three-way head
- Leveling base
- Tracker wedge
- Direct mount interface
6. Can the tripod be carried and deployed repeatedly?
Evaluate:
- Packed weight
- Folded length
- Number of locks
- Heaviest component
- Setup time
- Storage space
- Glove operation
7. Can the system remain stable without relying on its weakest configuration?
Avoid depending on:
- Full center-column extension
- The thinnest leg sections
- An undersized head
- A loose adapter stack
- A freely swinging weight bag
- A marginal quick-release plate
Practical Buyer Matrix
| User situation | Recommended direction |
|---|---|
| Beginner with lightweight camera and wide prime | Quality travel tripod with secure ball head |
| Milky Way hiker | Carbon or lightweight aluminum tripod that is genuinely carried |
| Heavy wide zoom and vehicle access | Mid-size or large tripod with stronger head |
| 135–200 mm tracked imaging | Stiffer legs, low center column, lens collar, secure wedge |
| Portable star tracker with counterweight | Calculate the full support load and prioritize torsional rigidity |
| Small telescope on tracker | Consider a dedicated astronomy tripod or heavier flat-top photo tripod |
| Windy coast | Lower, wider setup with appropriate feet and corrosion maintenance |
| Multi-row panorama | Leveling base or precise head with a stable leg set |
| Frequent airline travel | Short folded length, but verify the lowest leg sections |
| User who rarely carries heavy equipment | Choose a lighter tripod that still meets the real system requirement |
| Existing tripod with head creep | Replace or upgrade the head before replacing the legs |
| Existing tripod stable until tracker is added | Evaluate wedge, top platform, total load, and torsional stiffness |
Real-World Selection Scenarios
These scenarios demonstrate the decision framework and are not hands-on product tests.
Scenario 1: Lightweight Milky Way Travel Kit
System:
- Mirrorless camera
- 20 mm prime lens
- Articulating screen
- Short walk from vehicle
Practical choice:
A quality travel tripod with four sections and a secure ball head may provide enough support without excessive weight.
Avoid:
- Buying only by maximum height
- Raising the center column in wind
- Leaving the camera strap loose
Scenario 2: Backpacking Nightscape Photographer
System:
- APS-C camera
- Small wide lens
- Multi-hour hike
- Moderate-size output
Practical choice:
A lightweight tripod that reaches the required framing and remains usable with the center column down.
Reason:
A heavier tripod offers no practical advantage if it is left behind.
Scenario 3: Heavy Full-Frame Wide Zoom
System:
- Full-frame camera
- Large 14–24 mm zoom
- Coastal wind
- Large print goal
Practical choice:
A larger leg diameter, strong ball head, minimal center-column use, and secure rubber or permitted spike feet.
Reason:
The large lens adds wind area and off-center load even if the total mass appears moderate.
Scenario 4: Portable Star Tracker and 135 mm Lens
System:
- Tracker
- Wedge
- Counterweight
- Camera
- 135 mm lens
- Dew heater
Practical choice:
A tripod selected from the full 6-component load, with a rigid top platform and enough torsional stiffness for the rotating system.
Reason:
The tripod supports far more than the camera and lens.
Scenario 5: Star Trails on a Boardwalk
System:
- Camera
- Wide lens
- Multi-hour sequence
- Public viewing area
Practical choice:
A stable rubber-footed tripod positioned outside the main walking path.
Reason:
A strong tripod cannot prevent deck vibration from footsteps. Capture during low traffic and follow site rules.
Scenario 6: Small Telescope Upgrade
System:
- Existing travel tripod
- Compact tracker
- Future small refractor
- Guide camera
- Filter drawer
Practical choice:
Compare a dedicated astronomy tripod or a stiffer flat-top photographic tripod before adding the telescope.
Reason:
The future load adds torque, cables, and tracking requirements that a camera-only support may not handle well.
What Are the Main Trade-Offs?
Travel tripod
Advantages:
- Easy to carry
- Short folded length
- Fast deployment
- Good for wide lenses
Limitations:
- Thin lower legs
- More joints
- Smaller head
- Greater sensitivity to wind
- Limited tracker growth
Mid-size tripod
Advantages:
- Strong balance of stiffness and transport
- Better head options
- Suitable for heavy lenses
- Can support many portable trackers
Limitations:
- Heavier
- Longer folded length
- Less attractive for airline travel
Large or systematic tripod
Advantages:
- Rigid top platform
- Strong torsional support
- Large legs
- Good tracker and telescope potential
- Modular bases on some systems
Limitations:
- High weight and cost
- More storage space
- May require a separate head or leveling base
- Can be excessive for wide-angle hiking
What Common Buying Mistakes Should You Avoid?
| Mistake | Why it causes problems | Better approach |
|---|---|---|
| Buying by payload alone | Payload does not measure long-exposure stiffness | Compare load geometry, legs, locks, and head |
| Ignoring the head | Head creep ruins framing | Rate the complete support chain |
| Counting only camera and lens | Tracker hardware and counterweights are omitted | Calculate everything carried by the legs |
| Buying maximum height | Extra height can add weight and flex | Measure required working height |
| Raising the center column in wind | The camera becomes a longer lever | Extend legs and lower the system |
| Assuming carbon is always better | Poor design can remain flexible | Compare tube size, joints, and locks |
| Assuming heavy means stable | Weak joints can still twist | Evaluate construction and head security |
| Choosing too many leg sections only for packing | Thin lower legs may reduce stiffness | Use the shortest folded size actually required |
| Hanging a loose camera bag | It can swing and transmit vibration | Secure approved ballast against movement |
| Using a weak ball head on strong legs | The head becomes the failure point | Match head and plate to the load |
| Ignoring quick-release compatibility | The plate can twist or disengage | Verify exact clamp and safety features |
| Using spikes everywhere | Spikes can slip or damage surfaces | Match feet to terrain and rules |
| Forgetting tracker clearance | Counterweight or camera can hit a leg | Test the full rotation path |
| Skipping maintenance after salt or sand | Locks and heads can bind or corrode | Clean according to the manual |
| Setting up in a walkway | The tripod becomes a collision hazard | Keep a safe path open |
Why Are My Stars Still Blurry on a Tripod?
A tripod removes major camera movement, but focus, star motion, wind, shutter vibration, stabilization settings, and lens aberrations can still blur stars.
Check:
- Manual focus
- Shutter time
- Wind
- Ground vibration
- Center-column extension
- Leg locks
- Head creep
- Camera strap
- Image stabilization setting
- Lens corner performance
- Dew
- Remote-release delay
A fixed tripod does not track the stars. Shorten the exposure or use a tracker when Earth’s rotation is the remaining cause.
Why Does the Camera Slowly Tilt After Framing?
Possible causes:
- Ball-head lock not fully tightened
- Friction setting too low
- Camera positioned far off-center
- Heavy lens without collar
- Plate twisting
- Clamp not fully engaged
- Center column slipping
- Head-to-tripod connection loose
Support the camera before loosening any lock. Re-center the load or use an L-bracket or lens collar when compatible.
Why Does the Tripod Vibrate in Wind?
Possible causes:
- Legs extended too high
- Center column raised
- Thin lowest sections extended
- Loose strap
- Lens hood catching wind
- Hanging bag swinging
- Soft ground
- Weak head
- Long lens torque
- People walking nearby
Lower the tripod and remove loose accessories before adding weight.
Why Does One Leg Keep Sinking?
Possible causes:
- Sand
- Soft soil
- Melting snow
- Mud
- Loose leg lock
- Small foot area
- Ground void
- Changing tide or runoff
Move to stable ground or use compatible wide feet. Do not continue when the site is unsafe.
Why Does the Tracker Drift Even Though the Tripod Is Level?
Leveling is not polar alignment.
Check:
- Polar-axis direction
- Tracking rate
- Wedge security
- Tripod settling
- Cable drag
- Counterweight clearance
- Tracker clutch
- Power
Recheck polar alignment after the complete load is installed if the tracker manual recommends it.
Tripod Buying Checklist
Define the system
- Camera weight recorded
- Lens weight recorded
- Head weight recorded
- Tracker and wedge included
- Counterweight and shaft included
- Guide equipment included
- Heaters and attached accessories included
- Longest focal length recorded
Check the tripod legs
- Safety or load rating understood
- Test method reviewed when available
- Maximum height without center column checked
- Minimum height checked
- Folded length checked
- Packed diameter checked
- Leg-section count accepted
- Lowest tube diameter reviewed
- Leg angles reviewed
- Foot options reviewed
- Maintenance instructions available
Check the center column and platform
- Center column can remain lowered for normal use
- Short-column or flat-platform option reviewed
- Hook use follows manufacturer instructions
- Top plate fits the intended head or wedge
- Head locking screws or adapters identified
- Tracker rotation clearance checked
Check the head and plate
- Head capacity reviewed
- Main lock holds at upward angles
- Pan lock works independently when required
- Quick-release system identified
- Secondary safety stop confirmed
- Plate resists camera twist
- L-bracket compatibility checked
- Lens collar support checked
- Battery and cable doors remain accessible
Check field use
- Gloves can operate all locks
- Tripod can be carried the required distance
- Heaviest component is manageable
- Setup is practical in darkness
- Wind strategy prepared
- Terrain-appropriate feet available
- Salt, sand, and moisture maintenance understood
- Safe night location planned
- A remote-release method is available
Test during the return period
- Full equipment load mounted
- Camera aimed upward
- Head creep checked
- Center column tested lowered and raised
- Wind sensitivity checked safely
- Longest lens tested
- Tracker rotation checked
- Clamp and plate tested
- Folded tripod packed in real luggage
- Setup completed with gloves
- Multi-frame sequence reviewed for movement
How We Developed This Buying Framework
This guide uses seven priorities:
- Stability before payload marketing: holding weight and suppressing movement are different tasks.
- Complete system before camera-only weight: heads, trackers, wedges, and counterweights matter.
- Working height before maximum height: unnecessary extension adds weight and leverage.
- Support chain before leg material: the weakest lock, head, plate, or adapter can dominate.
- Terrain and wind before studio specifications: field conditions determine real performance.
- Carryability before theoretical stiffness: unused equipment has no practical value.
- Safety and maintenance before convenience: secure clamps, clear paths, and clean locks protect people and equipment.
No tripod, head, camera, lens, tracker, or telescope was hands-on tested for this article.
Which Tripod Should You Buy?
Choose a travel tripod when a lightweight camera, wide lens, and hiking or airline use define the system. Confirm that it remains stable at the required height with the center column lowered.
Choose a mid-size tripod when using a heavy camera, large wide zoom, telephoto lens, or portable tracker. Prioritize a strong head, larger leg sections, and a rigid top platform.
Choose a large photographic or dedicated astronomy tripod when the system includes a substantial tracker, counterweights, a small telescope, or frequent exposed-site use. Verify the mount interface and transport plan before buying.
The practical next step is to weigh the complete setup, measure the required working height, identify the real terrain and wind conditions, and test the tripod with the exact head and longest lens during the return period.
Frequently Asked Questions
How much tripod load capacity do I need for night sky photography?
Add the camera, lens, head, plate, tracker, wedge, counterweights, and attached accessories. Then confirm the ratings and test methods of each support component. Do not treat a payload number as a guarantee of vibration-free performance at the limit.
Is a carbon-fiber tripod better for astrophotography?
Carbon fiber is often lighter and can provide favorable rigidity for its weight, making it useful for hiking and travel. A well-designed aluminum tripod can still be an excellent and more affordable choice. Tube size, joints, locks, head, and field use matter more than material alone.
Should I use the tripod’s center column?
Keep the center column lowered for maximum practical stability, especially in wind, with a tracker, or with a telephoto lens. Raise it only when the composition requires the extra height and the support remains stable.
Is a travel tripod stable enough for the Milky Way?
It can be, particularly with a lightweight camera and wide lens in calm conditions. Test the tripod at the actual working height, secure the strap, use a remote release, and avoid relying on the thinnest sections or full center-column extension.
Do I need a special tripod for a star tracker?
Not always. A strong photographic tripod can support a lightweight tracker when its full load, wedge, counterweight, top-platform connection, and torsional stiffness are suitable. Larger trackers and telescopes may need a dedicated astronomy tripod.
Should I choose twist locks or flip locks?
Choose the lock type that remains secure, easy to inspect, glove-friendly, and maintainable in the intended environment. Both can work well. The quality and condition of the mechanism matter more than the category.
Sources
Sources were checked August 19, 2026.
- Nikon USA — Photographing the Night Sky
- Canon Europe — Astrophotography Tips for Wide-Angle Lenses
- U.S. National Park Service — How to Photograph Acadia’s Night Skies
- Manfrotto — Safety Payload and UNI/PdR 105:2021
- Gitzo — Systematic Tripods Instruction Manual
- Manfrotto — MVH608AH Instructions and Load-Balance Safety
- Gitzo — Carbon Fiber Tripods and Aluminum Stands
- Gitzo — Traveler α Tripod Product and Support Page
- Really Right Stuff — Tripods and Monopods Manual 2024
- Manfrotto — MVH500A/MVH500AH Head Instructions
- U.S. National Park Service — Keep Safety in the Picture
- U.S. National Park Service — Photography in Yellowstone
- Really Right Stuff — Tripod Cleaning and Maintenance
- Really Right Stuff — BH-30 Ball Head User Manual
- U.S. National Park Service — Exploring Night Skies
More from Trackers Mounts & Filters
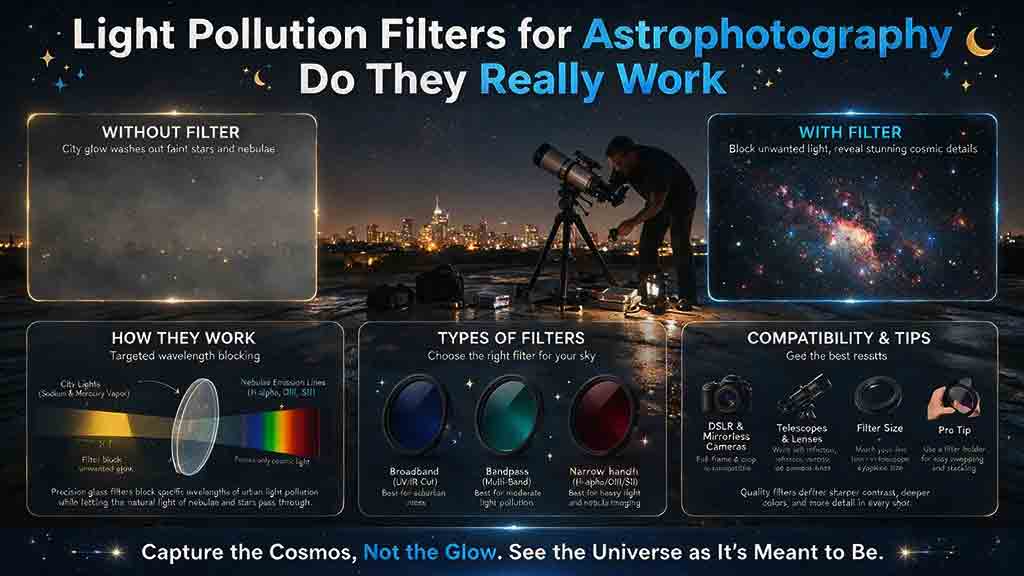
Light Pollution Filters for Astrophotography: Do They Really Work?
Light pollution filters can improve astrophotography, but their value depends on the target spectrum, local lighting, filter transmission curve, camera, and optical system. Dual-band and narrowband filters are most effective on emission nebulae because they isolate hydrogen-alpha, oxygen, and other narrow emission lines while rejecting much of the sky background. Broadband suppression filters offer smaller and less predictable gains on galaxies, reflection nebulae, star clusters, and Milky Way nightscapes, especially under broad-spectrum LED lighting. This guide compares filter categories, explains fast-optics passband shift, vignetting, focus changes, color casts, and halos, and provides an illustrative contrast and signal-to-noise calculation. Readers also receive a seven-question decision framework, matched A/B testing procedure, practical scenarios, troubleshooting, a complete buying checklist, and an essential warning that nighttime astrophotography filters are never safe solar filters.
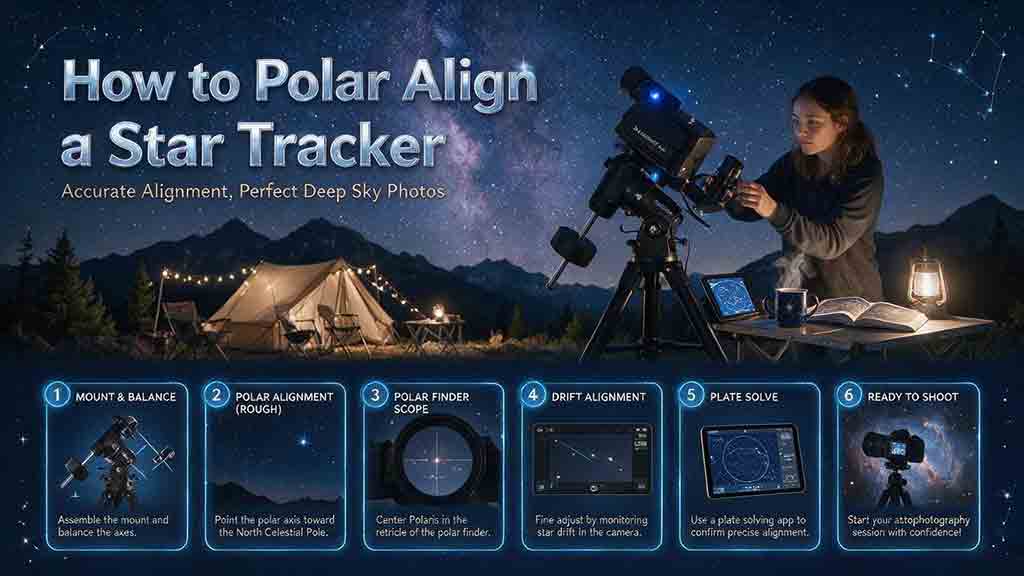
How to Polar Align a Star Tracker
Polar alignment points a star tracker’s right-ascension axis toward the north or south celestial pole so the mount can follow the apparent motion of the sky. This guide explains how to prepare and balance the tracker, identify true north or south, set the wedge near local latitude, and refine alignment with an optical polar scope, model-specific reticle app, electronic polar camera, plate-solving routine, or drift method. Separate Northern and Southern Hemisphere instructions explain why Polaris must be offset from the north celestial pole and how the faint Octans pattern is used in the south. Readers also receive a three-pass workflow, method-selection table, exposure-escalation test, practical scenarios, safety and setup checklists, common mistakes, polar-scope calibration test, and detailed troubleshooting guidance. The article distinguishes polar alignment from GoTo star alignment, balancing, plate solving, and autoguiding.
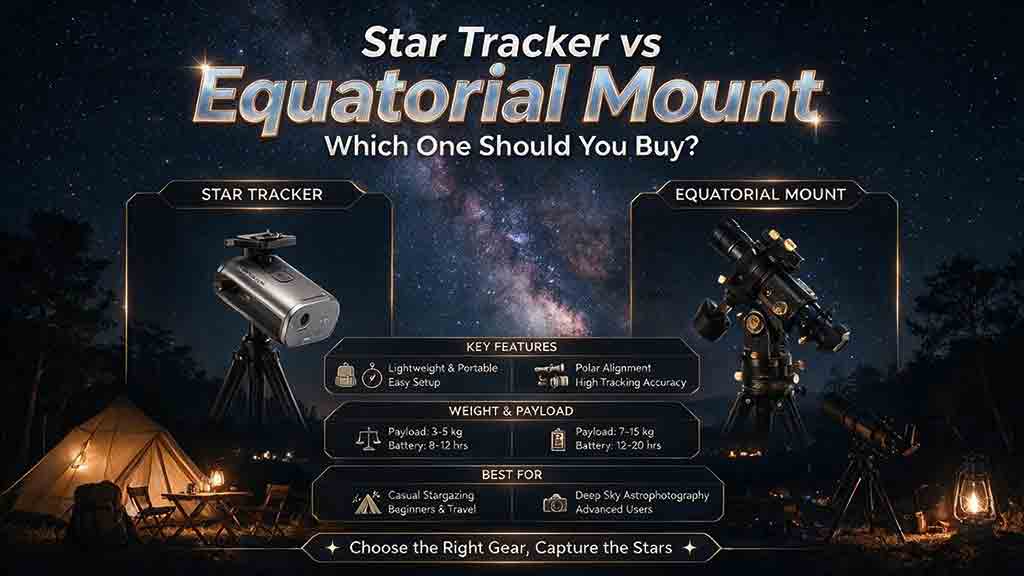
Star Tracker vs Equatorial Mount: Which One Should You Buy?
A star tracker is usually the better purchase for portable camera-lens astrophotography, while a full equatorial mount is better suited to telescopes, longer focal lengths, heavier accessories, dual-axis guiding, GoTo, plate solving, and automated imaging. This guide explains why the market also contains a middle category of dual-axis GoTo trackers, so product labels alone cannot determine the correct choice. It compares payload, torque, tracking consistency, guiding axes, periodic error, meridian behavior, transport, setup time, power, software, and complete ownership cost. Readers receive an illustrative torque calculation, a usable-integration calculation, a seven-step decision framework, six practical scenarios, troubleshooting tables, and a comprehensive buying checklist. The central recommendation is to choose the smallest system that reliably supports the real focal length, complete load, workflow, and upgrade plan.
Explore More Topics
Dedicated Astronomy Camera vs Regular Camera: What Is the Difference?
A dedicated astronomy camera is designed for telescope imaging through astronomy software and may provide regulated cooling, high-frame-rate readout, monochrome capture, filter-wheel integration, and FITS metadata. A regular DSLR or mirrorless camera is a self-contained general-purpose camera with a screen, battery, memory card, native lenses, autofocus, and daytime usefulness. This guide explains why neither category is universally better. It compares cooled deep-sky cameras, uncooled planetary cameras, guide cameras, monochrome and one-shot-color sensors, regular cameras, and specialized astrophotography DSLRs. Readers learn how cooling, dark current, H-alpha response, UV/IR filtering, sensor size, pixel scale, back focus, software, power, calibration, frame rate, and total system cost affect the decision. The article also includes calculation examples, use-case recommendations, a five-question selection process, a buying checklist, common mistakes, troubleshooting, and practical next steps.
How to Choose a Camera for Astrophotography
Choosing an astrophotography camera starts with the target, optical system, and workflow rather than megapixels or sensor size alone. This guide compares mirrorless and DSLR bodies, cooled one-shot-color cameras, cooled monochrome cameras, planetary cameras, and astronomy-modified models. Readers learn how sensor dimensions affect field of view, how pixel size and focal length determine image scale, and how cooling, quantum efficiency, read noise, full-well capacity, dynamic range, and frame rate should be interpreted. It also provides a color-versus-monochrome comparison, telescope compatibility and back-focus checks, software and driver requirements, a total-system-cost framework, five practical scenarios, troubleshooting, and a complete purchase checklist. The central recommendation is to choose the camera that fits the target, corrected image circle, mount, software, power system, processing workflow, and complete budget.
Best Focal Lengths for Milky Way Photography
For most untracked Milky Way landscapes, a 14–24mm full-frame-equivalent view offers the best balance of sky coverage, galactic scale, foreground context, and shutter-time tolerance. Wider 12–16mm views suit dramatic foregrounds and a large Milky Way arch, while 28–35mm makes the galactic center more prominent. Focal lengths of 40–50mm or longer are better for panoramas, stacking, or tracked high-detail images. This guide converts the recommendations for full-frame, 1.5× APS-C, 1.6× Canon APS-C, and Micro Four Thirds cameras. It explains shutter-time tradeoffs, crop-factor calculations, aperture and corner-performance limits, prime-versus-zoom choices, panorama planning, and tracker use. Readers also receive a three-question lens-selection method, real-world scenarios, a step-by-step lens test, a buying checklist, common mistakes, troubleshooting guidance, and practical recommendations without unsupported “best lens” claims.