Do You Need a Star Tracker for Astrophotography?

Do You Need a Star Tracker for Astrophotography?
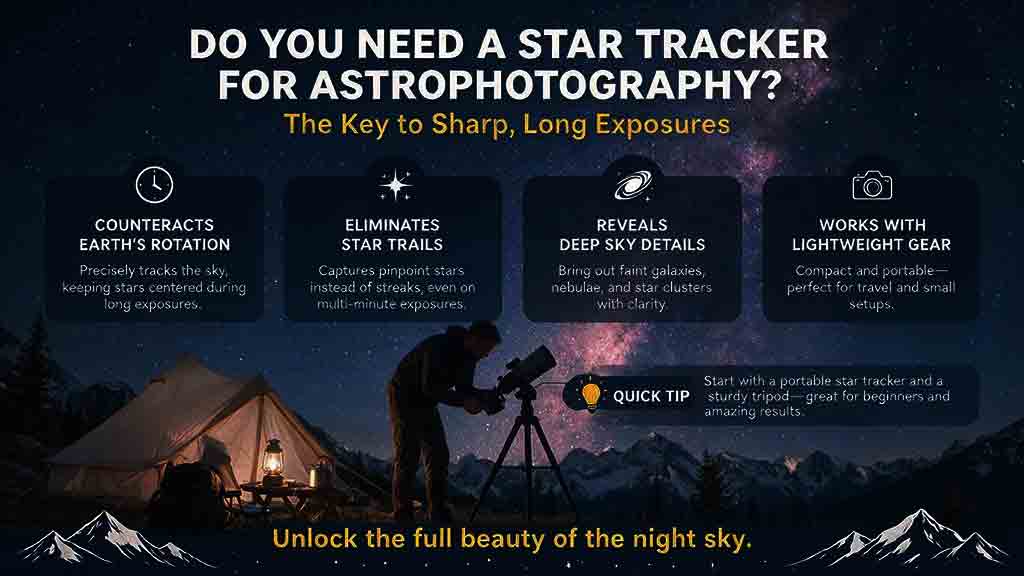
No, you do not need a star tracker for every kind of astrophotography. A sturdy tripod is enough for short wide-angle nightscapes, aurora, meteors, the Moon, planets, and intentional star trails. A tracker becomes valuable when you want longer exposures of stars, lower ISO, longer focal lengths, or deeper wide-field images. It cannot replace accurate focus, stable support, polar alignment, or good processing.
Key Takeaways
- Buy or use a star tracker when star motion—not focus, lens quality, light pollution, or camera shake—is the main limit.
- A tracker follows the sky, so a stationary landscape foreground will blur during a long tracked exposure.
- Wide-angle Milky Way photography can begin without a tracker; telephoto and deep-sky work benefit much sooner.
- Payload ratings are compatibility limits, not guarantees of round stars at every focal length.
- Polar alignment, balance, tripod stability, power, and cable management determine whether tracking actually improves the image.
This guide explains what a photographic star tracker does, when it helps, when it adds unnecessary complexity, how to estimate its benefit, how to choose between a tripod, tracker, and equatorial mount, and how to avoid common setup failures.
Editorial note: This guide is based on official mount manuals, NASA-supported astrophotography education, published specifications, and practical selection criteria rather than hands-on testing of a specific tracker, camera, lens, tripod, or mount.
What Does a Star Tracker Actually Do?
A photographic star tracker rotates the camera around an axis aligned with Earth’s rotational axis so stars remain approximately fixed on the camera sensor during a longer exposure.
Earth’s rotation makes the night sky appear to move around the celestial poles. A tracker turns in the opposite direction at approximately the sidereal rate, reducing apparent star motion when its polar axis is aligned correctly.
The iOptron SkyGuider Pro manual explains that an aligned polar axis lets the mount rotate with the celestial sphere for tracking and astrophotography.iOptron Sky-Watcher similarly describes its Star Adventurer GTi as compensating for apparent sky movement so longer exposures become possible.Sky-Watcher USA
A tracker does not:
- Make the camera more sensitive
- Improve lens sharpness
- Remove light pollution
- Correct missed focus
- Eliminate wind vibration
- Automatically find the target on every model
- Keep a stationary foreground sharp
- Guarantee round stars at the advertised payload
- Replace calibration or image processing
Is a Star Tracker the Same as an Equatorial Mount?
A compact camera tracker and a full equatorial mount use the same basic tracking principle, but they serve different payloads and workflows.
| Support type | Main function | Best use | Main limitation |
|---|---|---|---|
| Fixed tripod | Holds the camera still relative to the ground | Wide nightscapes, aurora, meteors, Moon, star trails | Stars move during longer exposures |
| Single-axis camera tracker | Rotates mainly in right ascension | Wide-field and moderate-telephoto tracked imaging | Manual target finding and limited correction |
| Two-axis GoTo tracker | Tracks and can slew in right ascension and declination | Portable deep-sky and automated framing | More setup, power, software, and cost |
| Full equatorial mount | Carries larger optical systems and supports guiding | Telescope deep-sky imaging | Heavier, less portable, and more expensive |
| Alt-azimuth mount | Points and tracks in altitude and azimuth | Visual observing and some short-exposure work | Field rotation affects long exposures unless compensated |
Right ascension, or RA, is the coordinate axis parallel to Earth’s rotation when an equatorial mount is polar aligned.
A simple tracker may rotate only the RA axis. A two-axis mount can also adjust declination, perform GoTo movements, and support more advanced guiding. Sky-Watcher’s current Star Adventurer GTi manual describes both RA and declination balancing and optional autoguiding, while smaller trackers may provide only basic RA tracking.Sky-Watcher USASky-Watcher
When Do You Need a Star Tracker?
You need a tracker when the untracked shutter time is too short to collect the star or deep-sky signal required by the intended focal length and output.
A tracker is most useful for:
- Detailed Milky Way sky frames
- Tracked panoramas
- Constellations
- Large nebulae
- Andromeda and other bright galaxies
- Comets against the stars
- Star fields with moderate telephoto lenses
- Multi-minute integration from many shorter sub-exposures
- Lower-ISO captures when the sky permits
- Portable deep-sky imaging without a large telescope mount
Longer focal lengths benefit sooner
A 14 mm lens may produce useful untracked results with a relatively short exposure. A 50 mm, 85 mm, 135 mm, or 200 mm lens shows star movement much sooner at the same output standard.
A tracker therefore becomes more valuable as:
- Actual focal length increases
- Pixel pitch decreases
- Final print size increases
- The target moves closer to the celestial equator
- The required stars must remain very round
- The scene needs more total integration
Faint targets benefit more than bright targets
The Moon is bright enough for short exposures. A faint nebula needs far more total signal.
A tracker does not necessarily require one extremely long exposure. Its larger benefit is often the ability to capture many consistently tracked sub-exposures that can be calibrated, aligned, and stacked.
When Is a Tripod Enough?
A fixed tripod is enough when the required exposure is short, star movement is intentional, or the subject changes too quickly for sky tracking to provide a meaningful advantage.
| Subject | Tracker needed? | Better starting approach |
|---|---|---|
| Wide Milky Way landscape | Optional | Learn tripod exposure and stacking first |
| Aurora | Usually no | Use a short shutter to preserve movement |
| Meteor shower | Usually no | Capture repeated wide-field frames |
| Star trails | No | Keep the camera fixed and stack a sequence |
| Moon | No | Use short exposures and appropriate focal length |
| Planets with camera lens | No | Use short exposures or video |
| Planetary telescope imaging | Use a suitable mount, but not necessarily a camera tracker | High-frame-rate capture and accurate tracking |
| Wide constellation field | Optional | Tracker helps at moderate focal lengths |
| Large nebula with camera lens | Usually helpful | Polar-aligned tracked sub-exposures |
| Small galaxy with long lens | Helpful, but a stronger mount may be more appropriate | Evaluate focal length and guiding needs |
Aurora does not wait for long tracking
Aurora curtains, rays, and folds can change quickly. Long tracked exposures may smooth the structure even if the stars remain sharp.
Meteors move independently of the stars
A tracker can keep background stars fixed, but it does not stop a meteor’s motion. Wide coverage, continuous capture, low frame gaps, focus, and total observing time are usually more important.
Star trails require a fixed camera
A tracker counteracts the apparent sky motion that creates star trails. Nikon’s star-trail guidance describes fixed-camera long exposures or stacked sequences rather than tracked sky frames.Nikon USA
Can You Photograph the Milky Way Without a Tracker?
Yes. A tripod, wide lens, accurate focus, short exposure, and multiple-frame stacking can produce strong Milky Way images without tracking.
Nikon’s Milky Way guidance includes examples made from a fixed tripod with exposures of roughly 15–25 seconds at wide focal lengths, illustrating that tracking is not a prerequisite for a recognizable Milky Way image.Nikon USA Those examples are not universal exposure presets.
Start untracked when:
- The lens is wide
- The final output is moderate
- The foreground is important
- Setup time is limited
- Portability matters
- The user is still learning focus and exposure
- The budget would improve the lens or tripod more
Add a tracker when:
- The sky frame remains too noisy
- A narrower lens is needed
- Dust lanes need more signal
- A large print reveals trailing
- A tracked panorama is planned
- Lower ISO and greater dynamic range are priorities
- Untracked stacking still does not provide enough quality
Stacking is the main no-tracker alternative
Capture a sequence of short exposures that keep stars acceptably round, align the stars in software, and average or stack the frames. Nikon describes this approach as a way to combine short star-preserving exposures for lower-noise Milky Way results.Nikon USA
Star-aligned stacking moves a fixed foreground between frames. Process the foreground separately when necessary and disclose the blend.
How Much Longer Can a Star Tracker Expose?
There is no universal multiplier. The improvement depends on focal length, polar alignment, tracker periodic error, balance, wind, tripod stability, pixel scale, and the standard used to judge star shape.
Avoid claims such as:
- “A tracker always turns 10 seconds into 5 minutes.”
- “The payload rating guarantees two-minute exposures.”
- “Perfect polar alignment removes every tracking error.”
- “Guiding fixes any overloaded tracker.”
An illustrative star-motion calculation
Earth turns approximately 360 degrees in one sidereal day, which is about 15 arcseconds per second near the celestial equator before projection and declination are considered.
Assume:
- Pixel pitch: 4 µm
- Lens focal length: 24 mm
Approximate image scale:
206.265 × 4 ÷ 24 ≈ 34.4 arcseconds per pixel
At 15 arcseconds per second, apparent motion near the celestial equator crosses roughly one pixel in about:
34.4 ÷ 15 ≈ 2.3 seconds
This does not mean a 24 mm lens must use a 2.3-second exposure. Blur visibility depends on lens projection, star declination, focus, demosaicing, pixel sampling, and final output size. The example shows why high-resolution files can reveal motion before a simple “500 Rule” predicts it.
Use an exposure ladder
For the actual system:
- Focus carefully.
- Capture a short tracked frame.
- Double the shutter time.
- Inspect stars near the center and corners.
- Continue until tracking error or sky brightness becomes unacceptable.
- Choose a shorter reliable exposure for the full sequence.
- Repeat after changing focal length, payload, or polar alignment.
Reliability across many frames matters more than one unusually successful exposure.
What Does a Tracker Improve Besides Shutter Time?
A tracker expands exposure options, but the useful improvement comes from better signal collection and repeatable stacking—not from a single specification.
Potential benefits include:
- More signal per sub-exposure
- Lower ISO for the same histogram position
- More flexible aperture choice
- Better color in faint stars
- More visible nebular structure
- Cleaner stacked results
- Use of longer camera lenses
- Reduced need for extreme shadow brightening
- More consistent star alignment
- Easier capture of large deep-sky targets
A tracker may also make the workflow harder by adding:
- Polar alignment
- Balance
- Counterweights
- More batteries or power cables
- Greater tripod demand
- More setup time
- Foreground blending
- Dew exposure
- Additional failure points
Why Does the Foreground Blur on a Tracker?
A tracker keeps the sky fixed relative to the camera, which makes the stationary ground move across the sensor during the exposure.
For a tracked nightscape:
- Stars remain sharper
- Mountains, buildings, and trees blur
- Wind can move vegetation independently
- A separate foreground exposure is often required
Three practical workflows
1. Untracked single exposure
Best for:
- Simplicity
- Moving foreground
- Documentary presentation
- Fast setup
Trade-off:
- Shorter sky exposure and potentially more noise
2. Tracked sky plus untracked foreground
Best for:
- High-quality Milky Way landscapes
- Controlled foreground detail
- Large prints
Trade-off:
- Requires careful alignment, blending, and disclosure
3. Tracked panorama plus foreground panorama
Best for:
- Large Milky Way arches
- High-resolution output
Trade-off:
- Requires overlap, consistent rotation, complex stitching, and more capture time
Do not present a tracked-sky composite as a single unprocessed exposure.
How Accurate Must Polar Alignment Be?
Polar alignment must be accurate enough for the focal length, exposure time, and output standard; longer lenses and longer exposures require greater accuracy.
Polar alignment places the tracker’s RA axis parallel to Earth’s rotational axis.
The iOptron manual states that precise polar alignment is crucial for accurate tracking.iOptron Sky-Watcher’s manual likewise requires polar alignment for the mount to counter apparent sky movement.Sky-Watcher USA
Rough alignment may work when:
- The lens is very wide
- Exposures are short
- The final image is small
- The target is away from the celestial equator
- Minor star elongation is acceptable
More precise alignment is needed when:
- The focal length is long
- Exposures are longer
- Pixel density is high
- The target is near the celestial equator
- Large prints are planned
- Many frames must align consistently
Leveling is not the same as polar alignment
A level tripod can make altitude and azimuth adjustments more intuitive, but the tracker follows the sky because its polar axis is aligned—not because the tripod bubble is perfect.
Follow the exact mount manual. Polar-scope orientation, app instructions, hemisphere procedures, and payload-on or payload-off alignment differ by product.
Does Payload Capacity Tell You Which Tracker to Buy?
Payload capacity tells you whether a setup may be mechanically compatible; it does not guarantee a specific exposure length or focal length.
Include the entire moving load:
- Camera
- Lens or telescope
- Ball head
- Declination bracket
- Dovetail
- Counterweight hardware
- Filter holder
- Dew heater
- Guide scope and guide camera
- Cables attached to the moving system
Sky-Watcher warns users not to exceed the specified payload and requires the complete optical system to be balanced.Sky-Watcher USA iOptron also specifies a sturdy tripod and provides balancing and polar-alignment procedures in its tracker documentation.iOptron
Why a light load can still track poorly
Possible causes include:
- Long focal length
- Poor balance
- Weak tripod
- Wind
- Loose ball head
- Cable drag
- Polar error
- Periodic gear error
- Lens collar flex
- Ground movement
Why a heavier load can sometimes work
A well-balanced wide-angle system may be forgiving, but that does not justify exceeding the manufacturer’s limit.
Treat published payload as a ceiling, then choose a conservative setup based on focal length and required precision. Do not use a universal “half the payload” rule as a guarantee; mount designs and test standards differ.
How Important Are Balance and Tripod Stability?
Balance and tripod stability are essential because a tracker cannot distinguish Earth’s rotation from movement caused by a slipping head, flexing tripod, or dragging cable.
Balance the actual capture configuration
Balance with:
- Lens at the intended focal length
- Focuser near the capture position
- Filter installed
- Dew heater attached
- Camera screen in its intended position
- Cables routed
- Guide equipment installed
Sky-Watcher’s GTi manual instructs users to balance both RA and declination with all accessories attached and to keep a hand on the system during adjustment.Sky-Watcher USA
Use a rigid support
The iOptron manual lists a sturdy tripod as required equipment.iOptron
Avoid:
- Fully extended thin center columns
- Loose leg locks
- Soft soil without stable footing
- Hanging bags that swing in wind
- Unsecured counterweights
- Cable tension
- Tripod placement in a walkway
A payload below the tracker’s limit can still fail on an unstable tripod.
Which Focal Lengths Benefit Most?
The transition from optional to useful occurs gradually as focal length increases.
| Actual focal length | Tracker value | Typical use |
|---|---|---|
| 14–20 mm | Optional | Wide Milky Way landscapes and aurora |
| 24–35 mm | Increasingly useful | Detailed nightscapes and panoramas |
| 50–85 mm | Strongly useful | Constellations, Milky Way regions, large nebulae |
| 100–200 mm | Usually important | Andromeda, nebulae, star fields, comets |
| Above 200 mm | Tracker may be insufficient by itself | Mount quality, guiding, focus, and wind become critical |
These are workflow categories, not exposure guarantees. A high-resolution camera, large print, or demanding star-shape standard can make tracking useful at shorter focal lengths.
Do You Need Autoguiding?
Most beginners using wide lenses do not need autoguiding. Guiding becomes useful when tracking error limits exposure consistency at longer focal lengths.
Autoguiding uses a guide camera and software to measure a guide star and send corrections to a compatible mount.
Sky-Watcher describes guiding as a way to correct some polar misalignment and worm-gear movement for longer exposures.Sky-Watcher USA
Guiding does not correct:
- Wind
- Loose tripod hardware
- Lens zoom creep
- Poor focus
- Camera tilt
- Flex between guide and imaging systems
- Clouds
- Overloaded bearings
- A badly slipping clutch
Start unguided when:
- Using a wide or normal lens
- Learning polar alignment
- Keeping sub-exposures modest
- Portability is the priority
- The tracker has no compatible guide input
Consider guiding when:
- Using a telephoto lens or small telescope
- Many frames show repeatable RA drift
- Polar alignment is already competent
- The mount supports guiding
- Added weight and cables remain manageable
- Longer reliable sub-exposures provide a real benefit
How Do You Decide Whether to Buy One?
Use this original six-question decision framework.
1. What is the subject?
No tracker is usually needed for:
- Aurora
- Meteors
- Star trails
- Moon
- Most short-exposure planetary work
Tracking is more useful for:
- Milky Way detail
- Constellations
- Nebulae
- Galaxies
- Comets
- Telephoto star fields
2. What focal length will you use?
Longer lenses make tracking errors and star motion visible sooner.
3. What currently limits the image?
Identify the failure:
- Star trailing
- High noise
- Poor focus
- Lens coma
- Light pollution
- Weak tripod
- Insufficient total integration
- Foreground movement
Buy a tracker only when it addresses the actual limitation.
4. Can the foreground be captured separately?
A tracker is less convenient when the scene contains:
- People
- Waves
- Moving trees
- Vehicles
- Fast cloud
- Documentary foreground action
5. Can the complete load be supported?
Check:
- Tracker payload
- Tripod
- Head
- Counterweight
- Lens collar
- Cables
- Power
- Wind exposure
6. Will the setup be used often?
A tracker is poor value when setup complexity prevents it from leaving the closet.
Practical Decision Matrix
| User situation | Recommendation |
|---|---|
| First Milky Way session with a 14–20 mm lens | Start with a tripod |
| Milky Way photographer seeking cleaner large prints | Add a tracker |
| Aurora photographer | Prioritize lens speed and short shutter |
| Meteor-shower photographer | Prioritize field coverage and continuous capture |
| Star-trail photographer | Keep the camera fixed |
| 50–135 mm constellation or nebula photographer | Tracker is strongly useful |
| Small refractor deep-sky beginner | Compare a tracker with a compact equatorial mount |
| 300 mm or longer lens user | Evaluate stronger mount, guiding, and tripod |
| Hiker with strict weight limit | Try untracked stacking before buying |
| User whose main problem is focus or coma | Fix focus or optics first |
| User with a moving foreground | Plan a separate foreground or remain untracked |
| User who wants automated GoTo framing | Choose a compatible two-axis mount |
Real-World Scenarios
These examples illustrate decisions rather than report hands-on tests.
Scenario 1: Wide Milky Way Over Mountains
Equipment:
- Full-frame camera
- 16 mm lens
- Strong tripod
- Large foreground
Decision:
Start without a tracker. Use a short exposure ladder and stack several sky frames if needed.
Reason:
The wide lens is forgiving, and a tracker would blur the mountain foreground during a long exposure.
Scenario 2: Milky Way Core With a 50 mm Lens
Equipment:
- APS-C camera
- 50 mm lens
- Large print goal
Decision:
A tracker is useful.
Reason:
The narrower field and higher enlargement make untracked star movement more visible, while the tracked sequence can collect more signal.
Scenario 3: Andromeda With a 135 mm Lens
Equipment:
- Mirrorless camera
- 135 mm lens
- Portable tripod
- Dark sky
Decision:
Use a tracker and verify payload, balance, and polar alignment.
Reason:
Andromeda benefits from many tracked sub-exposures, and untracked exposure time becomes restrictive at 135 mm.
Scenario 4: Fast Aurora Display
Equipment:
- Camera
- 20 mm lens
- Tripod
- Moving foreground
Decision:
Do not prioritize a tracker.
Reason:
Short shutter speed is needed to preserve aurora structure, and a moving landscape scene is easier with a fixed camera.
Scenario 5: Small Refractor Deep-Sky Rig
Equipment:
- Camera
- Small refractor
- Reducer
- Guide equipment
- Multiple cables
Decision:
Compare a compact GoTo equatorial mount with a basic tracker.
Reason:
The complete load, focal length, guiding, balance, and automated target acquisition may exceed the practical role of a simple camera tracker.
What Should You Check Before Buying?
Tracker compatibility
- Actual payload limit
- Mounting saddle or camera screw
- Counterweight availability
- Declination bracket
- Ball-head requirement
- Polar scope or electronic alignment method
- Northern and Southern Hemisphere support
- Tracking rates
- Guiding port
- GoTo capability
- Firmware and app support
- Operating temperature
- Power requirements
Camera and lens compatibility
- Complete weight
- Lens collar
- Zoom or focus extension
- Center of gravity
- Shutter-control cable
- Camera intervalometer
- Cable clearance
- Dew-heater placement
- Filter holder
- Tripod socket strength
Workflow compatibility
- Setup time
- Polar visibility
- Dark-site access
- App requirements
- Mobile signal or offline use
- Battery plan
- Storage
- Foreground workflow
- Stacking software
- Transport case
What Are the Pros and Cons of a Star Tracker?
Advantages
- Longer star-preserving exposures
- Better telephoto capability
- More signal per sub-exposure
- Cleaner stacked deep-sky data
- Lower ISO options
- Better color in faint targets
- Portable alternative to a large mount
- Supports tracked panoramas
- Expands lens-based deep-sky targets
Limitations
- Requires polar alignment
- Blurs stationary foregrounds
- Adds weight and setup time
- Requires balance and stronger support
- Introduces power and cable needs
- Can fail in wind
- Payload rating does not guarantee precision
- Long lenses may exceed practical accuracy
- Southern polar alignment can be more difficult
- More equipment increases the chance of setup errors
What Common Mistakes Should You Avoid?
| Mistake | Why it causes problems | Better approach |
|---|---|---|
| Buying before learning untracked exposure | The actual limitation remains unknown | Master focus, tripod, and stacking first |
| Treating payload as an exposure guarantee | Focal length and balance are ignored | Test the complete system |
| Polar aligning roughly with a long lens | Drift becomes visible | Improve alignment as focal length increases |
| Balancing without all accessories | Cables and heaters change torque | Balance the capture-ready setup |
| Using a weak tripod | The tracker follows tripod movement | Strengthen the support first |
| Tracking a landscape foreground | Ground becomes blurred | Capture a separate foreground |
| Starting with the longest possible exposure | One error can ruin more data | Use reliable shorter sub-exposures |
| Adding guiding too early | Complexity hides basic setup errors | Learn unguided tracking first |
| Forgetting the counterweight safety stop | Weight can slide off the shaft | Follow the mount manual |
| Moving clutches or weights without support | Equipment can swing or fall | Hold the payload during adjustment |
| Using an unverified power supply | Voltage or polarity can damage equipment | Follow official power specifications |
| Looking through a polar scope near the Sun | Severe eye injury is possible | Never aim an optical polar scope at the Sun |
Why Are My Tracked Stars Still Elongated?
The cause is usually polar error, periodic error, balance, vibration, focus, cable drag, or lens aberration rather than proof that tracking does not work.
Use this order:
- Shorten the exposure.
- Confirm focus.
- Check polar alignment.
- Check the tracker rate.
- Rebalance the load.
- Tighten the tripod and head.
- Remove cable tension.
- Check wind.
- Inspect center and corner stars separately.
- Compare several consecutive frames.
If stars stretch in the same direction across the entire frame, tracking or vibration is likely. If only the corners stretch outward, lens aberration may be responsible.
Why Do Stars Drift in One Direction Across the Sequence?
Possible causes include:
- Polar-axis error
- Wrong hemisphere or tracking direction
- Incorrect tracking rate
- Loose clutch
- Head slipping
- Tracker not running
- Low battery
- Cable drag
- Ground settling
Review the first and last frame, then identify whether the drift is steady, periodic, or sudden.
Why Are Some Frames Sharp and Others Blurry?
Possible causes include:
- Periodic gear error
- Wind gusts
- Tripod vibration
- Loose ball head
- Shutter movement
- Cable movement
- Passing cloud
- Dew
- Focus shift
- Tracker gear not fully engaged
A reliable workflow may discard a small number of flawed frames, but frequent failures indicate a setup problem.
Why Is the Foreground Misaligned After Stacking?
Star-alignment software registers the sky, so a stationary foreground shifts from frame to frame.
Options include:
- Mask the sky
- Process sky and foreground separately
- Capture an untracked foreground
- Use a fixed-camera stack instead
- Disclose the composite
Do not force automatic star alignment across trees or buildings and expect artifact-free results.
Star Tracker Setup Checklist
Before leaving
- Target and direction planned
- Moon and weather checked
- Tracker manual downloaded
- Firmware or app tested
- Batteries charged
- Correct cables packed
- Counterweight and safety stop packed
- Tripod plate and tools packed
- Offline polar-alignment method available
- Storage cleared
At the site
- Ground is stable
- Tripod is secure
- Mount head is firmly attached
- Counterweight installed in the correct order
- Camera and lens are firmly retained
- Full system balanced
- Cables have slack
- Polar scope is safely oriented away from the Sun
- Polar alignment completed
- Tracking rate confirmed
- Test exposure reviewed
- Foreground capture planned
During capture
- Focus checked
- Star shape checked
- Exposure ladder completed
- Histogram and highlights checked
- Dew monitored
- Battery monitored
- Tracker position monitored
- Tripod protected from contact
- Several frames reviewed
- Original files preserved
Before packing
- Camera supported before releasing clutches
- Counterweight removed in the manufacturer’s safe order
- Batteries switched off
- Cables removed without pulling ports
- Equipment dried before long-term storage
- Session settings recorded
How We Developed This Decision Framework
This guide uses six priorities:
- Target before equipment: not every night-sky subject benefits from tracking.
- Focal length before payload marketing: longer lenses demand greater precision.
- Actual limitation before purchase: a tracker cannot fix focus, optics, or light pollution.
- Complete load before body weight: heads, cables, heaters, and brackets affect tracking.
- Reliable sub-exposures before record lengths: repeatability matters more than one long frame.
- Transparent composites: tracked sky and fixed foreground workflows should be disclosed.
No tracker, mount, camera, lens, tripod, or guiding system was hands-on tested for this article.
Should You Buy a Star Tracker?
Buy a star tracker when untracked star motion prevents the focal length, signal level, or output quality you need—and when you are willing to learn polar alignment, balance, and tracked-sky processing.
Start with a tripod when photographing aurora, meteors, star trails, the Moon, or a wide Milky Way scene. Improve focus, exposure, lens performance, and short-frame stacking before adding equipment.
Choose a compact tracker for portable lens-based work. Compare a stronger equatorial mount when the setup includes a telescope, long lens, guiding equipment, automation, or a load near the tracker’s practical limit.
The right answer is not whether every astrophotographer needs a tracker. It is whether tracking solves the next documented constraint in your own imaging system.
Frequently Asked Questions
Can a beginner do astrophotography without a star tracker?
Yes. A tripod, wide lens, manual focus, short exposure, and multi-frame stacking can produce strong Milky Way, constellation, aurora, meteor, Moon, and star-trail images. A tracker is an upgrade when untracked star motion becomes the main limitation.
What focal length needs a star tracker?
There is no exact cutoff. Tracking becomes increasingly valuable as actual focal length, pixel density, exposure time, and output size increase. It is optional for many 14–20 mm nightscapes and strongly useful for common 50–200 mm deep-sky work.
Does a star tracker remove the need for stacking?
No. Stacking remains valuable for reducing random noise, rejecting flawed frames, increasing total integration, and improving faint detail. A tracker allows longer or more consistent sub-exposures; it does not replace total integration.
Can a star tracker photograph landscapes and stars together?
Yes, but a long tracked exposure keeps the stars sharp while blurring the stationary landscape. Many photographers capture a tracked sky and separate untracked foreground, then blend them with clear disclosure.
Is a star tracker enough for telescope astrophotography?
Sometimes for a very small refractor, but not always. Telescope focal length, complete payload, wind, guiding, balance, and automated target acquisition may justify a stronger equatorial mount.
Does polar alignment have to be perfect?
No alignment is literally perfect. It must be accurate enough for the focal length, exposure, pixel scale, target position, and final output. Wide lenses tolerate more error than telephoto lenses and telescopes.
Sources
Sources were checked August 19, 2026.
- iOptron — SkyGuider Pro Camera Mount Instruction Manual
- Sky-Watcher USA — Star Adventurer GTi User’s Manual
- Sky-Watcher — Star Adventurer Mini Product Manuals
- Nikon USA — Photographing the Night Sky: Star Trails
- Nikon USA — How to Photograph the Milky Way
- Nikon USA — Landscape Astrophotography With Short-Exposure Stacking
- NASA Night Sky Network — Introduction to Astro Imaging, Part 2
- Sky-Watcher USA — Star Adventurer 2i Photo Package
- Sky-Watcher USA — Star Adventurer Mini Pro Pack
- iOptron — User Manuals and Quick Start Guides
- Sky-Watcher USA — User Manual Library
- NASA Science — A Guide to Smartphone Astrophotography
More from Trackers Mounts & Filters
Tripod Buying Guide for Night Sky Photography
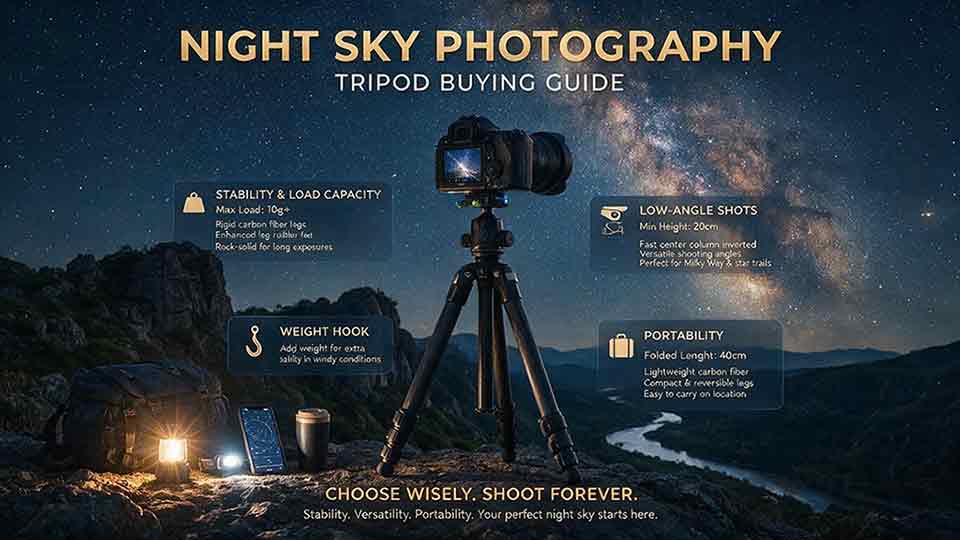
A tripod for night sky photography should be selected by stability, complete system load, working height, head security, terrain, wind exposure, and realistic carry weight rather than payload alone. This guide explains the difference between safely holding equipment and remaining steady during long exposures. It compares carbon fiber and aluminum, three-, four-, and five-section legs, center columns, twist and flip locks, ball and geared heads, leveling bases, quick-release systems, feet, and tracker-compatible platforms. Readers receive an illustrative complete-load calculation, a seven-question decision framework, six practical use scenarios, step-by-step setup guidance, troubleshooting, environmental maintenance advice, and a detailed buying checklist. The central recommendation is to choose the lightest tripod that remains dependable with the exact camera, lens, head, tracker, wind, and ground conditions in which it will actually be used.
Light Pollution Filters for Astrophotography: Do They Really Work?
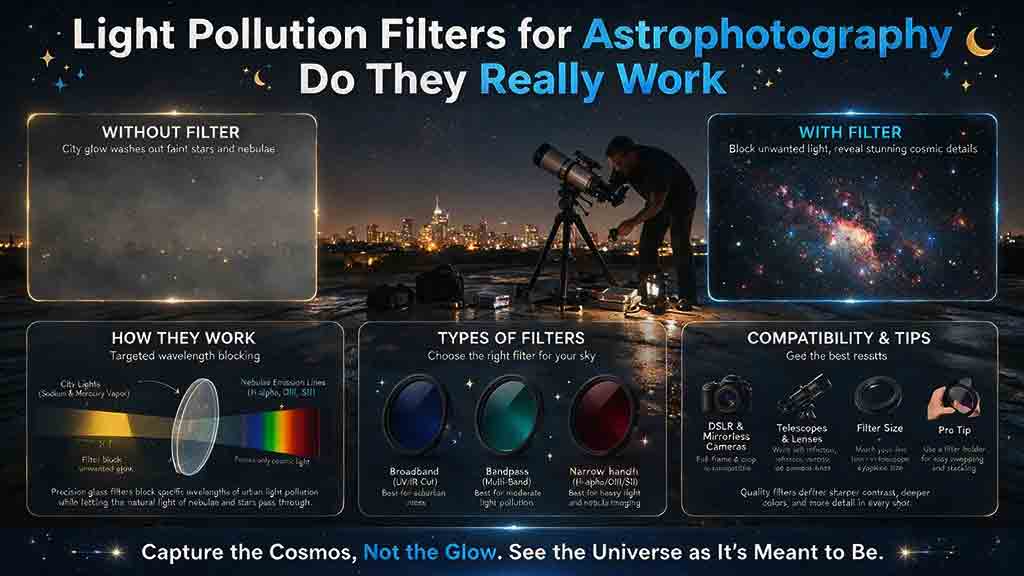
Light pollution filters can improve astrophotography, but their value depends on the target spectrum, local lighting, filter transmission curve, camera, and optical system. Dual-band and narrowband filters are most effective on emission nebulae because they isolate hydrogen-alpha, oxygen, and other narrow emission lines while rejecting much of the sky background. Broadband suppression filters offer smaller and less predictable gains on galaxies, reflection nebulae, star clusters, and Milky Way nightscapes, especially under broad-spectrum LED lighting. This guide compares filter categories, explains fast-optics passband shift, vignetting, focus changes, color casts, and halos, and provides an illustrative contrast and signal-to-noise calculation. Readers also receive a seven-question decision framework, matched A/B testing procedure, practical scenarios, troubleshooting, a complete buying checklist, and an essential warning that nighttime astrophotography filters are never safe solar filters.
How to Polar Align a Star Tracker
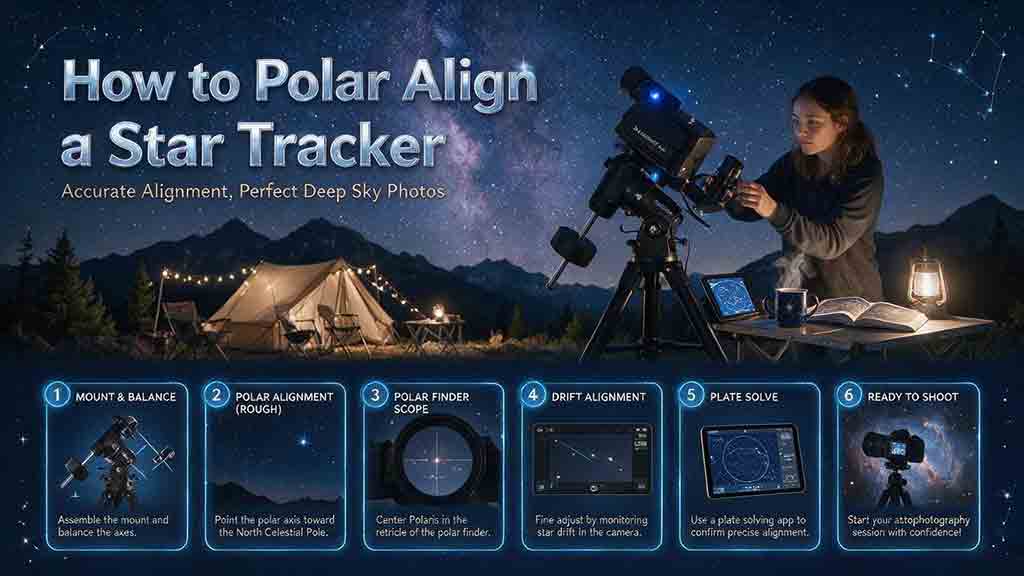
Polar alignment points a star tracker’s right-ascension axis toward the north or south celestial pole so the mount can follow the apparent motion of the sky. This guide explains how to prepare and balance the tracker, identify true north or south, set the wedge near local latitude, and refine alignment with an optical polar scope, model-specific reticle app, electronic polar camera, plate-solving routine, or drift method. Separate Northern and Southern Hemisphere instructions explain why Polaris must be offset from the north celestial pole and how the faint Octans pattern is used in the south. Readers also receive a three-pass workflow, method-selection table, exposure-escalation test, practical scenarios, safety and setup checklists, common mistakes, polar-scope calibration test, and detailed troubleshooting guidance. The article distinguishes polar alignment from GoTo star alignment, balancing, plate solving, and autoguiding.
Explore More Topics
Dedicated Astronomy Camera vs Regular Camera: What Is the Difference?
A dedicated astronomy camera is designed for telescope imaging through astronomy software and may provide regulated cooling, high-frame-rate readout, monochrome capture, filter-wheel integration, and FITS metadata. A regular DSLR or mirrorless camera is a self-contained general-purpose camera with a screen, battery, memory card, native lenses, autofocus, and daytime usefulness. This guide explains why neither category is universally better. It compares cooled deep-sky cameras, uncooled planetary cameras, guide cameras, monochrome and one-shot-color sensors, regular cameras, and specialized astrophotography DSLRs. Readers learn how cooling, dark current, H-alpha response, UV/IR filtering, sensor size, pixel scale, back focus, software, power, calibration, frame rate, and total system cost affect the decision. The article also includes calculation examples, use-case recommendations, a five-question selection process, a buying checklist, common mistakes, troubleshooting, and practical next steps.
How to Choose a Camera for Astrophotography
Choosing an astrophotography camera starts with the target, optical system, and workflow rather than megapixels or sensor size alone. This guide compares mirrorless and DSLR bodies, cooled one-shot-color cameras, cooled monochrome cameras, planetary cameras, and astronomy-modified models. Readers learn how sensor dimensions affect field of view, how pixel size and focal length determine image scale, and how cooling, quantum efficiency, read noise, full-well capacity, dynamic range, and frame rate should be interpreted. It also provides a color-versus-monochrome comparison, telescope compatibility and back-focus checks, software and driver requirements, a total-system-cost framework, five practical scenarios, troubleshooting, and a complete purchase checklist. The central recommendation is to choose the camera that fits the target, corrected image circle, mount, software, power system, processing workflow, and complete budget.
Best Focal Lengths for Milky Way Photography
For most untracked Milky Way landscapes, a 14–24mm full-frame-equivalent view offers the best balance of sky coverage, galactic scale, foreground context, and shutter-time tolerance. Wider 12–16mm views suit dramatic foregrounds and a large Milky Way arch, while 28–35mm makes the galactic center more prominent. Focal lengths of 40–50mm or longer are better for panoramas, stacking, or tracked high-detail images. This guide converts the recommendations for full-frame, 1.5× APS-C, 1.6× Canon APS-C, and Micro Four Thirds cameras. It explains shutter-time tradeoffs, crop-factor calculations, aperture and corner-performance limits, prime-versus-zoom choices, panorama planning, and tracker use. Readers also receive a three-question lens-selection method, real-world scenarios, a step-by-step lens test, a buying checklist, common mistakes, troubleshooting guidance, and practical recommendations without unsupported “best lens” claims.