How to Photograph Stars With an iPhone or Android Phone

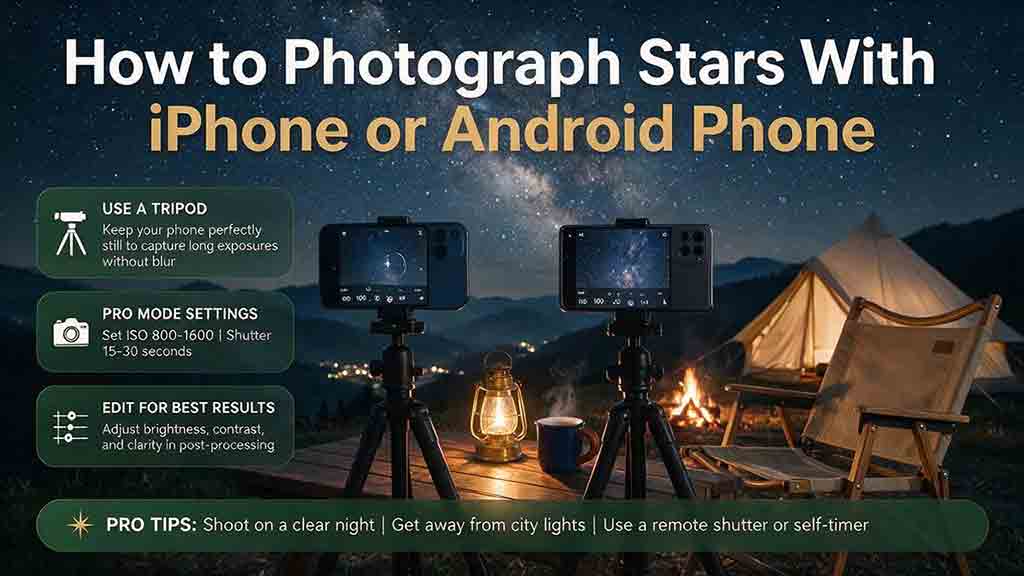
How to Photograph Stars With an iPhone or Android Phone
To photograph stars with an iPhone or Android phone, move away from bright lights, clean the main camera lens, secure the phone on a tripod, turn off the flash, and use Night mode, Astrophotography mode, or a manual camera mode. Focus on a distant star, use a timer, keep the phone untouched during capture, and review each image for focus, blur, and star trails before adjusting exposure.
Key Takeaways
- Stability matters more than maximum zoom: use a tripod or rigid support, a timer, and the phone’s main rear camera as the first setup.
- iPhone Night mode, Google Pixel Astrophotography, Samsung Expert RAW, and other Android camera systems use different controls; follow the exact phone and software version.
- Automated night modes often combine multiple frames, while manual modes expose shutter time, ISO, focus, and white balance more directly.
- Dark skies, clear weather, moon position, lens cleanliness, and accurate focus can improve results more than aggressive editing.
- Shoot several test frames and adjust one variable at a time; no single exposure setting works for every phone, lens, sky, or composition.
This guide explains how to photograph sharp stars, constellations, the Milky Way, and intentional star trails with a smartphone. It includes separate iPhone and Android workflows, the original SCOPE planning framework, an exposure-ladder test, a frame-stacking example, real-world scenarios, a decision tree, a field checklist, common mistakes, and troubleshooting guidance.
Method note: This guide is based on current Apple, Google, Samsung, NASA, and National Park Service documentation plus practical selection criteria rather than hands-on testing of every phone. NASA also publishes a broader educational guide for both Apple and Android smart devices. (NASA Science) Camera features, menu names, lens restrictions, RAW support, and exposure limits vary by model, region, operating-system version, and camera-app version.
Quick Navigation
- What a Phone Can Capture
- iPhone vs Android Features
- Basic Setup
- Automatic Night Mode Workflow
- Manual Camera Workflow
- Focus and Exposure
- Milky Way and Constellations
- Star Trails
- SCOPE Framework
- Troubleshooting
- FAQ
What Kinds of Star Photos Can a Phone Capture?
A modern phone can capture more than a black sky with a few bright dots, but realistic expectations matter.
Depending on the phone, location, and technique, possible results include:
- Bright stars and recognizable constellations.
- Stars above a landscape or city silhouette.
- The Milky Way from a dark site.
- Meteor streaks when timing and luck cooperate.
- Intentional star trails.
- Night-sky time-lapse clips.
- The Moon and bright planets through a telescope eyepiece.
- RAW files for more flexible editing on supported devices.
NASA identifies steadiness, locked focus, longer exposure, and processing as core smartphone astrophotography techniques. NASA also recommends beginning with realistic targets and practicing before buying more equipment. (NASA Science)
What Will a Phone Usually Not Capture Easily?
A single unsupported phone exposure will not reproduce a processed observatory image of a faint galaxy or colorful nebula.
Results are limited by:
- Small lens aperture.
- Small sensor area.
- Computational processing.
- Fixed or limited lens choices.
- Light pollution.
- Atmospheric conditions.
- Heat and battery limits.
- Exposure and RAW restrictions.
- Digital zoom.
- The observer’s ability to confirm focus on a small screen.
A phone can still produce an attractive and scientifically meaningful image of the visible night sky. The goal should be a clear, repeatable result rather than an imitation of a space-telescope image.
How Do iPhone and Android Star Photography Differ?
The largest difference is not simply iOS versus Android. The real difference is the camera hardware and software available on the exact device.
Current Feature Comparison
| Phone or camera system | Typical built-in approach | Useful strength | Important limitation |
|---|---|---|---|
| Supported iPhone | Automatic Night mode with adjustable available exposure options | Simple operation and multi-frame processing | Manual shutter, ISO, and focus control may require a third-party app |
| Supported Pixel | Night Sight and Astrophotography mode when the phone is sufficiently still | Dedicated night-sky workflow and automatic processing | Availability and lens or zoom restrictions vary by model |
| Supported Samsung Galaxy | Night mode, Pro mode, or Expert RAW with Astrophoto on supported devices | Direct ISO, shutter, white-balance, focus, and RAW options on compatible models | Expert RAW and Astrophoto are not available on every Galaxy phone |
| Other Android phones | Night mode, Pro mode, RAW, or third-party manual camera app | Wide range of manual options on some models | Controls, file formats, exposure limits, and processing vary widely |
Apple states that supported iPhone models activate Night mode in low light and can offer selectable exposure options, with a tripod recommended for greater detail. (Apple) Google documents a dedicated Pixel Astrophotography workflow that activates when a supported device is steady in Night Sight. (Google) Samsung’s Expert RAW documentation describes direct control over ISO, shutter speed, white balance, exposure, and focus, with Astrophoto support limited to compatible devices. (Samsung)
Why Should You Check the Exact Phone?
Two phones released in the same year may differ in:
- Sensor size.
- Main-lens aperture.
- Optical stabilization.
- Night-mode processing.
- Manual shutter limit.
- RAW output.
- Astrophotography detection.
- Ultrawide low-light performance.
- Telephoto availability.
- Tripod detection.
- Maximum capture duration.
- File size and thermal behavior.
Do not assume that instructions for a Pixel, Galaxy Ultra, or iPhone Pro apply to a lower-cost or older model.
What Do You Need Before Photographing Stars?
The minimum useful setup is a phone, stable support, clear sky, and enough time to test focus and exposure.
Essential Equipment
- A phone with Night mode, Astrophotography mode, or manual camera controls.
- A stable tripod and secure phone clamp, or a rigid safe surface.
- A timer, remote shutter, watch control, voice command, or another hands-free trigger.
- A clean microfiber cloth suitable for the camera lens cover.
- Enough battery and storage.
- A safe, legal observing location.
- Warm clothing and a dim light for setup.
- A weather and sky-planning source.
NASA recommends a tripod or stable improvised support and a delayed shutter to reduce vibration. (NASA Science) The National Park Service recommends planning around weather, moon phase, target direction, light pollution, access, and local regulations. (U.S. National Park Service)
Which Lens Should You Use?
Begin with the main 1× rear camera.
The main camera is commonly the strongest low-light camera on a phone. An ultrawide lens can show more sky but may collect less useful light or produce softer corners. A telephoto lens shows a smaller sky area and can make shake, focus error, and star movement more obvious.
Avoid pinch-to-zoom digital magnification for wide star fields. Digital zoom normally crops and enlarges data rather than collecting additional light.
Should You Use a Tripod?
Yes, whenever practical.
Phone night modes may capture several frames over multiple seconds. Hand movement can blur stars, weaken frame alignment, or cause the phone to shorten the available capture.
A tripod should be:
- Stable on firm ground.
- Low enough to resist wind when possible.
- Clear of traffic and walking paths.
- Tight enough to hold the intended angle.
- Positioned so the clamp does not press buttons.
- Tested before the site becomes fully dark.
Do not balance a phone on a moving vehicle, unstable railing, cliff edge, or restricted structure.
How Should You Plan the Location and Time?
Choose a clear, safe location with the darkest practical sky and a composition that remains accessible after dark.
Check These Conditions
- Cloud cover.
- Moon phase.
- Moonrise and moonset.
- Target direction.
- Artificial lighting.
- Wind.
- Temperature and dew.
- Road, park, and property access.
- Wildlife or terrain risks.
- Phone signal or offline navigation needs.
The National Park Service notes that clouds, moonlight, and artificial light affect how many stars are visible. A new-moon period, a time before moonrise, or a period after moonset can make faint stars easier to record, although moonlight can also illuminate a useful foreground. (U.S. National Park Service)
Is a Dark-Sky Site Always Required?
No. Bright stars, constellations, and star trails can be photographed from suburbs or cities when the composition is chosen carefully.
A darker site becomes more important for:
- The Milky Way.
- Dense star fields.
- Faint meteors.
- Low-contrast airglow.
- Longer exposures without a washed-out sky.
At an urban site, use a darker direction of the sky, block direct lamps, avoid reflective foregrounds, and lower exposure before highlights clip.
How Do You Photograph Stars With an Automatic Night Mode?
Use this workflow when the phone’s default camera app provides Night mode or a dedicated Astrophotography mode.
Step-by-Step Automatic Workflow
- Clean the camera lens. Fingerprints can turn bright stars and lamps into large halos.
- Select the main rear camera. Start at the native 1× view unless the phone documentation recommends another supported lens.
- Turn off the flash. A flash cannot illuminate stars and may brighten dust, people, or foreground objects.
- Disable unnecessary motion features. Live-photo or motion-photo features may conflict with some night modes; follow the phone’s instructions.
- Mount the phone securely. Wait for the view to stop moving.
- Choose Night mode or Astrophotography mode. Some phones activate it automatically after detecting darkness and stability.
- Frame a bright star, constellation, or Milky Way region. Include a foreground only when it improves the composition.
- Set or confirm focus. Tap a distant bright star or light, then lock focus if the app allows.
- Choose the longest available automated exposure only after the phone is stable.
- Use a timer or remote trigger. Do not touch the phone while it is collecting frames.
- Wait for processing to finish. Moving the phone immediately can interrupt capture or processing.
- Zoom into the saved photo and inspect the stars. Check focus, trails, shake, noise, and clipped highlights.
- Repeat with one change. Adjust framing, exposure preference, brightness, or focus—not every setting at once.
How Does iPhone Night Mode Work for Stars?
On supported iPhone models, Night mode activates automatically in low light. Apple allows the user to select among the available exposure options and recommends a tripod for more detailed Night mode images. (Apple)
Practical iPhone workflow:
- Open the built-in Camera app.
- Use the main rear camera first.
- Confirm that the Night mode icon is active.
- Mount the iPhone on a tripod.
- Select the longest exposure option currently offered by the phone when appropriate.
- Align the stabilization crosshairs if they appear.
- Use a timer or remote shutter.
- Keep the iPhone still until capture finishes.
- Review star shape at high zoom.
The available time is determined by the model, lens, light level, and detected stability. Do not promise a fixed maximum exposure for every iPhone.
How Does Pixel Astrophotography Work?
Google instructs users to enter Night Sight, point a supported Pixel at the sky, and place it on a stand, tripod, or other steady support. When the device is sufficiently still and conditions are suitable, the shutter changes to Astrophotography mode. (Google)
Practical Pixel workflow:
- Move to a dark area.
- Open Pixel Camera and select Night Sight.
- Mount or place the Pixel on a stable support.
- Wait for Astrophotography mode to become available.
- Start the countdown and do not touch the phone.
- Keep the phone still until the capture completes.
- Review the processed image before changing composition.
Google notes that model-specific restrictions can apply, including restrictions on supported zoom settings. Check the current Pixel Camera help page for the exact device.
How Does Samsung Astrophoto Work?
On supported Galaxy devices, Expert RAW can save JPEG and RAW files and expose controls such as ISO, shutter speed, white balance, exposure, and focus. Samsung also limits Astrophoto availability to compatible devices and software versions. (Samsung)
Practical Samsung workflow:
- Confirm that Expert RAW supports the phone.
- Install or update Expert RAW through the official Galaxy Store.
- Mount the phone and select a supported rear lens.
- Open Astrophoto when available.
- Use the sky guide only as a planning aid; confirm the real composition.
- Capture both JPEG and RAW when storage permits.
- Review sharpness before starting a long sequence.
Other Android manufacturers use different names and procedures. Check the official camera guide rather than assuming Samsung steps are universal.
How Do You Photograph Stars With Manual Controls?
Use manual controls when the built-in automatic mode is unavailable, inconsistent, or too restrictive.
Start With an Exposure Ladder
Instead of searching for one “perfect” setting, make a controlled series.
A practical starting sequence is:
- Fix the phone on a tripod.
- Use the main rear lens.
- Set focus near infinity, then refine it on a bright star.
- Choose a fixed white balance if the app permits.
- Start with an exposure of a few seconds.
- Take a second image with a longer exposure.
- Continue through a simple ladder, such as approximately 2, 4, 8, and 15 seconds when the app and sky allow.
- Review each frame for star trails, clipping, noise, and sky brightness.
- Choose the longest exposure that preserves the star shape you want.
- Adjust ISO only after choosing a useful shutter duration.
The exposure ladder is a testing method, not a claim that every phone supports those values or produces sharp stars at them. The National Park Service likewise recommends manual focus, a delayed shutter, and exposure experimentation for night-sky photography. (U.S. National Park Service)
How Should You Adjust ISO?
ISO does not make the lens collect more light. It changes how the camera or processing pipeline amplifies and records the signal.
Use the lowest ISO that produces a usable histogram and visible stars at the selected shutter time. Increase ISO when stars remain too weak, but expect more noise and reduced highlight headroom.
Avoid changing shutter time and ISO simultaneously during the first tests. One-variable adjustments make the result easier to understand.
Should You Use RAW?
Use RAW when the phone supports it and you are willing to edit larger files.
Apple states that Apple ProRAW retains more image information and gives greater control over exposure, color, and white balance, while producing larger files. (Apple) Samsung Expert RAW saves JPEG and RAW files on compatible Galaxy devices. (Samsung) Google documents JPEG + RAW capture and RAW viewing on supported Pixel devices. (Google)
RAW is useful for:
- White-balance correction.
- Shadow recovery.
- Noise reduction.
- Color adjustment.
- Stacking.
- Avoiding repeated lossy edits.
RAW is not automatically sharper or less noisy. It requires processing and may not include the same final computational result as the phone’s processed JPEG or HEIC.
How Do You Focus on Stars With a Phone?
Focus is successful when the smallest stars look like compact points instead of soft disks, streaks, or halos.
Automatic Focus Method
- Place a bright star or distant light near the center.
- Tap the subject.
- Wait for focus to settle.
- Lock autofocus and exposure if the app supports it.
- Reframe carefully.
- Take a test image.
- Zoom into the saved file, not only the live preview.
NASA recommends focusing on a distant bright star or light and locking focus when the app provides the option. (NASA Science)
Manual Focus Method
If the app exposes a focus slider:
- Move the slider toward infinity.
- Do not assume the end stop is exact infinity focus.
- Take a test image.
- Move the focus slightly in one direction.
- Repeat until stars are smallest.
- Lock or record the successful setting.
Temperature, lens switching, and software updates can change the best position.
Why Do Stars Look Like Large Blobs?
Common causes include:
- Fingerprints.
- Dew or condensation.
- Missed focus.
- Camera movement.
- Overexposure.
- Bright haze.
- Thin cloud.
- Internal lens reflections.
- A protective lens cover that degrades image quality.
Clean only the external lens cover with a suitable method. Do not use abrasive materials or liquid that can enter the phone.
How Do You Photograph the Milky Way and Constellations?
Use the widest practical composition that still provides good low-light quality, and place the Milky Way or constellation where it is actually visible during the chosen season and time.
Milky Way Workflow
- Plan when the bright Milky Way region is above the horizon.
- Choose a location with limited light in that direction.
- Arrive before darkness to frame the foreground safely.
- Use the main camera or the best-supported wide camera.
- Mount the phone in landscape orientation.
- Use automated Astrophotography mode or the manual exposure ladder.
- Keep direct lamps outside the frame.
- Capture several frames without moving the phone.
- Save RAW files when supported.
- Process with moderate contrast, color, and noise reduction.
The National Park Service recommends planning around target direction, weather, moon phase, and light pollution before a night photography session. (U.S. National Park Service)
Constellation Workflow
Constellations are easier because their brightest stars can be photographed under less-than-perfect skies.
Use:
- A shorter exposure when city glow is strong.
- A wider field that preserves the recognizable pattern.
- A foreground or horizon for orientation.
- Minimal digital zoom.
- A star-chart app before capture, then dim the display during the session.
Do not add artificial stars or replace the sky without clearly disclosing that the image is a composite.
How Do You Create Star-Trail Photos With a Phone?
A star-trail photo intentionally records the apparent motion of stars caused by Earth’s rotation.
The most flexible phone method is usually a sequence of many frames rather than one extreme exposure.
Star-Trail Sequence Workflow
- Mount the phone securely.
- Disable automatic lens switching when possible.
- Lock focus, white balance, and exposure.
- Use an interval or time-lapse feature that preserves suitable frames.
- Capture continuously without moving the tripod.
- Inspect early frames for dew, clouds, aircraft, or accidental light.
- Combine the aligned sequence in software that supports star-trail blending.
- Retain the original frames before exporting the final image.
A longer sequence creates longer trails, but clouds, battery depletion, heat, storage, and interruptions become more likely.
Frame-Count Example
Suppose a phone captures:
- One usable frame every 10 seconds.
- A 30-minute sequence.
- No lost intervals.
The theoretical maximum frame count is:
30 minutes × 60 seconds ÷ 10 seconds = 180 frames
This is a planning example. Processing delays, interval gaps, dropped frames, phone temperature, and storage can reduce the actual number.
Where Should You Point?
- Toward a celestial pole: stars form curved circles around the pole.
- East or west: trails tend to appear more diagonal.
- Toward the celestial equator: apparent movement across the frame is often more pronounced.
Use a star chart or planetarium app to plan the direction. Do not enter unsafe or restricted terrain just to obtain a specific alignment.
Should You Stack Multiple Star Photos?
Stacking can reduce random noise and strengthen faint signal when the frames are aligned correctly.
A basic workflow is:
- Capture multiple images without changing framing or focus.
- Remove frames affected by shake, cloud, aircraft, or bright light.
- Align the stars.
- Combine the remaining frames with suitable averaging or median methods.
- Adjust color and contrast after stacking.
Simple Frame-Retention Example
If you capture 24 frames and reject 6 because of blur or cloud:
24 total frames − 6 rejected frames = 18 usable frames
The original value is not the exact number of frames. It is the review process: capture enough material to reject poor frames without losing the entire session.
Automated phone night modes may already align and combine multiple exposures internally. Separate stacking is most useful when the phone saves individual frames or RAW files that can be processed externally.
How Can You Use the SCOPE Smartphone Astrophotography Framework?
The SCOPE framework is an original method for planning a phone star photograph before changing camera settings.
S — Sky and Safety
Check:
- Clouds.
- Moon.
- Light pollution.
- Target direction.
- Wind.
- Dew.
- Legal access.
- Terrain.
- Wildlife.
- Traffic.
- Offline navigation.
- A safe return route.
A technically ideal sky is not useful if the site is unsafe or closed.
C — Camera Capability
Confirm:
- Night mode.
- Dedicated Astrophotography mode.
- Manual shutter control.
- Manual focus.
- RAW support.
- Lens restrictions.
- Timer or remote trigger.
- Interval capture.
- Storage.
- Battery condition.
- Operating-system and app compatibility.
Build the workflow around the phone you have, not around instructions written for another model.
O — Optics and Orientation
Choose:
- Main, ultrawide, or telephoto lens.
- Landscape or portrait orientation.
- Foreground placement.
- Horizon level.
- Lens cleanliness.
- Phone angle.
- Tripod height.
- Whether direct lights can enter the lens.
Start with the main camera and a simple composition before adding complexity.
P — Power and Processing
Plan:
- Battery capacity.
- Cold-weather performance.
- Power bank and cable.
- Phone temperature.
- Free storage.
- RAW file size.
- Backup.
- Editing workflow.
- Stacking workflow.
- Final export format.
Do not leave a power bank or phone where moisture, overheating, or cable tension creates a hazard.
E — Exposure Evaluation
After every test, inspect:
- Star size.
- Star shape.
- Trails.
- Focus.
- Foreground sharpness.
- Sky brightness.
- Clipped lamps.
- Noise.
- Color.
- Lens flare.
- Dew.
- Composition.
Change one variable and repeat.
What Does the Smartphone Star-Photo Decision Tree Recommend?
Does the built-in camera have a dedicated Astrophotography mode?
- Yes: stabilize the phone and start with that mode.
- No: continue.
Does the phone offer Night mode with a tripod-sensitive exposure?
- Yes: use Night mode, maximum available stability, and a timer.
- No: continue.
Does a built-in Pro or manual mode allow shutter, ISO, and focus control?
- Yes: use the exposure ladder.
- No: consider a reputable compatible manual camera app.
Are the stars sharp but the sky too dark?
- Yes: lengthen exposure or raise ISO gradually.
- No: continue.
Are stars stretched or doubled?
- Yes: shorten exposure, improve stability, or verify processing.
- No: continue.
Is the sky bright orange or gray?
- Yes: reduce exposure, change direction, wait for the Moon to set, or move to a darker site.
- No: continue.
Is focus inconsistent?
- Yes: switch to manual or locked focus and repeat tests.
- No: continue.
Do you want longer trails instead of point-like stars?
- Yes: use a locked interval sequence and combine frames.
- No: preserve the sharpest exposure.
What Do Real-World Scenarios Suggest?
Scenario 1: Recent iPhone on a Tripod
Night mode activates automatically, and the phone offers a longer available exposure after detecting stability.
Use the main camera, select the longest appropriate Night mode option, trigger with a timer, and inspect the saved stars before repeating. Use ProRAW only when the model supports it and editing is planned.
Scenario 2: Supported Pixel at a Dark Site
The phone is placed on a tripod in Night Sight and changes to Astrophotography mode.
Do not touch the phone during the countdown or capture. Review the result before changing the lens or zoom because model-specific restrictions may apply.
Scenario 3: Samsung Galaxy With Expert RAW
The user wants manual control and a RAW file.
Confirm that Expert RAW and Astrophoto support the exact model. Lock the composition, test focus, save both processed and RAW versions, and monitor storage.
Scenario 4: Budget Android With Basic Night Mode
The camera offers limited manual control and produces a noisy city sky.
Use the main lens, tripod, timer, and shorter Night mode exposure. Photograph a bright constellation or star trail before attempting the Milky Way.
Scenario 5: Phone Through a Telescope Eyepiece
The goal is a bright star, the Moon, or a planet through an existing telescope.
Use a secure phone-to-eyepiece adapter rather than holding the phone by hand. Center the eyepiece exit pupil, reduce exposure for bright targets, and rebalance the telescope if the adapter adds significant weight.
Scenario 6: Windy Coastal Location
The phone moves slightly during every long capture.
Lower the tripod, shield it without touching it, add safe ballast to the tripod if the manufacturer permits, shorten exposures, and take more frames for later selection.
What Common Smartphone Astrophotography Mistakes Should You Avoid?
Using Digital Zoom
Digital zoom enlarges noise and movement without collecting more light.
Touching the Phone During Capture
Even a small tap can blur stars or disrupt multi-frame alignment. Use a timer or remote trigger.
Leaving the Lens Dirty
A fingerprint can mimic fog, cloud, poor focus, or severe lens flare.
Assuming Infinity Focus Is Always at the Slider End
Some apps and phones focus beyond the best star position. Confirm with test frames.
Changing Every Setting at Once
You cannot identify what improved or damaged the image. Use an exposure ladder and change one variable.
Using the Flash
The flash cannot illuminate stars. It may only brighten nearby dust, people, or foreground objects.
Expecting the Screen Preview to Show Final Sharpness
The live view is small, bright, and processed differently. Inspect the saved file at high zoom.
Overediting the Sky
Excessive noise reduction removes stars, while aggressive clarity produces halos and artificial texture.
Ignoring Moonlight
Moonlight can erase faint Milky Way contrast, but it can also illuminate a useful foreground. Plan rather than assuming every Moon is harmful.
Installing an Unknown Camera App Without Checking Privacy
A camera app may request access to location, files, microphone, network, or cloud services. Review the developer, permissions, privacy policy, cost, and device compatibility.
How Can You Troubleshoot Common Smartphone Star Photo Problems?
| Problem | Likely causes | First checks |
|---|---|---|
| No stars appear | Sky too bright, exposure too short, wrong lens, cloud | Use the main lens, darken the site, and lengthen exposure gradually |
| Stars are soft circles | Missed focus, dirty lens, dew, overexposure | Clean the lens cover, refocus, and reduce exposure |
| Stars are short lines | Exposure too long, tripod movement, wind | Shorten exposure and improve stability |
| Stars appear doubled | Multi-frame alignment failure or movement | Use a firmer tripod and avoid touching the phone |
| Sky is orange or gray | Light pollution, moonlight, excessive exposure | Reduce exposure or move to a darker direction |
| Bright lamps create large streaks | Fingerprints, internal reflections, direct light | Clean the lens and reframe away from lamps |
| Night mode will not activate | Scene not dark enough, flash enabled, unsupported lens or model | Check the official camera instructions and available modes |
| Pixel Astro mode will not appear | Phone not still, sky too bright, unsupported configuration | Use a tripod, wait in Night Sight, and verify model restrictions |
| RAW option is missing | Unsupported model, lens, mode, or app | Check current official RAW support |
| Phone overheats | Long processing, charging, warm case, high ambient temperature | Pause capture, remove only a nonessential case, and follow device temperature warnings |
| Battery falls quickly | Cold, long exposures, screen brightness, processing | Lower screen brightness and use a compatible power source safely |
| Foreground is sharp but stars are not | Focus set too near | Refocus on a star and consider a separate foreground exposure |
| Stars are sharp but foreground is black | Dynamic range exceeds one exposure | Add controlled foreground light only where legal, or blend clearly disclosed exposures |
| Condensation forms on the lens | Dew, breath, temperature transition | Stop wiping repeatedly, protect from breath, and let moisture clear safely |
Stop the session if the phone, battery, cable, or power bank becomes unusually hot, damaged, wet internally, swollen, or unstable on the support.
How Should You Edit Smartphone Star Photos?
Edit to reveal captured information, not to disguise a failed exposure.
A restrained workflow is:
- Preserve the original file.
- Correct lens profile or distortion when supported.
- Adjust white balance.
- Lower clipped highlights.
- Raise shadows cautiously.
- Set black point without erasing faint stars.
- Apply moderate noise reduction.
- Add restrained contrast and dehaze.
- Correct color casts.
- Sharpen only after noise control.
- Crop and level.
- Export a separate final copy.
Apple ProRAW, Samsung Expert RAW, and supported Pixel RAW files provide more editing flexibility but require more storage and processing. (Samsung) (Apple) (Google)
Clearly disclose:
- Sky replacement.
- Composite foreground.
- Multiple exposure blending.
- Star-trail stacking.
- Generative additions or removals.
- AI-based reconstruction that materially changes the scene.
Which Method Should You Use?
Use iPhone Night mode when the built-in Camera app offers a stable tripod-sensitive exposure and you want the simplest workflow.
Use Pixel Astrophotography mode when the supported Pixel recognizes a steady dark-sky setup and you want automated multi-frame processing.
Use Samsung Expert RAW or another documented Android Pro mode when you want direct shutter, ISO, focus, white-balance, and RAW control.
Use an exposure ladder when the automatic result is inconsistent or the phone has no dedicated astronomy mode.
Use multiple aligned frames when noise reduction and faint-star signal matter, and use an interval sequence when the goal is intentional star trails.
The practical next step is to clean the lens, secure the phone, choose the main camera, photograph one bright constellation with a timer, and review focus before attempting a longer Milky Way or star-trail sequence.
Frequently Asked Questions
Can every iPhone photograph stars?
Every iPhone camera can record sufficiently bright stars under suitable conditions, but Night mode, ProRAW, exposure options, lens performance, and tripod-sensitive processing vary by model. Check the current Apple camera guide for the exact iPhone.
Does every Android phone have Astrophotography mode?
No. Pixel, Samsung, and other Android manufacturers provide different night and manual modes. Some phones have dedicated Astrophotography or Astrophoto features, while others require Pro mode or a compatible third-party app.
What is the best shutter speed for phone star photos?
There is no universal best value. Start with a few seconds, review star shape and sky brightness, then lengthen or shorten the exposure. Phone lens angle, sensor, processing, stabilization, direction, and desired trail length all affect the result.
Should I use RAW or the processed phone photo?
Use both when the phone allows it. The processed image may contain strong computational noise reduction and frame blending, while RAW provides more editing control. Compare the results rather than assuming one is always superior.
Why can my phone photograph more stars than I can see?
A phone can collect light over several seconds and combine multiple frames, while the eye sees continuously without storing light in the same way. Processing can also increase contrast and reveal faint recorded stars.
Can I photograph stars through a telescope with a phone?
Yes, but afocal phone-through-eyepiece photography is easier for the Moon and bright planets than for wide star fields. Use a secure adapter, align the camera with the eyepiece exit pupil, and rebalance the telescope when necessary.
Sources
The following sources were accessed on July 30, 2026. Camera features, supported models, app availability, exposure behavior, file formats, and menu names can change.
- NASA Science, “Astrophotography With Your Smartphone,” steadiness, focus lock, exposure, processing, and beginner expectations. NASA Science
- Apple Support, “Take Night mode photos with your iPhone camera,” automatic Night mode, available exposure controls, movement indicators, and tripod recommendation. Apple
- Google Pixel Camera Help, “Take photos in low light or at night on your Pixel phone or tablet,” Night Sight, Astrophotography mode, stability, timer, and model restrictions. Google
- Samsung Support, “Take RAW photos on your Samsung Galaxy,” Expert RAW, Astrophoto availability, JPEG/RAW capture, and manual controls. Samsung
- U.S. National Park Service, “The Unique Photography Techniques That Help Preserve Spectacular Night Skies,” planning for weather, moon phase, target direction, light pollution, access, and rules. U.S. National Park Service
- U.S. National Park Service, “Astronomy,” clear-sky, moonlight, night-vision, and responsible stargazing guidance. U.S. National Park Service
- Apple Support, “Take Apple ProRAW photos with your iPhone camera,” supported-device RAW capture, editing flexibility, and larger files. Apple
- Google Pixel Help, “Edit a photo or video on your Pixel phone or tablet,” JPEG + RAW capture and RAW viewing on supported devices. Google
- NASA Science, “A Guide to Smartphone Astrophotography,” educational guide for Android and Apple smart devices. NASA Science
- U.S. National Park Service, “How to Photograph Acadia’s Night Skies,” tripod, manual focus, timer, exposure experimentation, and night-sky composition guidance. U.S. National Park Service
Editorial method: Technical and software claims were checked against the listed sources. No hands-on test of every iPhone or Android device is claimed.
More from Smartphone Astrophotography
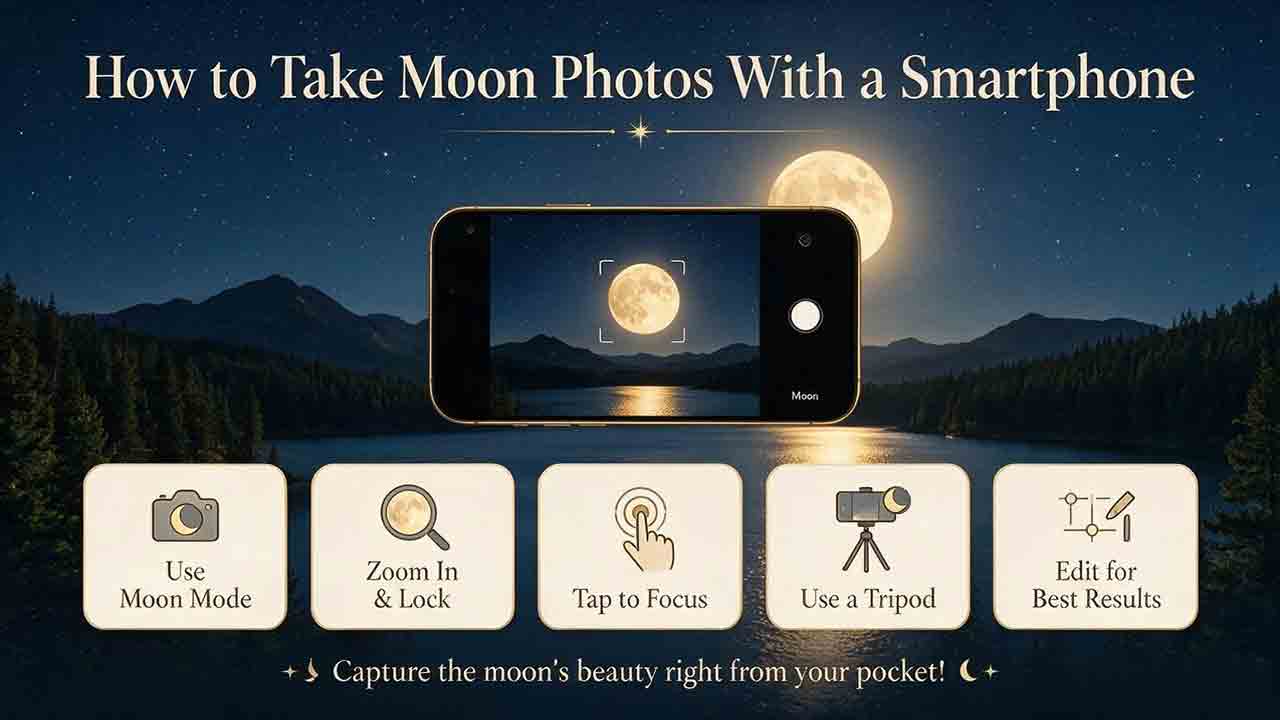
How to Take Moon Photos With a Smartphone
Clear smartphone Moon photos depend on real image scale, stable support, accurate focus, and reduced exposure rather than maximum digital zoom or a long Night-mode capture. This guide explains how to photograph the Moon with a phone alone, on a tripod, or through a telescope eyepiece using an afocal smartphone adapter. Readers learn how lunar phase and the terminator affect visible detail, how to choose between optical and digital zoom, how to lock focus and exposure, and how to prevent white disks, blur, vignetting, drift, and color fringes. It also provides practical settings principles, telescope magnification examples, still-versus-video guidance, frame-stacking basics, three real-world workflows, restrained editing recommendations, and a complete field checklist. The central recommendation is to start at low magnification, preserve lunar highlights, capture multiple frames, and keep original files.
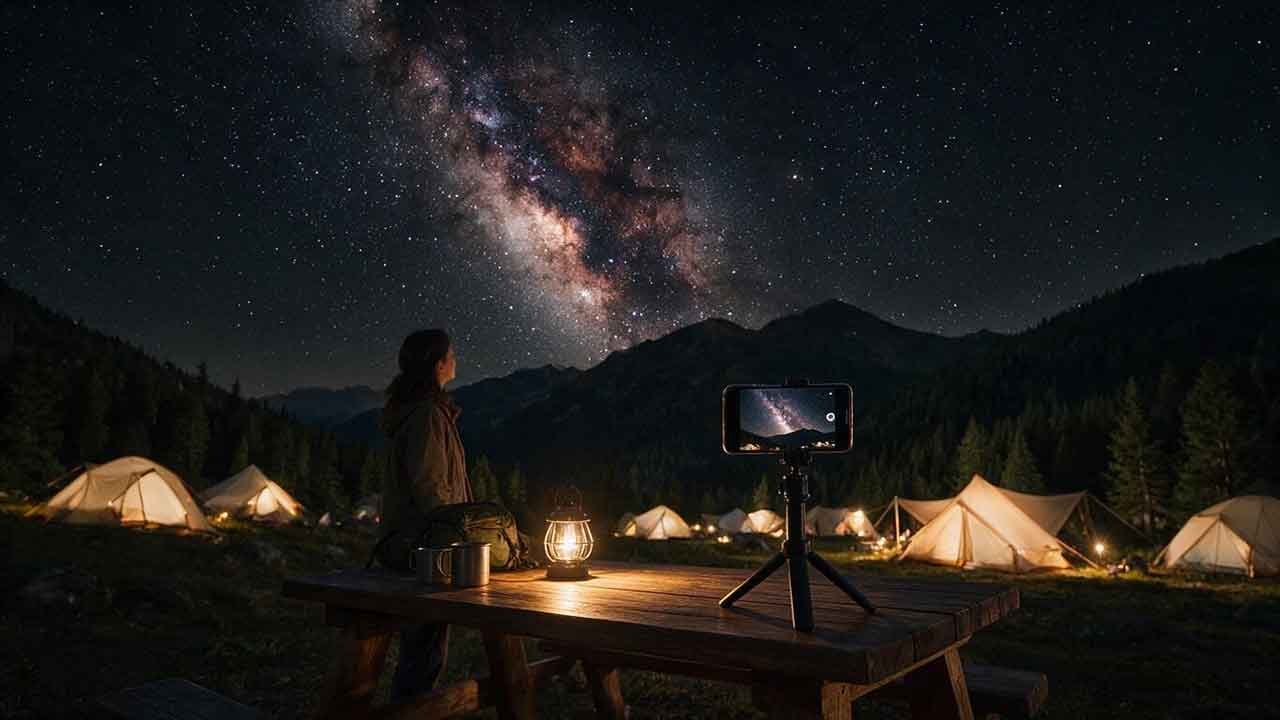
Can a Smartphone Photograph the Milky Way?
Yes, a supported smartphone can photograph the Milky Way when the galactic band is above the horizon, the sky is dark and clear, and the phone remains stable during a long or multi-frame capture. This guide explains how to determine whether the Milky Way will be visible, how moonlight and light pollution affect contrast, and how iPhone Night mode, Google Pixel Astrophotography, Samsung Expert RAW, and other Android camera systems differ. Readers receive separate device workflows, a Milky Way readiness scorecard, an exposure-testing table, focus and composition instructions, RAW and processed-file guidance, point-star stacking and storage calculations, a decision tree, real-world scenarios, a complete field checklist, common mistakes, and troubleshooting steps. The article avoids universal camera settings and does not claim that every phone was tested.
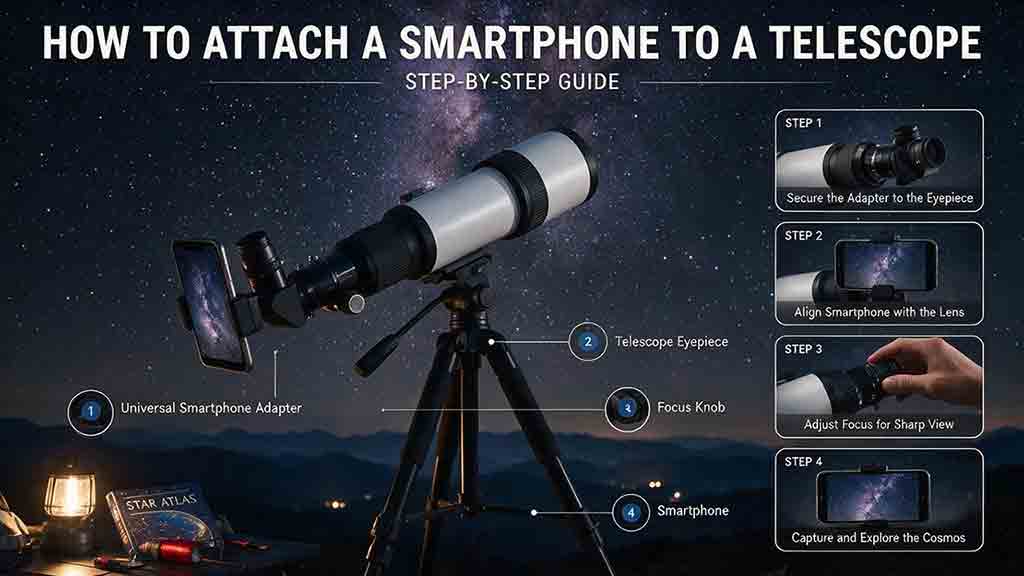
How to Attach a Smartphone to a Telescope
Attaching a smartphone to a telescope requires more than centering a camera over an eyepiece. The phone, adapter, eyepiece, focuser, diagonal, mount, and tripod form one mechanical load chain that must remain secure and balanced. This guide explains afocal imaging, exit pupil, eye relief, vignetting, adapter types, phone and eyepiece compatibility, active-camera selection, low-power eyepiece choice, three-axis alignment, telescope rebalancing, focus, exposure, and safe removal. It provides step-by-step instructions for refractors, Dobsonians, and diagonal-equipped telescopes, plus real-world Moon and Jupiter workflows, an adapter decision framework, troubleshooting for black circles, blur, lens switching, slipping, and focus failure, and a complete attachment checklist. The central recommendation is to align at low power, support the phone during every clamp adjustment, and verify the entire load path before capture.
Explore More Topics
Dedicated Astronomy Camera vs Regular Camera: What Is the Difference?
A dedicated astronomy camera is designed for telescope imaging through astronomy software and may provide regulated cooling, high-frame-rate readout, monochrome capture, filter-wheel integration, and FITS metadata. A regular DSLR or mirrorless camera is a self-contained general-purpose camera with a screen, battery, memory card, native lenses, autofocus, and daytime usefulness. This guide explains why neither category is universally better. It compares cooled deep-sky cameras, uncooled planetary cameras, guide cameras, monochrome and one-shot-color sensors, regular cameras, and specialized astrophotography DSLRs. Readers learn how cooling, dark current, H-alpha response, UV/IR filtering, sensor size, pixel scale, back focus, software, power, calibration, frame rate, and total system cost affect the decision. The article also includes calculation examples, use-case recommendations, a five-question selection process, a buying checklist, common mistakes, troubleshooting, and practical next steps.
How to Choose a Camera for Astrophotography
Choosing an astrophotography camera starts with the target, optical system, and workflow rather than megapixels or sensor size alone. This guide compares mirrorless and DSLR bodies, cooled one-shot-color cameras, cooled monochrome cameras, planetary cameras, and astronomy-modified models. Readers learn how sensor dimensions affect field of view, how pixel size and focal length determine image scale, and how cooling, quantum efficiency, read noise, full-well capacity, dynamic range, and frame rate should be interpreted. It also provides a color-versus-monochrome comparison, telescope compatibility and back-focus checks, software and driver requirements, a total-system-cost framework, five practical scenarios, troubleshooting, and a complete purchase checklist. The central recommendation is to choose the camera that fits the target, corrected image circle, mount, software, power system, processing workflow, and complete budget.
Best Focal Lengths for Milky Way Photography
For most untracked Milky Way landscapes, a 14–24mm full-frame-equivalent view offers the best balance of sky coverage, galactic scale, foreground context, and shutter-time tolerance. Wider 12–16mm views suit dramatic foregrounds and a large Milky Way arch, while 28–35mm makes the galactic center more prominent. Focal lengths of 40–50mm or longer are better for panoramas, stacking, or tracked high-detail images. This guide converts the recommendations for full-frame, 1.5× APS-C, 1.6× Canon APS-C, and Micro Four Thirds cameras. It explains shutter-time tradeoffs, crop-factor calculations, aperture and corner-performance limits, prime-versus-zoom choices, panorama planning, and tracker use. Readers also receive a three-question lens-selection method, real-world scenarios, a step-by-step lens test, a buying checklist, common mistakes, troubleshooting guidance, and practical recommendations without unsupported “best lens” claims.