How to Photograph the Milky Way: A Step-by-Step Guide

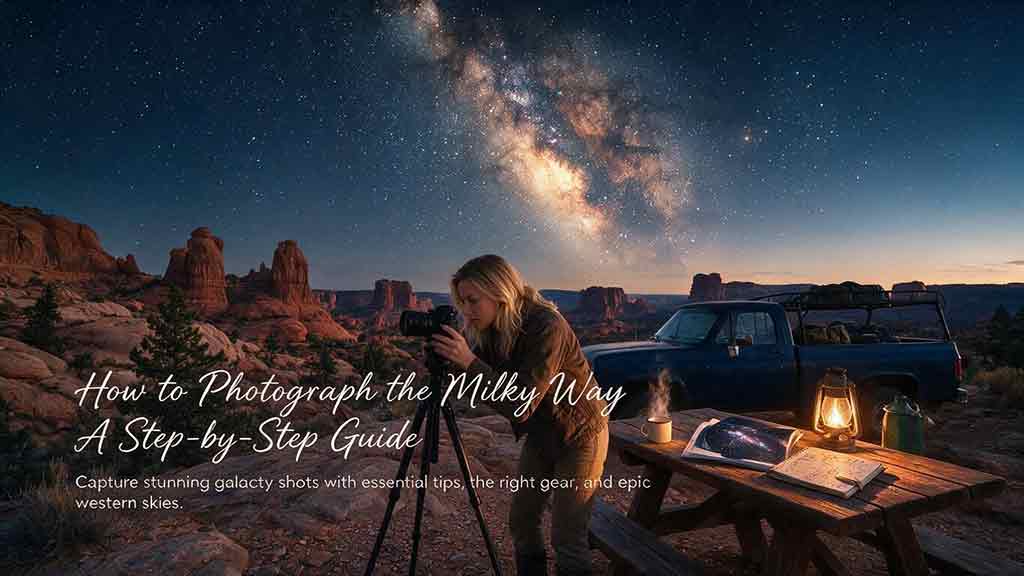
How to Photograph the Milky Way: A Step-by-Step Guide
To photograph the Milky Way, choose a dark location and a clear night with little moonlight, mount a camera with a wide, bright lens on a sturdy tripod, focus manually on a bright star, and begin around f/2.8, 10–20 seconds, and ISO 1600–6400. Shoot RAW, inspect star sharpness and the histogram, then adjust one setting at a time.
Key Takeaways
- A dark sky, clear air, and suitable moon timing usually matter more than buying a new camera.
- Use manual exposure, manual focus, RAW files, a wide aperture, and a shutter speed short enough to keep stars reasonably round.
- Treat every recommended setting as a starting point because focal length, sensor size, pixel density, sky brightness, and editing goals change the result.
- A single exposure is simplest; stacking reduces noise; a star tracker captures more sky detail but complicates the foreground.
- Sharp focus and controlled highlights are harder to repair than moderate noise, so verify focus and star shape before shooting a full sequence.
This guide explains how to plan a Milky Way shoot, choose practical equipment, calculate a safe starting shutter speed, capture a clean exposure, edit the file, and diagnose common problems. It is based on authoritative documentation and practical selection criteria rather than hands-on testing of a specific camera or lens.
How Should You Plan a Milky Way Photography Session?
Plan around darkness, the Milky Way’s position, moonlight, weather, and safe access. A technically perfect exposure cannot reveal strong galactic detail if artificial skyglow, clouds, haze, or bright moonlight washes out the scene.
Choose a genuinely dark location
Artificial light scattered through the atmosphere creates skyglow that reduces contrast between the Milky Way and the surrounding sky. The U.S. National Park Service also notes that clouds, moisture, dust, and aerosols can intensify the effect of nearby artificial lighting. (U.S. National Park Service — Light Pollution — Night Skies.)
Look for a location away from large cities and direct light sources. A dark-sky map is useful for comparing broad areas, but it cannot show every temporary light, road restriction, wildfire closure, or local obstruction. Confirm access rules with the relevant land manager before leaving.
Check the Moon’s phase and timing
A new Moon rises and sets near the Sun, while a full Moon rises around sunset and remains visible through much of the night. (NASA Science — Moon Phases.) For the darkest sky, plan near a new Moon or shoot during a window when the Moon is below the horizon.
A bright Moon is not automatically a reason to cancel. A low crescent can illuminate a foreground from the side, but strong moonlight near the Milky Way reduces visible contrast. Check both the phase and the local moonrise and moonset times.
Confirm where the Milky Way will appear
The Milky Way is the broad band created by viewing our galaxy’s disk from inside it. (NASA — The Milky Way.) Its angle, visible section, and time above the horizon change with date, latitude, and location.
Use a reputable sky-planning app or planetarium tool to preview the direction and elevation of the galactic center. Save an offline screenshot because rural locations may have weak cellular service.
Check weather beyond a simple “clear” icon
Review cloud cover, wind, temperature, humidity, and possible haze. High thin clouds can soften stars without looking dramatic on a general forecast, while high humidity can increase glow and cause condensation on the lens.
Also check for wildfire smoke, dust, coastal marine layers, thunderstorms, and extreme temperatures. Conditions can change quickly, so review the forecast again before departure.
Scout the composition in daylight
Arrive before dark when possible. Identify stable tripod positions, safe paths, drop-offs, traffic, private property boundaries, and foreground subjects.
A compelling Milky Way photograph usually combines the sky with a recognizable landscape element, such as a rock formation, tree, barn, mountain ridge, or shoreline. Avoid placing the brightest nearby town directly behind the most important section of the Milky Way unless the light dome is an intentional part of the composition.
What Equipment Do You Need to Photograph the Milky Way?
The essential kit is a camera with manual control, a wide lens, and a stable tripod. Premium equipment can improve image quality, but careful planning and technique create the largest gains for most beginners.
| Item | Essential or Optional | What to Look For | Practical Limitation |
|---|---|---|---|
| Camera | Essential | Manual exposure, manual focus, and preferably RAW capture | Smaller sensors and older models may show more noise at high ISO |
| Wide-angle lens | Essential | Wide field of view and a bright maximum aperture | Fast lenses can show coma, softness, or vignetting near the corners |
| Sturdy tripod | Essential | Stable legs and a head that does not drift | Lightweight tripods can vibrate in wind |
| Two-second timer or remote | Recommended | Prevents movement while pressing the shutter | A timer is usually sufficient for single frames |
| Spare battery | Recommended | Cold temperatures and long sessions drain batteries faster | Keep spares protected from extreme cold |
| Dim red light | Recommended | Helps you move safely while preserving night vision | Even red light should be kept dim and pointed downward (U.S. National Park Service — Dark Adaptation of the Human Eye and the Value of Red Flashlights.) |
| Lens cloth and dew control | Recommended in humid areas | Removes condensation; a lens heater can prevent repeated fogging | Wiping alone may not solve persistent dew |
| Star tracker | Optional | Allows longer sky exposures by following Earth’s rotation | The landscape blurs unless photographed separately |
| Intervalometer | Optional | Automates a sequence for stacking or time-lapse work | Confirm connector compatibility with the camera |
Which lens is most practical?
A wide, bright lens is usually the easiest choice. On a full-frame camera, roughly 14–24mm provides a broad landscape view; on an APS-C camera, a lens around 10–16mm creates a similar angle of view.
A maximum aperture near f/1.8 to f/2.8 gathers more light, but the widest setting is not always the sharpest. If stars become wing-shaped or smeared near the corners, stop the lens down slightly and compensate with ISO or stacking.
Do you need a full-frame camera?
No. Full-frame cameras often provide cleaner high-ISO files and a wider view with the same focal length, but APS-C and Micro Four Thirds cameras can produce strong Milky Way images with an appropriate lens, stable support, accurate focus, and careful processing.
The correct comparison is not simply sensor size. Lens brightness, focal length, pixel density, dynamic range, weather, light pollution, and technique all affect the final image.
Which Camera Settings Should You Use for the Milky Way?
Start with manual mode, the widest usable aperture, a conservative shutter speed, and enough ISO to place the sky data clearly above the left edge of the histogram. Then refine the settings after checking star shape at high magnification.
Official Nikon examples commonly use manual exposure, f/2.8, about 15–20 seconds, and ISO values around 3200–5000, while emphasizing experimentation for the conditions. (Nikon USA — How to Photograph the Milky Way.) Canon’s night-sky guidance similarly recommends a wide aperture and exposure times that depend on focal length. (Canon Europe — Night Sky Photography.)
Milky Way starting-settings table
| Setting | Practical Starting Point | Adjust When |
|---|---|---|
| Exposure mode | Manual | Keep manual so the camera does not reinterpret the dark scene |
| File type | RAW | Use RAW when you plan to correct white balance, noise, and shadows |
| Aperture | Widest acceptably sharp setting, often f/1.8–f/2.8 | Stop down slightly if corners are soft or stars show strong coma |
| Shutter speed | Often 10–20 seconds with a wide lens | Shorten if stars trail; lengthen only if stars remain acceptably round |
| ISO | Often ISO 1600–6400 | Raise if the file is too dark after optimizing aperture and shutter speed |
| White balance | About 3500–4500 K as a neutral preview | Adjust for local sky color and artistic intent; RAW allows later correction |
| Focus | Manual, magnified live view | Recheck after temperature changes or accidental contact |
| Image stabilization | Follow the lens and camera manual | Some systems should be disabled on a tripod; others detect tripod use |
| High-ISO noise reduction | Optional | It affects the preview or JPEG more than the underlying RAW data on many cameras |
| Long-exposure noise reduction | Usually off for rapid sequences | Consider it for isolated long exposures if waiting between frames is acceptable |
These values are recommendations, not universal facts. A bright f/1.4 lens, a slow f/4 zoom, a high-resolution sensor, and a heavily light-polluted sky require different compromises.
How do you calculate a starting shutter speed?
A conservative field estimate is:
Maximum starting shutter time in seconds ≈ 300 ÷ full-frame-equivalent focal length
This is a practical estimate, not a physical law. It is deliberately more cautious than the traditional “500 rule,” and even this estimate may be too long for a high-resolution camera or a large print.
Example 1: 20mm lens on full frame
300 ÷ 20 = 15 seconds
Start around 15 seconds, enlarge a test image, and shorten the exposure if the stars look elongated.
Example 2: 16mm lens on a 1.5× crop-sensor camera
16 × 1.5 = 24mm full-frame equivalent
300 ÷ 24 = 12.5 seconds
Start around 10–12 seconds. If the result is too dark, raise ISO rather than lengthening the shutter after trails appear.
Which setting should you change first?
Use this order:
- Open the aperture to the widest setting that still gives acceptable star quality.
- Set the longest shutter speed that keeps stars acceptably round for your output size.
- Raise ISO until the exposure is workable without clipping important highlights.
- If noise remains distracting, capture a stack of matching frames instead of forcing one extreme exposure.
ISO does not create more light; aperture and exposure time determine how much light reaches the sensor. Raising ISO changes how the captured signal is amplified and recorded, which can make the preview and file easier to work with but may reduce highlight headroom.
How Do You Focus on the Milky Way at Night?
Use manual focus, magnify a bright star or distant light in live view, and adjust until the point is as small and crisp as possible. Do not trust the infinity mark without checking it.
- Switch the lens and camera to manual focus.
- Open live view and select a bright star, planet, or very distant light.
- Magnify the selected point as far as the camera reasonably allows.
- Rotate the focus ring slowly through the sharpest point.
- Stop when the star looks smallest, not necessarily brightest.
- Take a test frame and inspect stars near both the center and corners.
- Secure the ring gently if it moves easily, taking care not to leave residue or damage the lens.
Temperature changes can shift focus slightly during a long session. Recheck after the camera has cooled, after changing the composition, or whenever stars look larger than expected.
How Do You Photograph the Milky Way Step by Step?
Step 1: Plan the date, direction, and access
Select a dark location, confirm legal access, identify the Milky Way’s position, and choose a time with favorable moonlight and weather. Share your plan with someone who is not joining the trip.
Step 2: Arrive before full darkness
Scout safe routes, foreground options, and tripod positions. Set the camera bag where it will not become a tripping hazard.
Step 3: Build a stable composition
Extend the thickest tripod sections first and keep the center column low when possible. Include enough foreground to give the sky scale, but avoid clutter that competes with the Milky Way.
Step 4: Configure the camera
Choose RAW, manual exposure, manual focus, and a two-second timer or remote release. Turn off automatic ISO and any automatic scene mode.
Step 5: Focus precisely
Magnify a bright star in live view and focus until it becomes a small point. Capture a test image and verify sharpness at 100% magnification.
Step 6: Enter a conservative starting exposure
For a wide f/2.8 lens, begin around 10–20 seconds and ISO 3200, then adapt to the focal length and sky. A faster lens may allow a lower ISO or shorter exposure; an f/4 lens may require a higher ISO or stacking.
Step 7: Evaluate the test frame
Check four things:
- Are the stars round enough for the intended display size?
- Is the Milky Way separated from the background sky?
- Are city lights, signs, or the Moon clipping?
- Is the foreground composition clean and level?
The camera’s rear screen can make a dark image look brighter than it is. Use the histogram and highlight warning, but remember that the displayed histogram is usually based on a processed preview rather than the full RAW data.
Step 8: Refine one variable at a time
If stars trail, shorten the shutter. If they are sharp but the image is dark, raise ISO or open the aperture. If corners are poor, stop down slightly and compensate elsewhere.
Changing one variable at a time makes it easier to understand which adjustment improved the image.
Step 9: Capture a clean sequence
Once the settings are stable, shoot several identical frames without moving the tripod. These files provide backups and can later be aligned and stacked to reduce random noise.
Also capture one or more dark frames with the lens cap on if your stacking workflow uses them. Match the exposure time, ISO, and temperature as closely as practical.
Step 10: Photograph the foreground separately when needed
A close or very dark foreground may require a second focus point, a longer exposure, light painting where permitted, or a blue-hour frame captured before the sky becomes fully dark.
Keep the camera position fixed if you plan to blend exposures. Disclose composites when the publishing context, contest rules, or audience expectations require it.
Which Milky Way Capture Method Is Best?
Single exposures are best for simplicity, stacking is best for improving noise without specialized hardware, and a tracker is best when maximum sky detail matters more than a one-frame workflow.
| Method | Best For | Advantages | Limitations |
|---|---|---|---|
| Single untracked exposure | Beginners, travel, fast setup | Simple capture and editing; landscape and sky align naturally | More noise and less faint detail |
| Stacked untracked exposures | Photographers who can shoot a sequence | Reduces random noise and improves processing flexibility | Requires alignment software; moving foliage and clouds can complicate stacking |
| Tracked sky plus static foreground | High-detail landscape astrophotography | Longer sky exposure, lower noise, more star detail | Requires extra equipment and a blended foreground |
| Blue-hour foreground plus night sky | Clean, detailed foregrounds | Better foreground color and lower noise | The final image represents two moments and should be treated as a composite |
| Panoramic sequence | Large arches and high resolution | Wider field of view and detailed output | More chances for stitching, alignment, or changing-light errors |
A simple decision framework
Choose a single exposure when you are learning, moving between locations, photographing wind-blown foregrounds, or want the most straightforward representation of the scene.
Choose stacking when the composition is stable and high-ISO noise is the main problem. It is often the most useful next step after mastering a single frame.
Choose a star tracker when the sky is the priority and you are comfortable photographing and blending a separate foreground. A tracker does not automatically improve composition, focus, or light pollution.
Choose a blue-hour blend when the foreground is close, highly detailed, or too dark to record cleanly during the Milky Way exposure. Keep the edit visually credible and transparent about the method where appropriate.
What Does a Real-World Starting Setup Look Like?
Consider a full-frame camera with a 20mm f/2.8 lens under a dark, clear sky:
- Aperture: f/2.8
- Shutter speed: 15 seconds, based on 300 ÷ 20mm
- ISO: 3200
- White balance: 4000 K for a neutral starting preview
- Focus: Manual, confirmed on a magnified bright star
- File type: RAW
- Release: Two-second timer
- Sequence: Several identical frames for selection or stacking
After the first exposure:
- If stars are visibly elongated, reduce the shutter to 10–12 seconds and raise ISO if necessary.
- If the sky is too bright and orange, reduce ISO, shorten the exposure, reframe away from the light dome, or choose a darker location.
- If the Milky Way is faint but the stars are sharp, confirm that haze, moonlight, or skyglow is not the main limitation before increasing exposure.
- If the foreground is black, plan a separate foreground exposure rather than pushing the sky file until noise becomes distracting.
This example is a starting workflow, not a guaranteed recipe. The correct exposure is the one that preserves acceptable star shape and useful tonal information under the actual conditions.
How Should You Compose a Milky Way Photograph?
Use the landscape to create direction, scale, and a clear visual relationship with the Milky Way. The galaxy should feel connected to the scene rather than pasted into an empty sky.
Use foreground shapes deliberately
Roads, shorelines, branches, rock edges, and ridgelines can direct attention toward the Milky Way. Keep the silhouette readable and avoid merging important shapes.
Decide whether the Milky Way is vertical, diagonal, or arched
A vertical galactic core works well with portrait orientation and tall foregrounds. A diagonal arrangement adds movement, while a full arch often requires a panorama.
Leave room for cropping and lens correction
Wide lenses can stretch objects near the edges, and profile corrections may crop part of the frame. Compose slightly wider than the final result.
Control artificial light
A small warm light in a cabin can add scale, but a bright flashlight or vehicle headlight can dominate the exposure. Ask companions to keep lights low and wait for traffic when shooting near roads.
How Do You Edit Milky Way Photos Without Making Them Look Artificial?
Edit for separation, color balance, and noise control while preserving believable stars and natural transitions. Strong contrast and saturation can reveal structure, but excessive processing creates halos, crushed shadows, and unnatural color.
1. Select the sharpest frame
Compare star shape, focus, vibration, aircraft trails, and accidental light. A slightly noisier sharp frame is usually more useful than a cleaner but soft frame.
2. Apply lens corrections carefully
Correct chromatic aberration and test the lens profile. Automatic distortion correction can change the edges or crop the image, so verify the composition after applying it.
3. Set white balance before heavy contrast work
Use a neutral region of sky as a starting reference, then adjust for a believable balance between sky, airglow, and foreground. There is no single mandatory Kelvin value because atmospheric conditions and artistic intent differ.
4. Establish the global tones
Adjust exposure, highlights, whites, shadows, and blacks so the sky remains dark without losing all faint detail. Avoid clipping the galactic core or turning the background sky pure black.
5. Add local contrast selectively
Use moderate texture, clarity, dehaze, curves, or local masks to separate dust lanes. Apply these tools more strongly to the Milky Way than to the entire image when possible.
6. Reduce noise without erasing stars
Adobe recommends balancing luminance noise reduction with detail and contrast because excessive reduction can make a night image unnaturally soft. (Adobe — Reduce Noise in Night Photos.) Inspect the file at 100% and at the final output size; those views may suggest different amounts of reduction.
7. Sharpen after noise reduction
Mask sharpening away from smooth sky regions when the editor allows it. Sharpening every pixel can exaggerate noise and color speckles.
8. Align and stack when planned
Align the stars before averaging or median-blending a sequence. Mask the foreground separately if it moved relative to the aligned sky.
9. Check color and halos
Zoom out and look for cyan or magenta edges, over-saturated airglow, dark rings around the Milky Way, or bright halos along mountain ridges. These artifacts are easier to see at normal viewing size than at extreme magnification.
10. Export for the intended use
A large print needs more careful noise, sharpening, and star-shape control than a small social image. Judge the file at the size at which people will actually see it.
What Are the Most Common Milky Way Photography Mistakes?
| Problem | Likely Cause | Practical Fix |
|---|---|---|
| Stars look like short lines | Shutter speed is too long, tripod moved, or stabilization behaved unpredictably | Shorten the exposure, stabilize the tripod, use a timer, and follow the equipment manual |
| Stars are round but soft | Focus is slightly off, lens has dew, or the lens is soft wide open | Refocus with magnified live view, clean or warm the lens, or stop down slightly |
| Sky is bright orange or gray | Light pollution, haze, clouds, moonlight, or overexposure | Move to a darker direction or location, wait for better conditions, and reduce exposure |
| Milky Way has little contrast | Galactic core is low, sky is bright, or processing is too flat | Confirm planning, improve sky conditions, and use selective contrast rather than global extremes |
| Foreground is nearly black | One exposure cannot cover both sky and land cleanly | Capture a separate foreground exposure or use a brighter natural-light window |
| Image is very noisy | Underexposure, high ISO, warm sensor, or aggressive shadow recovery | Improve capture exposure within star-trail limits, stack frames, and apply moderate noise reduction |
| Corners have “bird-shaped” stars | Lens coma or field curvature | Stop down slightly, crop modestly, or use a lens with better off-axis performance |
| Lens suddenly fogs | Lens temperature falls near the dew point | Use a lens heater, shield the lens between frames, and carry a clean microfiber cloth |
| Horizontal or vertical bands appear | Extreme shadow lifting, electronic interference, or sensor pattern noise | Improve exposure, avoid severe recovery, test another shutter mode, and stack compatible frames |
| Foreground edge has a bright halo | Overdone masking, dehaze, or sharpening | Refine the mask, reduce local contrast, and inspect at normal output size |
How Do You Troubleshoot a Milky Way Photo in the Field?
The Milky Way is not visible in the test frame
First confirm the camera is pointed in the correct direction and the galactic center is above the horizon. Then check moonlight, clouds, haze, and nearby skyglow.
Increase exposure only after ruling out environmental limits. More ISO cannot restore contrast that bright sky conditions have removed.
The stars are sharp in the center but poor at the edges
This usually indicates lens behavior rather than missed focus. Stop down by a small amount, recheck focus, or compose with important stars away from the weakest corners.
The camera cannot autofocus
Switch to manual focus. Magnify a bright star, planet, or distant light and adjust slowly until it becomes the smallest point.
The foreground is blurred while the stars are sharp
The foreground may be too close to share the same focus plane at a wide aperture. Capture a second frame focused on the foreground and blend the two, or choose a more distant foreground.
Every frame has a different brightness
Disable automatic ISO, exposure bracketing, flicker-related automation, and automatic exposure modes. Also check whether passing headlights, clouds, or changing moonlight affected the sequence.
Milky Way Photography Field Checklist
Before leaving
- Confirm land access, parking rules, closing times, permits, and weather alerts.
- Check Milky Way direction, elevation, moonrise, moonset, and cloud cover.
- Charge batteries and clear memory cards.
- Pack a tripod, lens cloth, dim red light, warm layers, water, and offline navigation.
- Tell someone where you are going and when you expect to return.
At the location
- Scout hazards before full darkness.
- Keep lights dim and pointed down.
- Level and stabilize the tripod.
- Shoot RAW in manual exposure mode.
- Focus manually on a magnified star.
- Check star shape, focus, highlights, and histogram.
- Capture several identical frames.
- Recheck focus after temperature changes.
- Leave the area as you found it.
Before packing up
- Capture any planned foreground or dark frames.
- Review at least one file at high magnification.
- Check that the lens is dry and capped.
- Verify that all batteries, cards, lights, and tripod parts are accounted for.
A Practical Next Step
The most reliable first Milky Way workflow is simple: choose a dark and legally accessible location, use a wide lens on a tripod, focus manually, start with a conservative shutter speed, and review the first frame closely. Beginners should master one clean exposure before adding stacking. Photographers limited by noise should capture a consistent sequence, while advanced users who want more sky detail can consider a tracker and a separately photographed foreground.
Frequently Asked Questions
Can a smartphone photograph the Milky Way?
Yes, some smartphones can record the Milky Way with a tripod, a manual camera app, or a dedicated night-sky mode. Results depend heavily on sensor size, computational processing, sky darkness, and the phone’s ability to save a minimally processed or RAW file. A phone is most successful under dark skies with a stable mount.
Do I need a star tracker?
No. A tracker is optional for landscape Milky Way photography. It allows a longer sky exposure, but the ground moves relative to the tracked stars, so the foreground usually needs a separate untracked frame.
What is the best lens for Milky Way photography?
The most practical lens is wide enough for the intended composition, bright enough to gather useful light, and acceptably sharp near its maximum aperture. A 14–24mm full-frame-equivalent view is beginner-friendly, but a longer lens can create detailed panoramas or emphasize the galactic core.
Can I photograph the Milky Way when the Moon is visible?
Yes, especially when the Moon is a thin crescent, low in the sky, behind the camera, or scheduled to set before the Milky Way reaches the desired position. Strong moonlight near the galaxy reduces contrast, so check moon direction as well as phase.
Why should I not simply set the lens to the infinity mark?
Infinity markings can be approximate, and focus can shift with temperature or lens design. Magnified live view on a bright star gives a more reliable result than assuming the printed mark is exact.
How many frames should I take for stacking?
There is no fixed requirement. Eight to 15 matching frames is a practical starting range for learning, while larger sets may improve noise reduction at the cost of more storage, capture time, and processing. Keep exposure, focus, aperture, white balance, and composition consistent.
Sources
- U.S. National Park Service. “Light Pollution — Night Skies.” Accessed July 31, 2026.
- NASA Science. “Moon Phases.” Accessed July 31, 2026.
- NASA. “The Milky Way.” Accessed July 31, 2026.
- U.S. National Park Service. “Dark Adaptation of the Human Eye and the Value of Red Flashlights.” Accessed July 31, 2026.
- Nikon USA. “How to Photograph the Milky Way.” Accessed July 31, 2026.
- Canon Europe. “Night Sky Photography.” Accessed July 31, 2026.
- Adobe. “Reduce Noise in Night Photos.” Accessed July 31, 2026.
More from Shooting & Editing
How to Edit Milky Way Photos Without Making Them Look Artificial
Edit a Milky Way photo by protecting believable color, smooth tonal transitions, natural star sizes, and a realistic relationship between the sky and foreground. Start with lens corrections and white balance, build contrast gradually, use Dehaze and saturation sparingly, and make local adjustments with soft masks. Judge the result at both full-image view and 100% magnification before exporting.
RAW vs JPEG for Astrophotography
For most astrophotography, shoot RAW. A RAW file preserves substantially more sensor data and gives you greater control over white balance, shadow recovery, color gradients, noise reduction, and stacking. JPEG is useful when speed, storage, or immediate sharing matters, but its in-camera processing and lossy compression leave less room for correcting faint stars and dark skies.
How to Stack Astrophotography Images
To stack astrophotography images, capture a consistent series of RAW exposures, remove technically poor frames, calibrate them when appropriate, align the stars, normalize brightness, reject outliers, and combine the accepted frames with an averaging method. The stack can reduce random noise and reveal faint detail, but it cannot repair missed focus, severe trailing, clipped highlights, or inconsistent capture settings.
Explore More Topics
Dedicated Astronomy Camera vs Regular Camera: What Is the Difference?
A dedicated astronomy camera is designed for telescope imaging through astronomy software and may provide regulated cooling, high-frame-rate readout, monochrome capture, filter-wheel integration, and FITS metadata. A regular DSLR or mirrorless camera is a self-contained general-purpose camera with a screen, battery, memory card, native lenses, autofocus, and daytime usefulness. This guide explains why neither category is universally better. It compares cooled deep-sky cameras, uncooled planetary cameras, guide cameras, monochrome and one-shot-color sensors, regular cameras, and specialized astrophotography DSLRs. Readers learn how cooling, dark current, H-alpha response, UV/IR filtering, sensor size, pixel scale, back focus, software, power, calibration, frame rate, and total system cost affect the decision. The article also includes calculation examples, use-case recommendations, a five-question selection process, a buying checklist, common mistakes, troubleshooting, and practical next steps.
How to Choose a Camera for Astrophotography
Choosing an astrophotography camera starts with the target, optical system, and workflow rather than megapixels or sensor size alone. This guide compares mirrorless and DSLR bodies, cooled one-shot-color cameras, cooled monochrome cameras, planetary cameras, and astronomy-modified models. Readers learn how sensor dimensions affect field of view, how pixel size and focal length determine image scale, and how cooling, quantum efficiency, read noise, full-well capacity, dynamic range, and frame rate should be interpreted. It also provides a color-versus-monochrome comparison, telescope compatibility and back-focus checks, software and driver requirements, a total-system-cost framework, five practical scenarios, troubleshooting, and a complete purchase checklist. The central recommendation is to choose the camera that fits the target, corrected image circle, mount, software, power system, processing workflow, and complete budget.
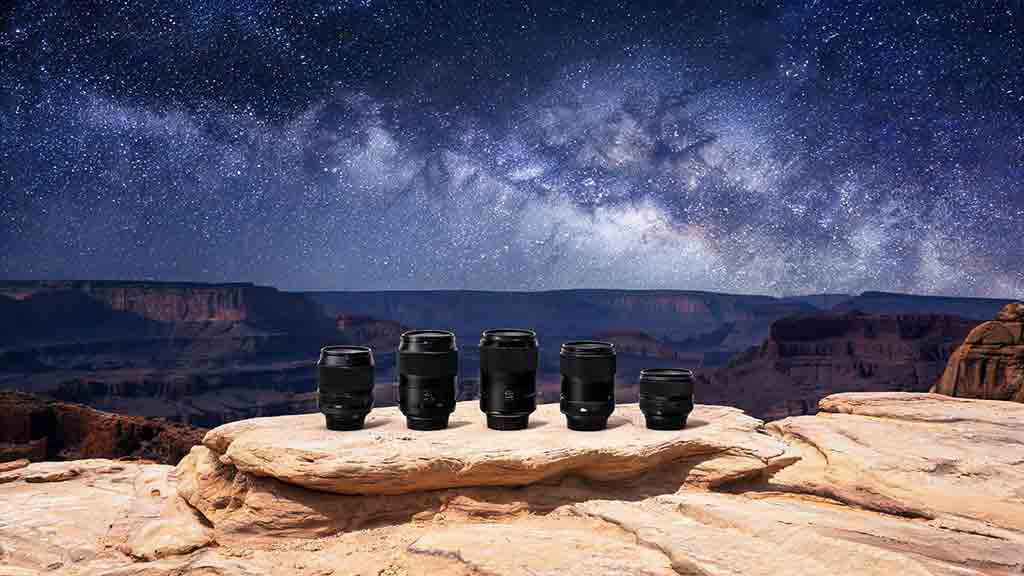
Best Focal Lengths for Milky Way Photography
For most untracked Milky Way landscapes, a 14–24mm full-frame-equivalent view offers the best balance of sky coverage, galactic scale, foreground context, and shutter-time tolerance. Wider 12–16mm views suit dramatic foregrounds and a large Milky Way arch, while 28–35mm makes the galactic center more prominent. Focal lengths of 40–50mm or longer are better for panoramas, stacking, or tracked high-detail images. This guide converts the recommendations for full-frame, 1.5× APS-C, 1.6× Canon APS-C, and Micro Four Thirds cameras. It explains shutter-time tradeoffs, crop-factor calculations, aperture and corner-performance limits, prime-versus-zoom choices, panorama planning, and tracker use. Readers also receive a three-question lens-selection method, real-world scenarios, a step-by-step lens test, a buying checklist, common mistakes, troubleshooting guidance, and practical recommendations without unsupported “best lens” claims.