How to Edit Milky Way Photos Without Making Them Look Artificial

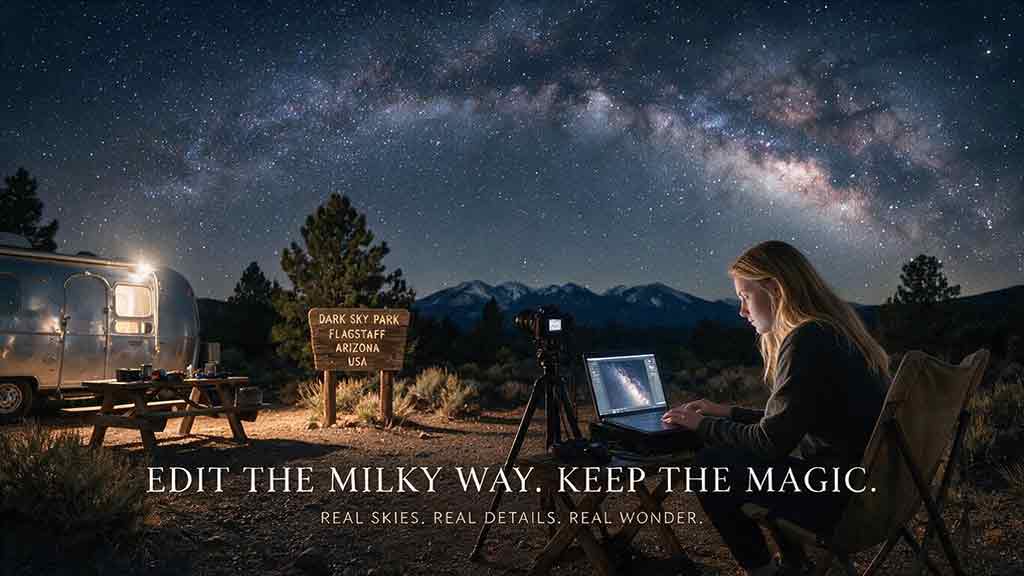
How to Edit Milky Way Photos Without Making Them Look Artificial
Edit a Milky Way photo by protecting believable color, smooth tonal transitions, natural star sizes, and a realistic relationship between the sky and foreground. Start with lens corrections and white balance, build contrast gradually, use Dehaze and saturation sparingly, and make local adjustments with soft masks. Judge the result at both full-image view and 100% magnification before exporting.
Key Takeaways
- A natural-looking Milky Way edit preserves credible color, controlled contrast, and realistic star size rather than maximizing every slider.
- Correct global problems first; use local masks only when the sky, Galactic core, or foreground needs separate treatment.
- Dehaze, Clarity, saturation, sharpening, and noise reduction can all create an artificial look when pushed too far.
- A dark sky should still contain tonal separation; crushed blacks and clipped stars remove useful detail.
- Compare the final image with the unedited RAW file and a temporarily desaturated version to reveal color casts, halos, and excessive contrast.
This guide provides a repeatable editing workflow, practical starting ranges, a naturalness decision framework, a troubleshooting table, and an export checklist. The examples are written for RAW editors such as Adobe Lightroom and Camera Raw, but the principles also apply to other non-destructive photo editors.
Methodology note: This guide is based on official image-processing documentation, established astrophotography processing principles, and transparent editorial recommendations rather than a claimed hands-on test of every camera, lens, or software version.
What Makes a Milky Way Edit Look Natural?
A natural-looking edit is not necessarily identical to what the unaided eye saw. A camera can collect faint light and color over several seconds that human night vision does not perceive in the same way. The goal is therefore not to imitate a dark, nearly colorless naked-eye view, but to create a believable interpretation of the recorded scene.
A convincing result usually has five qualities:
- The sky color is plausible for the location and lighting.
- The Milky Way is visible without looking cut out from the sky.
- Stars remain points rather than large glowing disks.
- Noise is controlled without turning the sky into plastic.
- The foreground and sky appear to belong to the same time, place, and lighting conditions.
“Natural” remains partly an editorial judgment. A documentary image, a fine-art nightscape, and a scientifically calibrated deep-sky image may use different standards. State clearly when an image is a composite, uses a tracked sky, or combines exposures made at different times.
Which Editing Problems Create an Artificial Look?
| Artificial-looking symptom | Common cause | Better direction |
|---|---|---|
| Electric blue or purple sky | White balance, tint, or HSL pushed too far | Neutralize broad color casts before creative grading |
| Milky Way looks pasted onto the sky | Strong local contrast or hard-edged mask | Reduce mask strength and increase feathering |
| Stars look oversized and crunchy | Excess sharpening, Clarity, or Dehaze | Lower edge enhancement and inspect at 100% |
| Sky has black holes between stars | Blacks or curve lowered too far | Restore shadow separation and a softer black point |
| Galactic core is orange and oversaturated | Excess temperature, saturation, or color grading | Reduce chroma before changing luminance |
| Foreground looks like daylight | Shadows raised too far or local white balance mismatched | Keep directional night lighting and plausible darkness |
| Sky looks waxy or smeared | Heavy luminance noise reduction | Restore fine texture and accept some grain |
| Bright halo follows the horizon | Poor sky mask, aggressive Dehaze, or overblending | Refine the boundary and reduce local contrast |
| Corners become unnaturally bright | Excess vignetting correction | Balance lens correction with the original light distribution |
| Clouds glow more than the Milky Way | Strong global contrast or Dehaze | Mask clouds separately or reduce the global adjustment |
Use this table as a diagnostic guide rather than a fixed recipe. Several causes can occur at the same time.
What Is the Best Order for Editing Milky Way Photos?
A reliable sequence is:
- Work from the RAW file when available.
- Select a suitable camera profile.
- Apply optical corrections carefully.
- Set white balance and remove broad color casts.
- Establish exposure, highlights, shadows, whites, and blacks.
- Shape contrast with a gentle curve.
- Correct gradients before enhancing the Milky Way.
- Apply restrained local contrast.
- Refine color with targeted controls.
- Use soft masks for the sky, Galactic core, and foreground.
- Apply noise reduction before final sharpening.
- Inspect transitions, stars, and dark areas at multiple zoom levels.
- Export for the intended display size and color space.
This order prevents later adjustments from compensating for an unresolved earlier problem. For example, increasing saturation before correcting a green or magenta cast usually makes the cast harder to remove.
How Should You Prepare the RAW File?
Choose a Neutral Starting Profile
A camera profile influences the initial color and tonal interpretation of a RAW file. Start with a neutral or general-purpose profile rather than a highly saturated landscape profile.
The profile is a starting point, not a correction. Compare several profiles while watching star color, the Galactic core, airglow, and illuminated foreground objects. Select the profile that requires the least corrective work.
Apply Chromatic Aberration Correction
Bright stars near the edge of the frame can reveal colored fringes. Adobe’s optical tools can correct chromatic aberration and use lens profiles to address distortion and vignetting. (Adobe — Use lens profiles in Photoshop, Lightroom, and Camera Raw)
Enable automatic chromatic aberration correction when it improves the image. If residual purple or green fringes remain, use a defringe control carefully so that real magenta or green detail is not removed from the sky.
Use Lens Profiles Carefully
A lens profile may correct distortion and corner darkening, but maximum vignetting correction is not always visually ideal. Strong correction can brighten noisy corners and make the sky look unnaturally flat.
Use the profile as a technical baseline, then reduce the correction if the corners become noisy or brighter than the center. A slight natural falloff can help keep attention near the Milky Way without appearing like an added vignette.
How Should You Set White Balance?
Set white balance by removing an unwanted global color cast before deciding on a creative mood. Adobe Camera Raw reads the camera white-balance metadata as a starting point and allows RAW white balance to be reinterpreted during processing. (Make color and tonal adjustments in Adobe Camera Raw)
There is no universal Kelvin value for the Milky Way. Appropriate color depends on:
- Moonlight
- Airglow
- Light pollution
- Atmospheric haze
- Nearby artificial lighting
- Camera spectral response
- Lens transmission
- Personal rendering intent
Use Neutral References With Caution
A gray rock, road, cloud, or building is not automatically a reliable neutral reference at night. It may be illuminated by warm lamps, moonlight, reflected city light, or mixed sources.
Use the white-balance eyedropper only when the sampled object should genuinely be neutral under the recorded illumination. Otherwise, adjust Temperature and Tint while comparing several known elements:
- The sky background away from strong light pollution
- Neutral foreground materials
- Star colors
- Clouds
- The transition between the horizon and upper sky
Avoid the “One-Color Sky” Problem
A realistic night sky can contain several colors at once. The horizon may be warmer from artificial light, the upper sky may be cooler, and airglow may introduce green or red variation.
Do not force every part of the sky to the same blue or purple. If the color gradient is caused by real lighting, reduce its distraction rather than erasing all variation.
How Should You Set Exposure and Tonal Range?
Use the histogram and clipping indicators to understand the tonal distribution. Adobe documents the histogram as a map of pixel luminance and provides shadow and highlight clipping warnings for checking lost detail. (Make color and tonal adjustments in Adobe Camera Raw)
Set the Overall Exposure First
Increase Exposure only until the Milky Way and foreground become readable. A night image does not need to fill the histogram from edge to edge.
If the entire image is made bright enough to resemble daytime, the atmosphere of the scene may be lost. Preserve a visibly dark reference somewhere in the frame.
Protect Bright Stars and Artificial Lights
Bright stars may clip even when the surrounding sky is dark. Some clipping in the centers of the brightest stars can be unavoidable, but large featureless disks and blown foreground lights are distracting.
Lower Highlights or Whites only when the adjustment improves visible structure. Extreme highlight recovery can create gray stars, halos, or flat illuminated areas.
Keep the Black Point Soft
A strong black point can make the Milky Way appear dramatic, but it can also erase dust lanes, dim stars, and subtle sky gradients. Watch the shadow clipping warning while adjusting Blacks and the lower part of the tone curve.
The goal is not to eliminate all black pixels. The goal is to avoid widespread featureless areas created by editing rather than capture conditions.
How Can You Build Contrast Without Overprocessing?
Create contrast in layers rather than with one aggressive adjustment.
Start With a Gentle Tone Curve
Adobe describes the tone curve as a way to refine specific tonal ranges after broader adjustments. (Make color and tonal adjustments in Adobe Camera Raw) Use a shallow S-curve to separate the Milky Way from the background while protecting the darkest sky and brightest stars.
A steep curve can make dust lanes collapse into black shapes and cause stars to lose color. If the curve creates dramatic contrast immediately, reduce it and build separation locally instead.
Use Texture, Clarity, and Dehaze for Different Jobs
These controls are related but not interchangeable:
- Texture changes medium-scale detail with less effect on broad tone.
- Clarity increases local contrast, especially in midtones.
- Dehaze changes haze-related contrast and can strongly affect color and dark values.
Adobe describes Clarity as increasing local contrast and Dehaze as reducing or increasing visible haze. (Adobe — Lightroom Classic Masking Tool) Both can be useful, but global application can make stars hard-edged and the horizon unnaturally dark.
Editorial Starting Ranges
The following values are illustrative starting ranges, not universal settings:
| Control | Conservative starting range | What to watch |
|---|---|---|
| Texture | 0 to +10 | Granular noise and brittle detail |
| Clarity | 0 to +8 | Halos and oversized stars |
| Dehaze | +3 to +12 | Black clipping, blue shifts, and hard horizons |
| Vibrance | 0 to +12 | Excess cyan, magenta, or orange |
| Saturation | -5 to +5 | Uniformly exaggerated star and sky color |
A stacked, tracked, or very clean file may tolerate different values. A noisy single exposure may need less local contrast, not more.
How Should You Remove Light-Pollution Gradients?
Correct broad gradients before strongly enhancing the Milky Way. A gradient is a smooth change in brightness or color caused by factors such as artificial light, moonlight, vignetting, or atmospheric conditions.
Siril’s background-extraction documentation explains that a modeled background can be used to reduce unwanted gradients while attempting to preserve real astronomical signal. (Siril Documentation — Background Extraction) For a landscape photograph, a dedicated astronomical background tool may not always be appropriate because the foreground and horizon contain real structure.
For a Single Nightscape
Use broad, soft tools such as:
- A low-strength linear gradient
- A large radial mask
- A luminance or color-range mask
- Gentle local white-balance correction
- A modest local exposure reduction near a light dome
Do not place a strong correction directly along the horizon. That often produces a dark band or visible halo.
For a Stacked Sky Without a Foreground
A dedicated gradient-removal tool can be more appropriate. Ensure that sample points avoid the Milky Way, bright nebulae, large clouds, and other real structures.
If background extraction removes parts of the Galactic core or creates a flat gray sky, reduce the model complexity or return to an earlier version.
How Much Color Is Too Much?
Color becomes artificial when it dominates the scene rather than clarifying it. Increase color only after white balance, gradients, and tonal contrast are stable.
Prefer Targeted Color Controls
Use HSL or a color mixer to correct specific hues instead of increasing global saturation. For example:
- Reduce magenta if the entire sky becomes purple.
- Reduce aqua or blue saturation if the sky looks electric.
- Lower orange saturation if the Galactic core becomes unnaturally vivid.
- Adjust green carefully because airglow can be real.
Adobe’s color tools allow hue, saturation, and luminance changes to selected color ranges rather than the entire image. (Make color and tonal adjustments in Adobe Camera Raw)
Preserve Star Color
Stars naturally vary in color. Heavy saturation, clipping, or broad color grading can make all stars blue, white, or orange.
Zoom to 100% and check several bright stars. If each star has a colored ring or identical hue, reduce saturation, chromatic-aberration correction, or local contrast as appropriate.
Use Color Grading as a Finishing Tool
Color grading can unify shadows, midtones, and highlights, but it should not be used to hide an unresolved white-balance problem.
Apply a subtle grade near the end. Temporarily disable it and ask whether the image still has coherent color. If the entire look collapses without the grade, earlier corrections may need more work.
How Should You Use Masks Without Creating Halos?
Masks should separate adjustments, not reveal their boundaries. Adobe Lightroom and Camera Raw support sky, object, brush, gradient, radial, color-range, and luminance-range masks, and those adjustments are non-destructive. (Adobe — Lightroom Classic Masking Tool)
Use the Sky Mask as a Starting Point
Automatic sky selection can save time, but inspect:
- Tree branches
- Mountain ridges
- Buildings
- Hair or fine objects
- Clouds near the horizon
- Bright artificial lights
Add or subtract from the mask where the selection is incomplete. Increase feathering or use a low-flow brush near difficult edges.
Enhance the Galactic Core With a Broad Mask
Use a large, soft radial or brush mask centered on the Milky Way. Make small changes to exposure, contrast, texture, or Dehaze.
Avoid tracing the exact outline of the Galactic core. A precise, strong mask often makes it look pasted onto the background.
Protect the Horizon
Intersect a sky mask with a luminance or color range when the horizon is affected by light pollution. Alternatively, subtract the horizon with a soft linear gradient.
At 100% magnification, inspect for:
- Bright rims
- Dark rims
- Color seams
- Repeated brush patterns
- Noise differences between masked and unmasked areas
How Should You Control Noise Without Making the Sky Plastic?
Noise reduction should make noise less distracting while preserving faint stars and fine tonal variation. Adobe’s Denoise feature is designed for high-ISO and low-light RAW files, while conventional detail controls provide luminance and color-noise adjustments. (Adobe — Enhance Features: Denoise, Raw Details, and Super Resolution)
Apply Color Noise Reduction First
Colored speckles are often more distracting than luminance grain. Reduce color noise until random red, green, or blue pixels are controlled, but watch for loss of star color and small colored detail.
Treat Luminance Noise Conservatively
Some fine grain is usually more natural than a completely smooth sky. Excess luminance noise reduction can:
- Erase small stars
- Smear dust lanes
- Create blotchy low-frequency texture
- Make the foreground look waxy
- Produce a different texture in masked areas
Evaluate the image at 100% and at its final output size. A file that looks slightly noisy at 100% may look clean after a normal web export.
Use AI Denoise Before Heavy Local Editing
When using a RAW-specific AI denoise tool, apply it early enough that later masks and sharpening are based on the improved file. Software behavior changes over time, so consult the current documentation for the specific editor and version.
Do not assume a high Denoise amount is automatically better. Compare fine stars, dark dust lanes, and foreground texture before accepting the result.
How Should You Sharpen Stars?
Sharpen the captured detail without enlarging every star. Apply sharpening after major tonal and noise adjustments because both operations influence visible edges.
Use masking or edge protection so sharpening affects strong detail more than smooth sky. A high Amount combined with a small Radius can create crunchy stars; a large Radius can create halos.
A Practical Inspection Method
At 100% magnification:
- Find a group of medium-bright stars.
- Toggle sharpening on and off.
- Watch the star diameter, edge halo, and surrounding noise.
- Reduce sharpening if stars become visibly larger.
- Check the corners separately because lens aberrations can react differently.
Output sharpening should be matched to the final size and medium. A full-resolution master and a small web JPEG should not necessarily use the same sharpening.
How Should You Edit the Foreground?
The foreground should remain believable under nighttime lighting. Raising Shadows can reveal detail, but it can also make an unlit landscape look like a daytime photograph.
Keep a Nighttime Anchor
Retain at least one region that still feels dark. This might be a shadowed hillside, an unlit tree, or the side of a structure facing away from the Moon or artificial light.
Match Color Direction
A foreground illuminated by warm artificial light should not become neutral gray while the horizon remains orange. A moonlit foreground may be cooler, but the color should remain consistent with the Moon’s position and atmospheric conditions.
Avoid Excessive Microcontrast
Strong Texture and Clarity can make rocks and vegetation more visually dominant than the Milky Way. Reduce local contrast if the foreground begins to compete with the sky.
How Can You Blend a Separate Sky and Foreground Naturally?
A separate tracked sky exposure and untracked foreground exposure can produce a cleaner result, but the blend must respect perspective, time, and lighting.
Use Compatible Captures
For the most believable composite:
- Use the same camera position and focal length.
- Capture the sky and foreground during the same session when practical.
- Keep the Milky Way in a physically plausible position.
- Match the direction and quality of light.
- Avoid combining a moonless sky with a brightly moonlit foreground unless the creative composite is disclosed.
- Preserve realistic depth around trees, mountains, and buildings.
Refine the Transition at Several Zoom Levels
At high magnification, inspect branches, ridges, and architecture. At fit-to-screen view, inspect the overall brightness and color relationship.
A technically precise edge can still look artificial if the sky is much more detailed, saturated, or noise-free than the foreground.
Disclose Material Compositing
Disclosure is especially important in journalism, competitions, scientific contexts, travel documentation, and educational content. A clear note such as “tracked sky and foreground captured separately from the same tripod position” helps readers understand the process without reducing the artistic value.
A Practical Naturalness Decision Framework
Before export, evaluate the image using the COLOR–TONE–STAR–EDGE–TEXTURE–CONTEXT framework.
| Check | Question | Warning sign |
|---|---|---|
| Color | Do sky, stars, and foreground have plausible relationships? | One dominant purple, cyan, or orange cast |
| Tone | Is the image dark yet readable? | Daylight-like foreground or crushed sky |
| Star | Are stars varied, small, and free of halos? | Uniform white disks or colored rings |
| Edge | Are masks and blends invisible? | Bright or dark lines along the horizon |
| Texture | Does the image retain fine variation? | Plastic sky or crunchy noise |
| Context | Do sky position and lighting make sense together? | Physically implausible composite |
If two or more checks fail, return to the earlier global adjustments instead of adding another local mask.
Worked Example: Editing a Single RAW Milky Way Nightscape
The following is a hypothetical workflow, not a universal preset.
Starting Conditions
- Wide-angle RAW exposure
- Moderate light-pollution glow near the horizon
- Dark foreground with some recoverable detail
- Visible color noise
- Slight corner vignetting
- No separate tracked sky
Step 1: Establish a Neutral Base
Select a neutral camera profile. Enable chromatic-aberration correction and a lens profile, then reduce vignetting correction if the corners become too bright or noisy.
Step 2: Correct Broad Color
Adjust Temperature and Tint until the upper sky is believable and neutral foreground materials no longer have an obvious green or magenta cast. Leave some warmth near the horizon if it reflects the actual light dome.
Step 3: Set Tonal Limits
Raise Exposure slightly, lower Highlights enough to control bright lights, and open Shadows only until the foreground becomes readable. Set Whites and Blacks while watching clipping indicators.
Step 4: Shape Global Contrast
Add a shallow curve. Use small Texture, Clarity, and Dehaze adjustments rather than one strong global effect.
Step 5: Reduce the Light Dome
Apply a large, feathered linear gradient from the horizon. Make a small local change to exposure, saturation, or white balance. Stop before the horizon becomes darker than the upper sky in an implausible way.
Step 6: Support the Milky Way
Use a broad radial or brush mask over the Milky Way. Add modest contrast or texture, then reduce the mask opacity until its boundary disappears.
Step 7: Refine Color
Use targeted HSL adjustments to control excessive magenta, blue, or orange. Avoid increasing every color equally.
Step 8: Reduce Noise and Sharpen
Apply color-noise reduction, then conservative luminance reduction or RAW denoise. Add masked sharpening while watching medium-sized stars.
Step 9: Perform the Naturalness Checks
Compare:
- Before and after
- Color and temporarily desaturated versions
- 100% and fit-to-screen views
- Sky-only and full-image views
- Dark-room and normal-room display conditions
If the image looks impressive only at one zoom level or on one dark display, revise it.
What Are the Most Common Editing Mistakes?
Using Dehaze as the Main Editing Tool
Dehaze can quickly reveal the Milky Way, but excessive use darkens the sky, increases color, and creates hard transitions. Use it as one component of contrast, not the entire workflow.
Making the Sky Uniformly Blue or Purple
A single stylized color may be intentional, but it often removes natural variation. Correct broad casts, then preserve subtle local differences.
Brightening the Foreground Too Far
The foreground may contain recoverable detail without needing to look fully illuminated. Compare it with the sky and keep a believable nighttime hierarchy.
Applying Strong Global Clarity
Clarity can enlarge stars, emphasize noise, and create halos around the horizon. Apply smaller global amounts and use local masks where needed.
Removing All Noise
A completely smooth sky can look synthetic and may erase real faint detail. Judge noise at the final display size.
Ignoring the Histogram
A visually dramatic preview can conceal crushed blacks and clipped highlights. Check channel clipping as well as overall luminance.
Editing Only on a Dark Background
A dark software interface and dim room can encourage overly bright exports. Check the image against a light-gray or white background before publishing.
Trusting One Display
An uncalibrated display can hide a color cast or make shadows appear more open than they are. Use a calibrated monitor when possible and check a second device.
How Can You Tell When the Edit Is Finished?
An edit is finished when additional adjustments no longer solve a clearly identified problem.
Use this stopping test:
- Reset your eyes by leaving the image for several minutes.
- Compare the edit with the original RAW preview.
- Temporarily remove all local masks.
- Temporarily desaturate the image.
- View it as a small thumbnail.
- Inspect the horizon and stars at 100%.
- Check clipping and color-channel warnings.
- Ask what the next adjustment is intended to fix.
If you cannot name the specific problem, do not move another slider.
Milky Way Editing Checklist
Global Foundation
- RAW file or highest-quality source is used
- Camera profile is appropriate
- Chromatic aberration is corrected
- Lens correction does not overbrighten the corners
- White balance is plausible rather than simply “cool”
- Broad color casts are addressed
- Histogram and channel clipping are checked
Tone and Contrast
- The image still feels like night
- The foreground is readable but not daylight-bright
- The black point retains useful separation
- Bright stars and lights are controlled
- Tone curve changes are gradual
- Dehaze and Clarity have not created halos
Color
- The sky is not uniformly electric blue or purple
- Star colors have not been erased
- The Galactic core is not oversaturated
- Horizon color reflects plausible lighting
- Color grading supports rather than replaces white balance
Local Adjustments
- Sky mask boundaries are invisible
- Galactic core enhancement is broad and soft
- Horizon has no bright or dark rim
- Trees, mountains, and buildings are cleanly masked
- Noise texture is consistent across masks
Detail and Output
- Noise reduction preserves fine stars
- Sharpening does not enlarge stars
- Composite elements are physically plausible
- Material compositing is disclosed when appropriate
- Export color space matches the destination
- Output sharpening matches the final size
- The exported file has been checked on another display
Export the Image for Its Real Destination
Keep the RAW file and a high-quality master so the image can be re-exported later. Lightroom Classic supports export choices including file format, color space, dimensions, and resolution. (Adobe — Export Photos from Lightroom Classic)
For general web use:
- Export a JPEG at the required pixel dimensions.
- Use sRGB unless the publishing platform clearly supports another color space.
- Apply output sharpening for screen only after resizing.
- Avoid repeated JPEG editing and resaving.
- Check the exported file rather than relying only on the editor preview.
A smaller web image may hide fine noise but exaggerate oversharpening. Recheck stars and the horizon after export.
Keep the Milky Way Dramatic but Believable
A natural Milky Way edit does not have to be weak or colorless. It can be detailed, vivid, and expressive when the color relationships, tonal transitions, star shapes, noise texture, and sky-to-foreground balance remain coherent.
Begin with global corrections, solve gradients before adding drama, and use local masks with soft boundaries. Stop when every remaining adjustment has a clear purpose. The most effective edit is usually the one in which viewers notice the night sky before they notice the processing.
Recommended Next Step by Editing Situation
- Single RAW nightscape: Prioritize white balance, tonal separation, restrained local contrast, and noise control.
- Stacked Milky Way sky: Correct gradients and color before strong stretching or saturation.
- Tracked sky with foreground blend: Match lighting, noise, perspective, and capture context before refining the edge.
- Heavy light pollution: Reduce the gradient rather than forcing the entire sky to one color.
- Noisy high-ISO file: Accept some natural grain and avoid using Clarity to compensate for lost detail.
- Image intended for a large print: Inspect transitions and stars at full resolution, then make a print proof before finalizing.
Frequently Asked Questions
How Much Dehaze Should I Use on a Milky Way Photo?
There is no universal value. Begin with a small adjustment and watch the black point, star size, horizon, and sky color. If the Milky Way gains contrast but the sky turns nearly black or intensely blue, reduce the amount and build contrast with a curve or local mask.
Should the Milky Way Look Blue?
The Milky Way does not need to be blue. Recorded color depends on white balance, airglow, light pollution, atmospheric conditions, camera response, and processing. Use plausible relationships among stars, sky, and foreground rather than targeting one fashionable hue.
Is It Acceptable to Use a Sky Mask?
Yes. A sky mask is a normal local-editing tool. The result looks artificial when the mask boundary is visible or when the sky receives much stronger contrast, color, or noise reduction than the rest of the image.
How Do I Keep Stars From Becoming Too Large?
Limit global Clarity, Dehaze, and sharpening. Use sharpening masking or edge protection, inspect at 100%, and compare medium-bright stars before and after each detail adjustment.
Should I Remove All Light Pollution?
Not necessarily. Remove or reduce distracting gradients, but preserve believable horizon illumination when it reflects the actual location. Eliminating every warm or bright area can make the image physically implausible.
Can I Make a Natural-Looking Edit From a JPEG?
Yes, if the JPEG is well exposed and needs only moderate correction. A RAW file generally provides more flexibility for white balance, gradients, noise reduction, and strong tonal changes.
Sources
- Adobe, Use lens profiles in Photoshop, Lightroom, and Camera Raw. Updated April 10, 2026. Accessed July 31, 2026.
- Adobe, Make color and tonal adjustments in Adobe Camera Raw. Accessed July 31, 2026.
- Adobe, Lightroom Classic Masking Tool. Updated June 18, 2026. Accessed July 31, 2026.
- Siril Documentation, Background Extraction. Accessed July 31, 2026.
- Adobe, Enhance Features: Denoise, Raw Details, and Super Resolution. Accessed July 31, 2026.
- Adobe, Export Photos from Lightroom Classic. Accessed July 31, 2026.
More from Shooting & Editing
RAW vs JPEG for Astrophotography
For most astrophotography, shoot RAW. A RAW file preserves substantially more sensor data and gives you greater control over white balance, shadow recovery, color gradients, noise reduction, and stacking. JPEG is useful when speed, storage, or immediate sharing matters, but its in-camera processing and lossy compression leave less room for correcting faint stars and dark skies.
How to Stack Astrophotography Images
To stack astrophotography images, capture a consistent series of RAW exposures, remove technically poor frames, calibrate them when appropriate, align the stars, normalize brightness, reject outliers, and combine the accepted frames with an averaging method. The stack can reduce random noise and reveal faint detail, but it cannot repair missed focus, severe trailing, clipped highlights, or inconsistent capture settings.
How Long Can You Expose Before Stars Begin to Trail?
The longest exposure that keeps stars looking round depends on focal length, sensor resolution, aperture, sky position, and the intended output size. This practical guide explains why the familiar 500 Rule often overestimates safe shutter speeds on modern cameras and shows how the NPF Rule provides a more useful starting point. Readers will learn how to calculate pixel pitch, compare both methods through worked examples, choose realistic starting times for full-frame, APS-C, and Micro Four Thirds cameras, and verify results with a simple field test. The article also distinguishes genuine star trailing from poor focus, lens coma, tripod movement, and atmospheric problems. It concludes with a decision framework for different output needs, a troubleshooting table, a fixed-tripod checklist, and guidance on when stacking or a star tracker is the better solution
Explore More Topics
Dedicated Astronomy Camera vs Regular Camera: What Is the Difference?
A dedicated astronomy camera is designed for telescope imaging through astronomy software and may provide regulated cooling, high-frame-rate readout, monochrome capture, filter-wheel integration, and FITS metadata. A regular DSLR or mirrorless camera is a self-contained general-purpose camera with a screen, battery, memory card, native lenses, autofocus, and daytime usefulness. This guide explains why neither category is universally better. It compares cooled deep-sky cameras, uncooled planetary cameras, guide cameras, monochrome and one-shot-color sensors, regular cameras, and specialized astrophotography DSLRs. Readers learn how cooling, dark current, H-alpha response, UV/IR filtering, sensor size, pixel scale, back focus, software, power, calibration, frame rate, and total system cost affect the decision. The article also includes calculation examples, use-case recommendations, a five-question selection process, a buying checklist, common mistakes, troubleshooting, and practical next steps.

How to Choose a Camera for Astrophotography
Choosing an astrophotography camera starts with the target, optical system, and workflow rather than megapixels or sensor size alone. This guide compares mirrorless and DSLR bodies, cooled one-shot-color cameras, cooled monochrome cameras, planetary cameras, and astronomy-modified models. Readers learn how sensor dimensions affect field of view, how pixel size and focal length determine image scale, and how cooling, quantum efficiency, read noise, full-well capacity, dynamic range, and frame rate should be interpreted. It also provides a color-versus-monochrome comparison, telescope compatibility and back-focus checks, software and driver requirements, a total-system-cost framework, five practical scenarios, troubleshooting, and a complete purchase checklist. The central recommendation is to choose the camera that fits the target, corrected image circle, mount, software, power system, processing workflow, and complete budget.
Best Focal Lengths for Milky Way Photography
For most untracked Milky Way landscapes, a 14–24mm full-frame-equivalent view offers the best balance of sky coverage, galactic scale, foreground context, and shutter-time tolerance. Wider 12–16mm views suit dramatic foregrounds and a large Milky Way arch, while 28–35mm makes the galactic center more prominent. Focal lengths of 40–50mm or longer are better for panoramas, stacking, or tracked high-detail images. This guide converts the recommendations for full-frame, 1.5× APS-C, 1.6× Canon APS-C, and Micro Four Thirds cameras. It explains shutter-time tradeoffs, crop-factor calculations, aperture and corner-performance limits, prime-versus-zoom choices, panorama planning, and tracker use. Readers also receive a three-question lens-selection method, real-world scenarios, a step-by-step lens test, a buying checklist, common mistakes, troubleshooting guidance, and practical recommendations without unsupported “best lens” claims.