How Long Can You Expose Before Stars Begin to Trail?

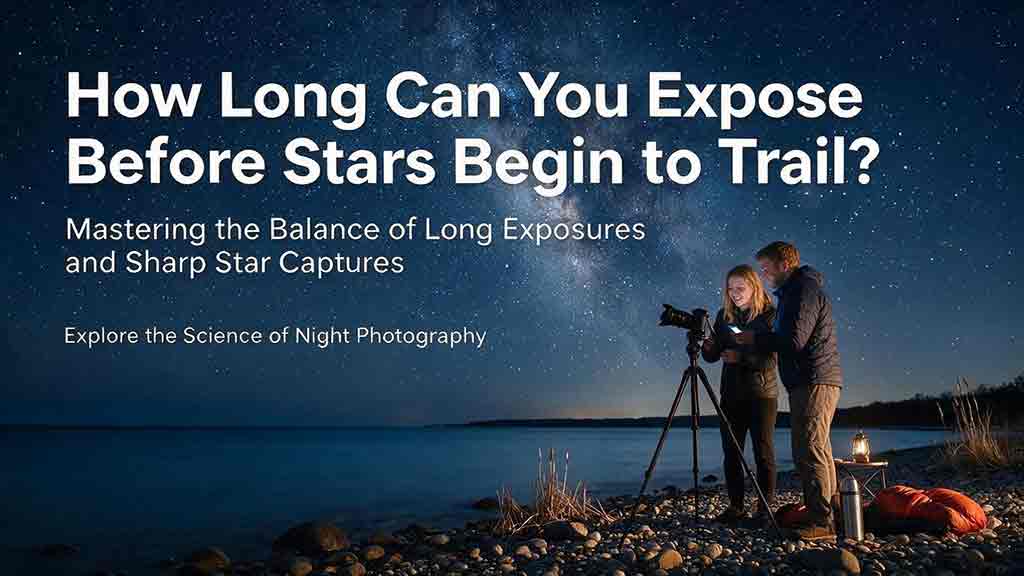
How Long Can You Expose Before Stars Begin to Trail?
On a fixed tripod, the longest exposure before stars begin to trail is usually about 8–20 seconds with common wide-angle lenses, but there is no universal safe shutter speed. Focal length, sensor resolution, aperture, sky position, and output size all matter. Use the NPF Rule for a starting point, then confirm sharpness with a magnified test frame.
Key Takeaways
- The 500 Rule is a quick estimate, but it often gives exposures that are too long for modern high-resolution cameras.
- The NPF Rule is a better starting point because it considers focal length, aperture, and pixel size.
- Stars near the celestial equator appear to move faster across the frame than stars near a celestial pole.
- Always inspect a test image at high magnification; lens coma, poor focus, and tripod movement can resemble star trailing.
- If the required shutter speed is too short for a clean image, use image stacking or a star tracker rather than simply extending the exposure.
This guide explains how to estimate a practical shutter speed, calculate it with two common methods, test it in the field, and diagnose why stars may still look stretched.
Editorial methodology: This guide is based on published astronomical references, the original NPF framework, established photography calculations, and practical selection criteria rather than a claimed hands-on test of every camera and lens combination.
What Actually Causes Stars to Trail?
Stars trail in a fixed-tripod photograph because Earth rotates while the camera records the sky. The stars are effectively stationary at astronomical distances, but their apparent positions move across the camera sensor during the exposure.
The U.S. Naval Observatory states that the interval between two passages of the equinox across a meridian is about 23 hours, 56 minutes, and 4 seconds of civil time. That sidereal rotation is why the night sky changes position continuously even when the camera and tripod remain still.
A star trail begins as a very small elongation. Whether that elongation is visible depends on how many sensor pixels it crosses and how large the final photograph is displayed.
Why Do Stars Near the Celestial Poles Trail More Slowly?
Stars near a celestial pole travel around a smaller apparent circle than stars near the celestial equator. NASA explains that Polaris traces only a small circle because it lies close to the north celestial pole, while stars farther from the pole sweep through larger circles.
This means a north-facing composition containing Polaris may tolerate a longer exposure than a composition aimed toward stars near the celestial equator. For a wide Milky Way photograph, use the fastest-moving important stars in the frame as the limiting case.
Which Factors Determine the Maximum Exposure Time?
The maximum practical shutter speed is controlled by several variables, not focal length alone.
| Factor | Effect on visible trailing | Practical implication |
|---|---|---|
| Longer focal length | Enlarges apparent star movement | Use a shorter exposure |
| Higher pixel density | Records smaller movements more clearly | Use a shorter exposure for pixel-level sharpness |
| Wider aperture | Makes each star image larger because of optical effects and diffraction balance | Included in the NPF estimate |
| Stars near the celestial equator | Appear to cross the frame faster | Use a shorter exposure |
| Stars near a celestial pole | Move through smaller apparent circles | A longer exposure may be acceptable |
| Large print or 100% inspection | Reveals small elongation | Choose a stricter shutter speed |
| Small web image | Hides some minor elongation | A slightly longer exposure may look acceptable |
| Poor focus or lens aberrations | Makes stars look stretched without true motion trails | Diagnose before shortening the exposure |
Two photographers using the same 20mm lens can therefore choose different shutter speeds and both be reasonable. One may be preparing a large print from a 60-megapixel file, while the other may be exporting a small image for a website.
How Does the 500 Rule Estimate Star-Trail Exposure?
The 500 Rule estimates the longest exposure in seconds by dividing 500 by the full-frame-equivalent focal length:
Maximum exposure time ≈ 500 ÷ (focal length × crop factor)
For a 20mm lens on a full-frame camera:
500 ÷ (20 × 1.0) = 25 seconds
For a 16mm lens on a 1.5× APS-C camera:
500 ÷ (16 × 1.5) = 20.8 seconds
Advantages of the 500 Rule
- It is easy to calculate mentally.
- It provides a fast first estimate when camera details are unavailable.
- It can be adequate for small images or cameras with relatively low pixel density.
Limitations of the 500 Rule
- It does not account for pixel size or megapixel density.
- It does not account for aperture.
- It does not account for the declination of the stars.
- It often permits visible elongation when a modern file is inspected at 100%.
- Different photographers use alternative constants such as 400 or 300, which shows that the method is only a rough convention.
PhotoPills explicitly describes its 500 Rule result as less accurate and notes that it can fail to prevent visible trailing. Use it as an upper-limit estimate, not as a guarantee of pinpoint stars.
How Does the NPF Rule Give a Better Starting Point?
The NPF Rule was developed by Frédéric Michaud as a more detailed alternative to the 500 Rule. “NPF” refers to the variables used in the calculation: aperture number, pixel pitch, and focal length.
A commonly used simplified form is:
Maximum exposure time ≈ (35 × N + 30 × p) ÷ f
Where:
Nis the lens aperture, such as 2.8 for f/2.8.pis pixel pitch in micrometers.fis the actual focal length in millimeters.- The result is an estimated exposure time in seconds.
The full NPF calculation can also account for star declination and camera orientation. A calculator that includes those variables is more precise than the simplified formula.
How Do You Find Pixel Pitch?
If a manufacturer does not publish pixel pitch, estimate it from the sensor width and the horizontal pixel count:
Pixel pitch in micrometers =
(sensor width in millimeters ÷ horizontal pixels) × 1,000
For a full-frame sensor approximately 35.9mm wide with a 6,000-pixel image width:
(35.9 ÷ 6,000) × 1,000 = 5.98 micrometers
Use the actual recorded pixel dimensions of the camera mode you plan to use. A lower-resolution crop or pixel-binned mode may behave differently from the camera’s full-resolution mode.
Worked Example: A 20mm Lens on a 24-Megapixel Full-Frame Camera
Assume the following setup:
- Full-frame sensor
- Approximately 24 megapixels
- Pixel pitch: about 5.98 micrometers
- Lens: 20mm
- Aperture: f/1.8
500 Rule Estimate
500 ÷ 20 = 25 seconds
Simplified NPF Estimate
[(35 × 1.8) + (30 × 5.98)] ÷ 20
= (63 + 179.4) ÷ 20
= 12.1 seconds
The two methods produce very different recommendations: about 25 seconds versus about 12 seconds.
For a high-resolution file intended to show round stars at high magnification, begin near 10–12 seconds, not 25 seconds. Then photograph a short bracket such as 8, 10, 13, and 15 seconds and choose the longest frame that meets the intended output standard.
This is an estimate, not a promise. Lens performance, star declination, focus accuracy, and viewing size still affect the result.
Practical Starting Times for Common Setups
The following table compares the 500 Rule with the simplified NPF Rule. Pixel pitch values are representative examples, not specifications for every camera in a format.
| Example setup | 500 Rule estimate | Simplified NPF estimate | Sensible first test range |
|---|---|---|---|
| Full frame, 14mm, f/2.8, 24 MP | 35.7 sec | 19.8 sec | 15–20 sec |
| Full frame, 20mm, f/1.8, 24 MP | 25.0 sec | 12.1 sec | 10–13 sec |
| Full frame, 24mm, f/1.4, 24 MP | 20.8 sec | 9.5 sec | 8–10 sec |
| APS-C, 16mm, f/2.8, 24 MP | 20.8 sec | 13.5 sec | 10–13 sec |
| APS-C, 23mm, f/2, 24 MP | 14.5 sec | 8.2 sec | 6–8 sec |
| Micro Four Thirds, 12mm, f/2, 20 MP | 20.8 sec | 14.2 sec | 10–14 sec |
These are starting ranges for a stationary tripod and a normally stable camera. Use the actual camera, lens, aperture, sky direction, and output requirement to make the final decision.
Which Method Should You Use?
Use this decision framework:
Use the 500 Rule When:
- You need a quick mental estimate.
- You do not know the camera’s pixel pitch.
- The photograph will be viewed small.
- You accept slight elongation that disappears after downsampling.
Use the NPF Rule When:
- You want stars to remain round at high magnification.
- You use a modern high-resolution camera.
- You plan to print the photograph.
- You are comparing different apertures or sensor resolutions.
- You can enter the sky position into a full NPF calculator.
Use a Field Test When:
- The photograph matters more than the formula.
- The frame includes stars at very different declinations.
- The lens has visible coma or astigmatism.
- Wind, tripod stability, or ground vibration may be a problem.
- You are unsure how much elongation the final output can tolerate.
The most reliable workflow is calculate, round down, test, and inspect.
How to Find Your Best Shutter Speed in the Field
Step 1: Stabilize the Camera
Use a rigid tripod on firm ground. Extend the thickest leg sections first and avoid raising the center column unless necessary.
Use a remote release, a short self-timer, or another method that prevents the camera from moving when the exposure begins. Follow the camera manufacturer’s guidance on image stabilization when the camera is mounted on a tripod.
Step 2: Set the Intended Focal Length and Aperture
Calculate the shutter speed with the exact focal length and aperture used for the photograph. A zoom lens set to 24mm should not use a result calculated for 14mm.
For the NPF Rule, use the real focal length printed on the lens, not the full-frame-equivalent focal length.
Step 3: Focus on a Bright Star
Use magnified live view and adjust manual focus until a bright star is as small and defined as possible. Refocus after a major temperature change or accidental contact with the focus ring.
Poor focus enlarges stars in every direction and can hide the first signs of trailing.
Step 4: Calculate a Baseline
Use a full NPF calculator when possible. If only the 500 Rule is available, treat its result as a generous upper boundary and begin at least one normal shutter setting faster.
For example, if the 500 Rule suggests 20 seconds, test 10, 13, 15, and 20 seconds rather than assuming 20 seconds is safe.
Step 5: Shoot a Short Bracket
Take several otherwise identical frames with different shutter speeds. Adjust ISO to keep the comparison brightness reasonably similar, but remember that ISO does not change the physical amount of star movement.
A useful sequence might be:
8 sec → 10 sec → 13 sec → 15 sec
Step 6: Inspect the Right Stars
Check:
- Stars near the center of the frame
- Stars near the corners
- Stars farthest from the celestial pole
- Bright stars, which make elongation easier to see
Magnify the image enough to judge shape, but do not base the decision only on an unusually soft camera preview. Confirm the result later from the raw files on a larger screen.
Step 7: Choose the Longest Acceptable Frame
The best exposure is not automatically the longest exposure. Choose the longest shutter speed that keeps stars sufficiently round for the final use.
For a large print, select the stricter frame. For a small web image, a slightly longer frame may remain visually acceptable after downsampling.
A Practical “Sharpness Budget” for Different Outputs
The acceptable shutter speed depends partly on how the photograph will be used.
| Intended output | Recommended approach |
|---|---|
| Large print or detailed crop | Start with the NPF result, round down to a shorter standard speed, and inspect carefully |
| Full-resolution portfolio image | Use the NPF result and reject visible elongation at high magnification |
| General website image | Use NPF as the baseline; a small amount of movement may disappear after export |
| Small social image | The 500 Rule may look acceptable, but test before relying on it |
| Scientific or measurement work | Do not use a casual rule; use an appropriate tracking and calibration workflow |
These recommendations are editorial starting points, not physical thresholds. “Acceptably sharp” is an output decision as well as a technical calculation.
How Can You Tell Star Trailing From Other Problems?
Elongated stars do not always mean the shutter was too long.
| What the stars look like | Likely cause | What to try |
|---|---|---|
| Similar elongation across the entire frame | Exposure too long or camera movement | Shorten the exposure and retest |
| Wings, arrows, or bird-like shapes mainly in corners | Lens coma or astigmatism | Stop down slightly or use a better-corrected focal length |
| Large soft circles everywhere | Focus error, condensation, or haze | Refocus and inspect the front element |
| Double images or a sudden jump | Tripod movement, shutter vibration, or accidental contact | Improve support and use a delayed release |
| Some frames sharp and others blurred | Wind, unstable ground, or tripod movement | Lower the tripod, shield it, and avoid touching it |
| Foreground sharp but stars stretched consistently | True sky movement is likely | Shorten shutter speed or track the sky |
| Stars sharp but foreground blurred | Foreground movement, wind, or focus blending issue | Capture a separate foreground exposure |
A Useful Diagnostic Test
Take one frame at half the suspect shutter speed.
If the elongation becomes roughly less visible across the entire image, exposure time was probably the main cause. If corner shapes remain almost unchanged, lens aberration is more likely.
Do Higher ISO or a Wider Aperture Prevent Star Trails?
Higher ISO does not stop star movement. ISO changes how the camera records and amplifies the captured signal, but it does not shorten the exposure unless you deliberately select a faster shutter speed.
A wider aperture can help because it gathers more light during a shorter exposure. However, some lenses show stronger coma, astigmatism, vignetting, or softness when used fully open.
The practical choice is often a compromise:
- Open the lens enough to keep the shutter short.
- Stop down slightly if corner stars become badly distorted.
- Raise ISO only as much as needed after setting aperture and shutter speed.
- Consider stacking several short raw exposures to reduce noise.
Can Image Stacking Replace a Longer Exposure?
Image stacking can improve the signal-to-noise ratio while preserving a shutter speed short enough to keep stars round. For example, ten 10-second frames can be aligned and combined instead of recording one 100-second fixed-tripod exposure.
Stacking does not make an already elongated star perfectly round. Each source frame should still meet the chosen sharpness standard.
When a foreground is included, software may need to align the sky separately from the landscape. Moving trees, waves, clouds, and people can make blending more difficult.
When Should You Use a Star Tracker?
Use a star tracker when the fixed-tripod shutter speed is too short to collect enough clean sky signal at the desired aperture and ISO.
A tracker rotates the camera to follow the sky, allowing longer exposures with rounder stars. The trade-off is that the landscape then moves relative to the tracked camera, so many nightscape photographs use separate sky and foreground exposures.
A tracker is especially useful for:
- Longer focal lengths
- Dark nebula and detailed Milky Way work
- Lower ISO capture
- Narrower apertures
- Multi-frame panoramas
- High-resolution output
For a simple single-frame nightscape, a wide lens, short exposure, and careful stacking may be faster and easier.
Common Mistakes That Lead to Trailed or Misshapen Stars
Applying the 500 Rule Without Checking the File
The 500 Rule may produce a usable thumbnail while still showing obvious elongation at full resolution. Always inspect a test frame.
Using Equivalent Focal Length in the NPF Formula
The simplified NPF formula uses the actual lens focal length. Crop factor is used in the 500 Rule, not inserted into the NPF focal-length term.
Inspecting Only the Center
A lens may produce round center stars and distorted corner stars. Check both areas before deciding the shutter is correct.
Confusing Coma With Motion
Coma often creates directional wings or wedge-shaped stars toward the corners. True trailing is more consistently related to the sky’s direction of motion.
Increasing ISO Instead of Shortening the Shutter
ISO cannot freeze the apparent motion of stars. Use a shorter exposure first, then adjust ISO to restore brightness.
Expecting One Number to Work Everywhere
A shutter speed that works near Polaris may fail for a composition closer to the celestial equator. Recalculate or retest when the camera direction changes substantially.
Fixed-Tripod Exposure Checklist
Before the main sequence, confirm the following:
- Tripod is stable and the center column is minimized
- Lens focal length and aperture match the calculation
- Camera is recording raw files
- Focus has been checked on a bright star
- Stabilization follows the camera manufacturer’s tripod guidance
- A NPF-based shutter speed has been calculated
- Several shorter and longer test frames have been captured
- Center and corner stars have been inspected
- Stars far from the celestial pole have been checked
- ISO is adjusted only after the shutter-speed decision
- A stacking or tracking plan is available if the exposure is too short
Choose the Shortest Exposure That Meets Your Quality Goal
For most fixed-tripod Milky Way photographs made with wide lenses, a practical shutter speed often falls between 8 and 20 seconds, but the exact limit depends on the camera, lens, aperture, sky direction, and final display size.
Use the NPF Rule as the starting estimate, round down when critical sharpness matters, and confirm the result with a bracketed test. If the image becomes too noisy at the required shutter speed, capture multiple short frames for stacking or use a star tracker rather than accepting preventable trails.
Recommended Next Step by Situation
- First-time night photographer: Use the NPF estimate, take four bracketed exposures, and compare them on a computer.
- High-megapixel camera user: Avoid relying on the 500 Rule alone; prioritize pixel pitch and output size.
- Large-print photographer: Round down from the NPF result and inspect the fastest-moving stars at high magnification.
- Photographer needing more sky signal: Stack short exposures or use a tracker.
- Photographer seeing stretched corner stars only: Investigate lens aberrations before shortening every exposure.
Frequently Asked Questions
Is 20 seconds always safe for Milky Way photography?
No. Twenty seconds may be acceptable with an ultra-wide lens and moderate-resolution camera, but it can show visible trailing with a longer lens, denser sensor, or stars near the celestial equator. Calculate a baseline and test it.
Is the 500 Rule obsolete?
The 500 Rule remains useful as a quick estimate, but it is too approximate for many modern high-resolution cameras. The NPF Rule and a field test provide a more reliable result.
Does crop factor matter for star trails?
Crop factor is included in the 500 Rule because the rule uses full-frame-equivalent framing. In the simplified NPF Rule, use the actual focal length and the camera’s pixel pitch rather than multiplying focal length by crop factor.
Does raising ISO let me use a longer exposure without trails?
No. Higher ISO does not reduce apparent star movement. It may let you choose a shorter shutter speed while maintaining a brighter recorded image, but the motion is controlled by exposure time and sky movement.
Can editing software remove short star trails?
Minor elongation can sometimes be reduced during resizing or careful editing, but software cannot reliably restore detail that was never recorded as a round point. It is better to capture a shorter exposure.
Why can I expose longer near Polaris?
Polaris lies close to the north celestial pole and traces a much smaller apparent circle than stars farther from the pole. Stars near the celestial equator move through larger apparent arcs, so they usually reveal trailing sooner.
Sources
- U.S. Naval Observatory — Sidereal Time — definitions of sidereal time and the approximate length of the sidereal day. Accessed July 31, 2026.
- NASA Science — What Is the North Star and How Do You Find It? — explanation of apparent star motion around the celestial pole. Accessed July 31, 2026.
- PhotoPills — 500 Rule Photography Calculator and Spot Stars Calculator — comparison of the 500 Rule and the more detailed NPF approach. Accessed July 31, 2026.
- Société Astronomique du Havre — La Règle NPF — Frédéric Michaud’s description of the NPF Rule. Accessed July 31, 2026.
- Adobe — Astrophotography Tips and Techniques — general fixed-tripod astrophotography guidance and discussion of the 500 Rule. Accessed July 31, 2026.
More from Shooting & Editing
How to Edit Milky Way Photos Without Making Them Look Artificial
Edit a Milky Way photo by protecting believable color, smooth tonal transitions, natural star sizes, and a realistic relationship between the sky and foreground. Start with lens corrections and white balance, build contrast gradually, use Dehaze and saturation sparingly, and make local adjustments with soft masks. Judge the result at both full-image view and 100% magnification before exporting.
RAW vs JPEG for Astrophotography
For most astrophotography, shoot RAW. A RAW file preserves substantially more sensor data and gives you greater control over white balance, shadow recovery, color gradients, noise reduction, and stacking. JPEG is useful when speed, storage, or immediate sharing matters, but its in-camera processing and lossy compression leave less room for correcting faint stars and dark skies.
How to Stack Astrophotography Images
To stack astrophotography images, capture a consistent series of RAW exposures, remove technically poor frames, calibrate them when appropriate, align the stars, normalize brightness, reject outliers, and combine the accepted frames with an averaging method. The stack can reduce random noise and reveal faint detail, but it cannot repair missed focus, severe trailing, clipped highlights, or inconsistent capture settings.
Explore More Topics
Dedicated Astronomy Camera vs Regular Camera: What Is the Difference?
A dedicated astronomy camera is designed for telescope imaging through astronomy software and may provide regulated cooling, high-frame-rate readout, monochrome capture, filter-wheel integration, and FITS metadata. A regular DSLR or mirrorless camera is a self-contained general-purpose camera with a screen, battery, memory card, native lenses, autofocus, and daytime usefulness. This guide explains why neither category is universally better. It compares cooled deep-sky cameras, uncooled planetary cameras, guide cameras, monochrome and one-shot-color sensors, regular cameras, and specialized astrophotography DSLRs. Readers learn how cooling, dark current, H-alpha response, UV/IR filtering, sensor size, pixel scale, back focus, software, power, calibration, frame rate, and total system cost affect the decision. The article also includes calculation examples, use-case recommendations, a five-question selection process, a buying checklist, common mistakes, troubleshooting, and practical next steps.
How to Choose a Camera for Astrophotography
Choosing an astrophotography camera starts with the target, optical system, and workflow rather than megapixels or sensor size alone. This guide compares mirrorless and DSLR bodies, cooled one-shot-color cameras, cooled monochrome cameras, planetary cameras, and astronomy-modified models. Readers learn how sensor dimensions affect field of view, how pixel size and focal length determine image scale, and how cooling, quantum efficiency, read noise, full-well capacity, dynamic range, and frame rate should be interpreted. It also provides a color-versus-monochrome comparison, telescope compatibility and back-focus checks, software and driver requirements, a total-system-cost framework, five practical scenarios, troubleshooting, and a complete purchase checklist. The central recommendation is to choose the camera that fits the target, corrected image circle, mount, software, power system, processing workflow, and complete budget.
Best Focal Lengths for Milky Way Photography
For most untracked Milky Way landscapes, a 14–24mm full-frame-equivalent view offers the best balance of sky coverage, galactic scale, foreground context, and shutter-time tolerance. Wider 12–16mm views suit dramatic foregrounds and a large Milky Way arch, while 28–35mm makes the galactic center more prominent. Focal lengths of 40–50mm or longer are better for panoramas, stacking, or tracked high-detail images. This guide converts the recommendations for full-frame, 1.5× APS-C, 1.6× Canon APS-C, and Micro Four Thirds cameras. It explains shutter-time tradeoffs, crop-factor calculations, aperture and corner-performance limits, prime-versus-zoom choices, panorama planning, and tracker use. Readers also receive a three-question lens-selection method, real-world scenarios, a step-by-step lens test, a buying checklist, common mistakes, troubleshooting guidance, and practical recommendations without unsupported “best lens” claims.